Halloween is one of my favorite, favorite times of year. I looove the turning of the season, the chill in the air, sweaters, scarves, campfires, pumpkin....everything! While I'm a big fan of the pumpkin spice lattes, I'm actually here to talk about the pumpkin as the classic Halloween costume. It's pretty special to me as that FIRST Halloween costume for a couple of reasons. My mom made almost all of my Halloween costumes over the years, and I so love that memory. And the first costume of all of them was a pumpkin head! I could have actually used that same costume, but it's important to me to start that tradition all over again for my family. We can always use the original for playing dress up!
My mom taught me to sew in high school, and though I've been doing it for quite a while, I'm definitely no expert! This isn't necessarily a step-by-step how-to for that reason, but whenever I find myself stuck or having problems, I love looking to Make It & Love It for super clear and helpful tutorials.
When I'm sewing more than a hem or something simple like a rectangular pillow, I turn to patterns. I like the Simplicity brand because, well, they're pretty simple! They're good for beginners because they don't typically have a lot of complex steps or advanced stitches. I also tend to avoid things with buttons and zippers if I don't want to have a headache later! In this case I did some research ahead of my trip to the fabric store (I went to Joann's). Basically you just check the back of the pattern envelope and look at the options for your chosen pattern (they usually come with several related patterns per envelope - here I was following "D") and look under "Notions." Elastic and velcro are pretty easy, but I personally steer clear if buttons or zippers are listed! This envelope will also tell you how much fabric you need to buy. I like to buy a little extra to make sure that I don't come up short after pre-shrinking it in the wash - that's VERY annoying!
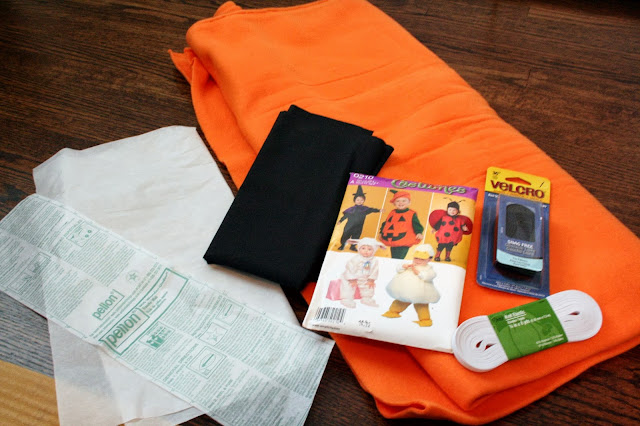
So gather up all of your materials.
The orange fleece doesn't matter so much because it doesn't fray, but the black cotton I wanted to use for the face will. It helps if you clip the corners on a diagonal before washing because it will help limit any fraying.
There's a white sheet of directions included along with tissue paper sheets that have all the pattern outlines. Here again you just look for the letter (D) of the pattern you are making, and it tells you which of the pattern outlines you'll want to cut out. It also gives you a layout that will help you maximize your fabric. The tissue sheets will also tell you what they are for specifically. I thought the hat looked pretty silly, and I had a different idea for underclothes other than the jumpsuit, so I opted not to make them. This means I didn't need to cut out the pieces associated with those parts of the costume. To me, this is part of the beauty of DIY-ing rather than just buying a whole outfit - it just seems easier to personalize it!
Gather up your materials. For me the most important things other than a work surface and sewing machine, etc. are the wine and junky shows streaming on Netflix. That's old school "Charmed" in the background! Way more seasons than I remember. :)
From here the pattern instructions will pretty much tell you what to do. Which, well, obviously.
This doesn't mean I don't deviate from time to time. I was supposed to use fusible interfacing for the, uh, face of the pumpkin. Basically you iron this sheet of paper onto the fabric that you want to turn into an applique, which is a fancy word for sticker as far as I can tell. Then you peel off the paper which exposes a sort of blue, and you iron them onto your fabric using a damp cloth. Why damp cloth, I have no idea, but since I don't usually use this stuff I went with it.
It looked super cute, but because I was trying to get the face to stick to the sort of nubby texture of the fleece, I didn't really trust the interfacing. The corners seemed a little loose to me, so I ended up stitching along the edges anyway. I suppose that's fine because the interfacing held it in place nicely while I sewed. If I had used just pins I'm sure it would have slipped all around, so in hindsight maybe that worked out well!
The one other thing I did a little differently was right at the end when you turn everything right side out, rather than just stitch it closed as they directed, I opted to add some stuffing. I wanted to make sure my little pumpkin was nice and round!
After the finishing touches, here is the finished product!
I found some cute striped leggings at the Carter's outlet that look just perfect, and I will top it off with a cute knit pumpkin head hat!
So that's my method for homemade costumes! It's definitely not perfect, but I hope that my little one will have the same great memories of wearing costumes made with love like I do.


Would you believe that I've never used a pattern? I always thought they would be too advanced for me but you make it sound pretty accessible. I'll have to give it a try sometime. Your pumpkin turned out so adorable!
ReplyDeleteThey're definitely not as intimidating as they seem as long as you read carefully!
Delete