

I've been wanting some re-useable garden markers for several years now. I've tried the popsicle stick thing in the past, and even with a sharpie marker, they were illegible by the end of the season. My grandma always sticks the seed packets in the ground, but mine always seem to get carried away by birds or something, and then I just have to wait a month or so till the plants get bigger to see what's what. I thought about buying some, as there are plenty of cute ones all over Etsy, but wanted the control to decide which herbs and veggies I wanted to grow rather than buying a pre-made set. I suppose I could have requested a custom set...but then I found these:

I've casually had my eye out for a long time for a set of letter stamps, and I was seduced by this full set of alphas and numbers at a local antique shop. I don't know what my ultimate purpose is for owning letter stamps, but because these are metal, I have the flexibility to press them into soft clay, hammer them into wood, maybe stamp them with ink or paint...the guy at the shop said they could even be heated up and burned into leather. I suppose it's that versatility that gave me the push to buy these rather than just something at a craft shop. Plus....they look pretty cool in their boxes.


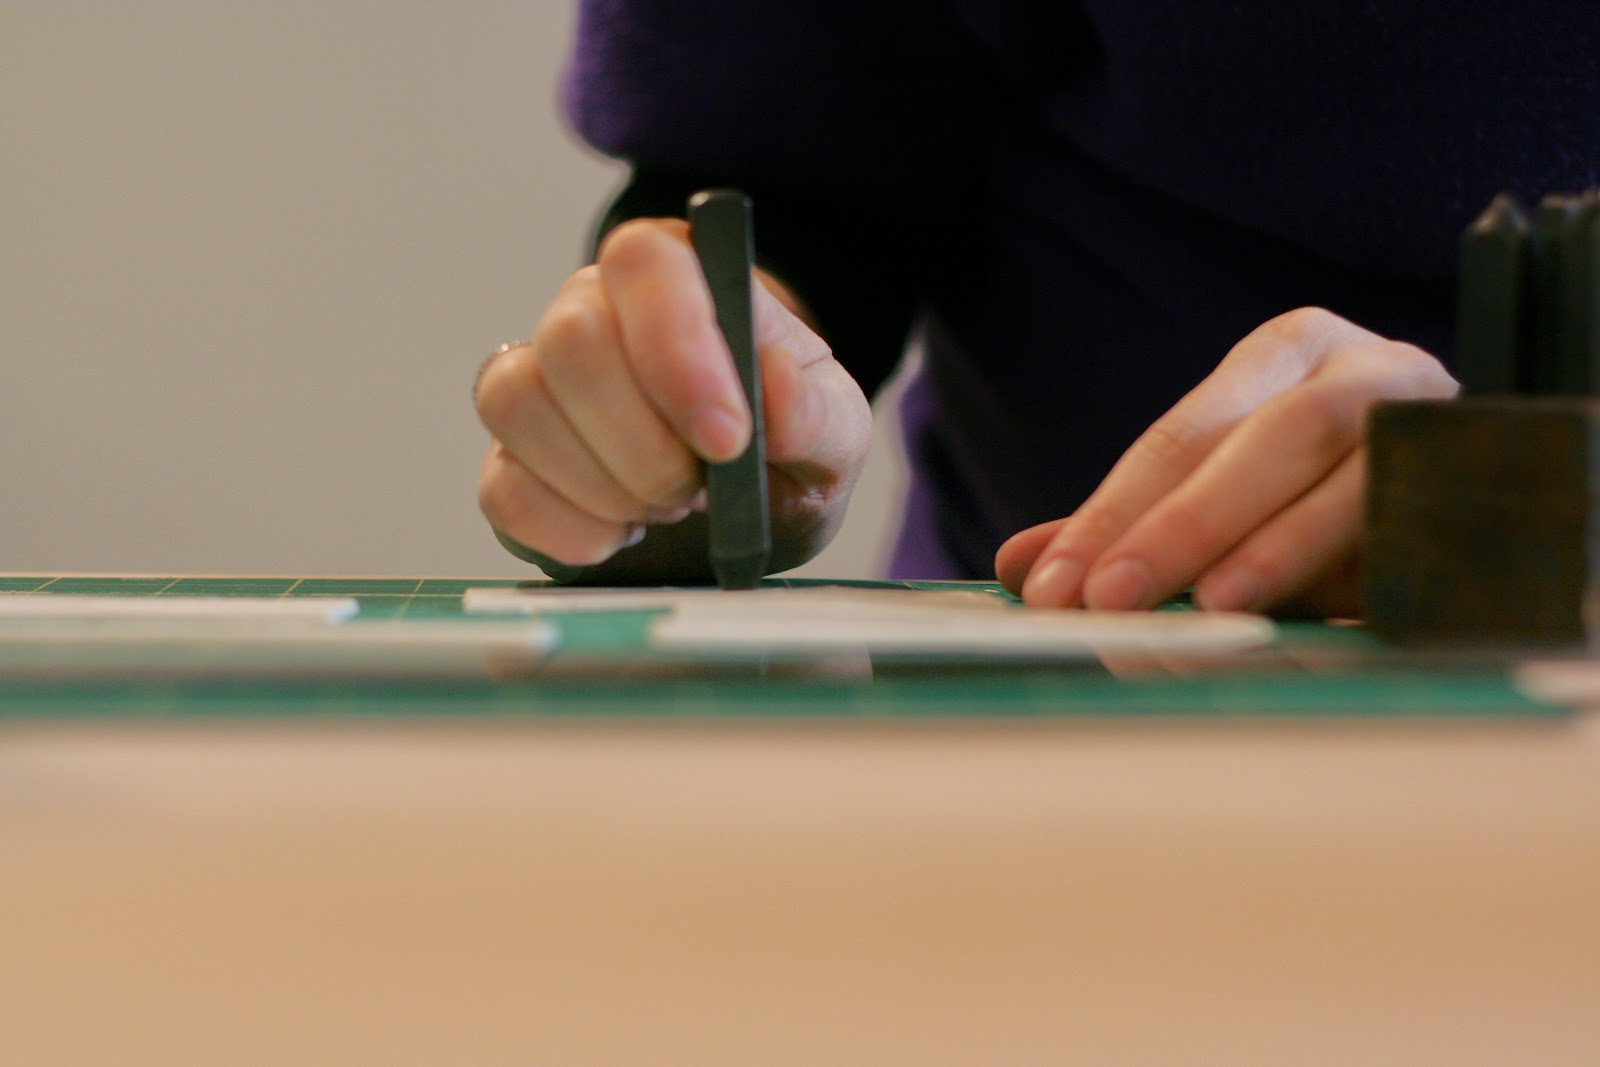
I rolled out a bunch of markers with Sculpey clay, stamped them, and baked them.


I baked them according to the directions on the package, but after they had cooled....they were still super flexible. That wasn't really my goal.

I thought, well, maybe they'll firm up if I cook them longer? Nope, not so much. They got really stinky, which is probably not a great sign, and they started changing color. At that point I just gave up. I did a little bit of research (not sure why I didn't do that before I started!), and found that if this sort of clay is thin enough, it will pretty much always be flexible. I did a little experimenting with markers two and three times as thick as my first attempt, and it turned out that triple thick was the charm.

The good news is that in addition to making markers for myself, I'd planned to make them for my mom for mother's day as well. This will be the first year that she can really do a garden at her new house because the yard was put in toward the end of summer last year. I decided that I would keep the beta test set for myself, and remake hers more sturdy. I had always planned on painting them, so the discoloration of my first try didn't really bother me. (I do wish that the depressed lettering stood out a bit more - I'd hoped that if I dragged the brush lightly enough that it would float over the impressions, but that didn't quite work. I'm interested to see how legible these will be at the end of the season. I think sitting in the dirt might actually make the lettering stand out more!)

I paired these with a potted planter of annuals for her front porch, and it turned out to be a nicely themed mother's day gift that I knew she would really love. I tried to anticipate what she'd plant based on what she's been talking about and what she had at her old house. If there's anything missing - she knows where they came from, and I can always make more now that I have the system down pat!
ağrı
ReplyDeletevan
elazığ
adıyaman
bingöl
4CC3KJ
ankara parça eşya taşıma
ReplyDeletetakipçi satın al
antalya rent a car
antalya rent a car
ankara parça eşya taşıma
JEK8İ
E4791
ReplyDeleteBurdur Lojistik
Kırklareli Şehirler Arası Nakliyat
Hatay Lojistik
Elazığ Lojistik
Elazığ Şehir İçi Nakliyat
Amasya Şehirler Arası Nakliyat
Eskişehir Evden Eve Nakliyat
Muğla Şehir İçi Nakliyat
Trabzon Şehirler Arası Nakliyat
1B0AA
ReplyDeleteÇankırı Parça Eşya Taşıma
Hakkari Şehir İçi Nakliyat
Gümüşhane Şehirler Arası Nakliyat
Çerkezköy Organizasyon
Ankara Şehir İçi Nakliyat
Denizli Şehir İçi Nakliyat
Çerkezköy Sineklik
Çerkezköy Ekspertiz
Bartın Parça Eşya Taşıma
B8454
ReplyDeleteSinop Parça Eşya Taşıma
Kütahya Şehirler Arası Nakliyat
Bitrue Güvenilir mi
Burdur Evden Eve Nakliyat
Apenft Coin Hangi Borsada
Sakarya Şehir İçi Nakliyat
Ankara Şehirler Arası Nakliyat
Çerkezköy Çamaşır Makinesi Tamircisi
Karabük Şehir İçi Nakliyat
6A355
ReplyDeletereferans
78396
ReplyDeleteKripto Para Nedir
Sohbet
Referans Kimliği Nedir
Mexc Borsası Kimin
Coin Nasıl Çıkarılır
Threads Beğeni Satın Al
Sohbet
Btcturk Borsası Güvenilir mi
Spotify Takipçi Hilesi
FFB35
ReplyDeletedefillama
avax
trezor suite
uniswap
dexscreener
ledger desktop
satoshi
looksrare
sushi
C7D30E32F0
ReplyDeletedüşmeyen takipçi
Pokemon GO Promosyon Kodu
İdle Office Tycoon Hediye Kodu
Avast Etkinleştirme Kodu
Total Football Hediye Kodu
M3u Listesi
Township Promosyon Kodu
Referans Kimliği Nedir
Google Yorum Satın Al