Showing posts with label Halloween. Show all posts

Thursday, October 31, 2013

Happy Halloween!


I've been ridiculously busy these past few weeks, using every available minute to get ready for my first craft fair this weekend, as well as keeping on top of a few orders from my etsy shop. A good problem to have for sure, but it makes for busy hands!!

But in the spirit of Halloween, this crazy pumpkin pyramid appeared near my house, and I just had to get a picture of it all lit up. Pretty impressive!!

Wednesday, October 16, 2013

Pumpkin Head Halloween Costume

In case you missed me over at Delightfully Noted for her Wicked Craft Week....here's a repost of my Halloween costume crafting.

Halloween is one of my favorite, favorite times of year. I looove the turning of the season, the chill in the air, sweaters, scarves, campfires, pumpkin....everything! While I'm a big fan of the pumpkin spice lattes, I'm actually here to talk about the pumpkin as the classic Halloween costume. It's pretty special to me as that FIRST Halloween costume for a couple of reasons. My mom made almost all of my Halloween costumes over the years, and I so love that memory. And the first costume of all of them was a pumpkin head! I could have actually used that same costume, but it's important to me to start that tradition all over again for my family. We can always use the original for playing dress up!

My mom taught me to sew in high school, and though I've been doing it for quite a while, I'm definitely no expert! This isn't necessarily a step-by-step how-to for that reason, but whenever I find myself stuck or having problems, I love looking to Make It & Love It for super clear and helpful tutorials.

When I'm sewing more than a hem or something simple like a rectangular pillow, I turn to patterns. I like the Simplicity brand because, well, they're pretty simple! They're good for beginners because they don't typically have a lot of complex steps or advanced stitches. I also tend to avoid things with buttons and zippers if I don't want to have a headache later! In this case I did some research ahead of my trip to the fabric store (I went to Joann's). Basically you just check the back of the pattern envelope and look at the options for your chosen pattern (they usually come with several related patterns per envelope - here I was following "D") and look under "Notions." Elastic and velcro are pretty easy, but I personally steer clear if buttons or zippers are listed! This envelope will also tell you how much fabric you need to buy. I like to buy a little extra to make sure that I don't come up short after pre-shrinking it in the wash - that's VERY annoying!


So gather up all of your materials.


The orange fleece doesn't matter so much because it doesn't fray, but the black cotton I wanted to use for the face will. It helps if you clip the corners on a diagonal before washing because it will help limit any fraying.


There's a white sheet of directions included along with tissue paper sheets that have all the pattern outlines. Here again you just look for the letter (D) of the pattern you are making, and it tells you which of the pattern outlines you'll want to cut out. It also gives you a layout that will help you maximize your fabric. The tissue sheets will also tell you what they are for specifically. I thought the hat looked pretty silly, and I had a different idea for underclothes other than the jumpsuit, so I opted not to make them. This means I didn't need to cut out the pieces associated with those parts of the costume. To me, this is part of the beauty of DIY-ing rather than just buying a whole outfit - it just seems easier to personalize it!


Gather up your materials. For me the most important things other than a work surface and sewing machine, etc. are the wine and junky shows streaming on Netflix. That's old school "Charmed" in the background! Way more seasons than I remember. :)

From here the pattern instructions will pretty much tell you what to do. Which, well, obviously.


This doesn't mean I don't deviate from time to time. I was supposed to use fusible interfacing for the, uh, face of the pumpkin. Basically you iron this sheet of paper onto the fabric that you want to turn into an applique, which is a fancy word for sticker as far as I can tell. Then you peel off the paper which exposes a sort of blue, and you iron them onto your fabric using a damp cloth. Why damp cloth, I have no idea, but since I don't usually use this stuff I went with it.


It looked super cute, but because I was trying to get the face to stick to the sort of nubby texture of the fleece, I didn't really trust the interfacing. The corners seemed a little loose to me, so I ended up stitching along the edges anyway. I suppose that's fine because the interfacing held it in place nicely while I sewed. If I had used just pins I'm sure it would have slipped all around, so in hindsight maybe that worked out well!

The one other thing I did a little differently was right at the end when you turn everything right side out, rather than just stitch it closed as they directed, I opted to add some stuffing. I wanted to make sure my little pumpkin was nice and round!


After the finishing touches, here is the finished product!


I found some cute striped leggings at the Carter's outlet that look just perfect, and I will top it off with a cute knit pumpkin head hat!

So that's my method for homemade costumes! It's definitely not perfect, but I hope that my little one will have the same great memories of wearing costumes made with love like I do.

Wednesday, October 9, 2013

Guest Posting at Delightfully Noted!

Yikes, it's my very first guest post! Won't you come visit me over at Delightfully Noted? I'm sharing where I ended up after outlining my plans for a classic Halloween costume here.

(I love the graphics Jennifer added - very Pinterest-ey!)

Linked up to the Newlywoodwards Pumpkin Parade

Tuesday, October 1, 2013

It's October!

Ahhh, can't you just smell the pumpkin spice latte in the air?! (I was at a non-Starbucks coffee establishment last night, and asked for a pumpkin spice latte and the girl looked at me as if I'd asked for something unheard of. It wasn't on the menu, but they DID have pumpkin chai. Is it possible the entire world DOESN'T anxiously await pumpkin spiced everything season like I do?)

So anyway, now that it's all officially fall and everything, I just wanted to put up a little note about Halloween hats. I have 3 (er, 4) available in the shop right now! I'll put up a more definitive deadline closer to Halloween as it's somewhat dependent on workload, but I think orders will need to be placed within the next THREE WEEKS to guarantee delivery by Halloween. (And keep in mind that you may need to order earlier if your community does trick-or-treating the weekend before like mine does. Halloween falls on a Thursday this year!)

The perennial classic pumpkin head:

The "boo" earflap hat:


And the newest addition, the monster hat! (This one is pink as it was a custom order, which is obviously not always the scariest color, unless you are a 5 year old boy - then pink might be downright terrifying! As pretty much everything in my shop is made to order, color options are always up to you!)


And this one isn't strictly Halloween, but darn it, I just like this owl hat! :) It could be partly costume.


Monday, September 30, 2013

Weekend Productivity

 This was my favorite kind of weekend - no real plans, gorgeous weather, and a full list of projects!


And wine. Love wine. :) I'm a red wine kind of gal all year round, but something about it in the crisp fall weather is just the best. I'm probably showing signs of my age, but the above photo was from Friday night. And it was perfect. A little crafting, nice glass (just kidding, it's not a nice wine - two buck chuck!) of wine, junky tv show, quiet, lovely.


Putting the finishing touches on a newsboy hat. This is before I noticed that I put the button strap on at an angle. Argh! Just grab the seam ripper. :)


It's so nice to actually be able to gather a bunch of finished hats up and SEE how much I got done! I finished up the monster hat that I started last week, the gray is the newsboy hat, and I managed to start AND finish a little elf hat for a new December baby! Plus I have the brown swatch in the back that has a bunch of stitch experimenting for a project I'm about to cast on. AND I made a couple meals this weekend - I felt like superwoman! That is before I figured out that I didn't actually turn on the dishwasher after I loaded it. Right back down to earth.


I took a couple of new photos of the newsboy hat to update the listing. I had a rare combination of daylight, time and finished items so I tried to take advantage. I also grabbed some shots of a new listing - the monster hat! This is a topper for a Halloween costume, so it seemed right to make it a little....nuts. Silly googly eyes, mouth full of pointy teeth, and all in pink, purple and green to match a little girl's costume. Can't wait it ship 'er out!


Monday, September 23, 2013

Boo!

 I have a new item in the shop! But first let me back up a little, and take you through some trial and error.

I had this vision in my head for a new series of earflap hats with embroidered lettering. The hat itself was simple enough as I've made it in a solid color a few times before. The lettering....oh the lettering though. I knew the look of the lettering I was looking for, but I wasn't sure exactly how to achieve it. 

I started with the middle "o" so that no matter how big they ended up, the letters would be centered.


Looks ok from the front.....


But it looks like crap from the back. Not to mention that all that bulk would be pretty irritating on little foreheads! 

So I tore that out and went back to the drawing board.
 

I thought that embroidery thread might still be the right thickness so that the letters would pop against the crocheted background. Of course I couldn't find a needle with an eye large enough for the embroidery thread (and I broke my needle threader in the process of trying to make it fit), so I tried pulling apart the plies of the thread. This worked....but totally disappeared into the yarn of the hat. So I thought that maybe if I went over the stitching a few times.....well yeah, that looks terrible. (This experiment would be the center "o" in the picture above.) Then I tried again with the yarn to make the "b", but only went through the stitches on the front side of the hat. This at least smoothed out the back side, but was super bulky on the front, and not really the cursive look that I was going for. So I tried one more time by basically stitching the yarn onto the front of the hat using regular old needle and thread...and found a look I liked on the final "o"! This gave me the boldness of text I wanted, but nothing bulky or itchy on the inside.


It turned out pretty darn close to my vision! I'm loving the earflaps and straps in an effort to actually keep the hat ON those little heads! I fear the pumpkin hat might be a bit of a struggle in our case, though I will still insist on it for trick or treating at the very least! Please visit my shop to see more details!


Monday, September 9, 2013

Trials in product photography and new listing in the shop!


Right off the bat, I am not a good photographer. In fact, I'd just go ahead and say I'm a downright BAD photographer. It's just one of those things that I can't get to click (oh lord, no pun intended) for me. For years I decided it was just my point and shoot, as everything I took came out blurry and dark, and my solution was just to not take pictures. Win! However, on the rare occasion when I could get over my awkwardness about even taking out the camera to begin with, I'd go to download them to the computer, and realize that the Christmas pictures I was saving were the first pictures there since the Christmas before. Now I'm not saying I want to photograph every waking moment of my life, but I'd like to be able to look back on more than one day a year!

So 2 years ago, I decided, well maybe it's not all me! Maybe it's the camera! I mean, what problem can't you improve by throwing money at it?! However my thrifty side said that there was no way I was dropping $4 or 500 at a DSLR for something that realistically probably wasn't going to improve my pictures, so I went to Craigslist. I managed to find a 10 year old Canon Rebel XT. Definitely not a top of the line model, but I figured it was something that I could try to learn on. So I got my camera for about $200 I think, and I proceeded to put it in auto and use it just like my point and shoot! Yeah...that didn't help a ton! I mean, things got less blurry, and I had the courage to actually use it more, but still, there are so many buttons and modes that I just didn't know anything about.

For my birthday last year, I decided to go ahead and learn this darn thing. I tried looking at a lot of tutorials online, and actually reading my manual, but it still just felt like Greek to me. I decided that the best thing would be to take a class, so that's what I asked for as my present - one of those extended learning seminars for beginners through my alma mater. This...kind of worked. I mean, at least I now kind of know what a lot of the modes do, and in certain circumstances I feel ok putting it into manual for low light situations, which seem to be all of my situations inside my house. But I'm still bad. I can't seem to get a grip on white balancing, and I end up doing a lot of adjusting after the fact in Photoshop. I think what I probably need to do, apart from practice, is sign up for an intermediate class. Maybe I'll ask for that for my birthday this year!

In the meantime, I want to try to make sure my Etsy listings don't look like total garbage. #1, I want people to look at them. But #2, I can't say in the description, "hey, this totally looks better in person! Trust me! Just buy it, then you'll see!" So I need to try to make my items look realistic and try to convey the cuteness through the screen on a plain, non-distracting background. I was reading a book that talked about a super simple construction of a light box. Just clip smooth white paper onto cardboard and set it up like a box with 3 sides, aim a lamp into it, and shoot away!


Fail.

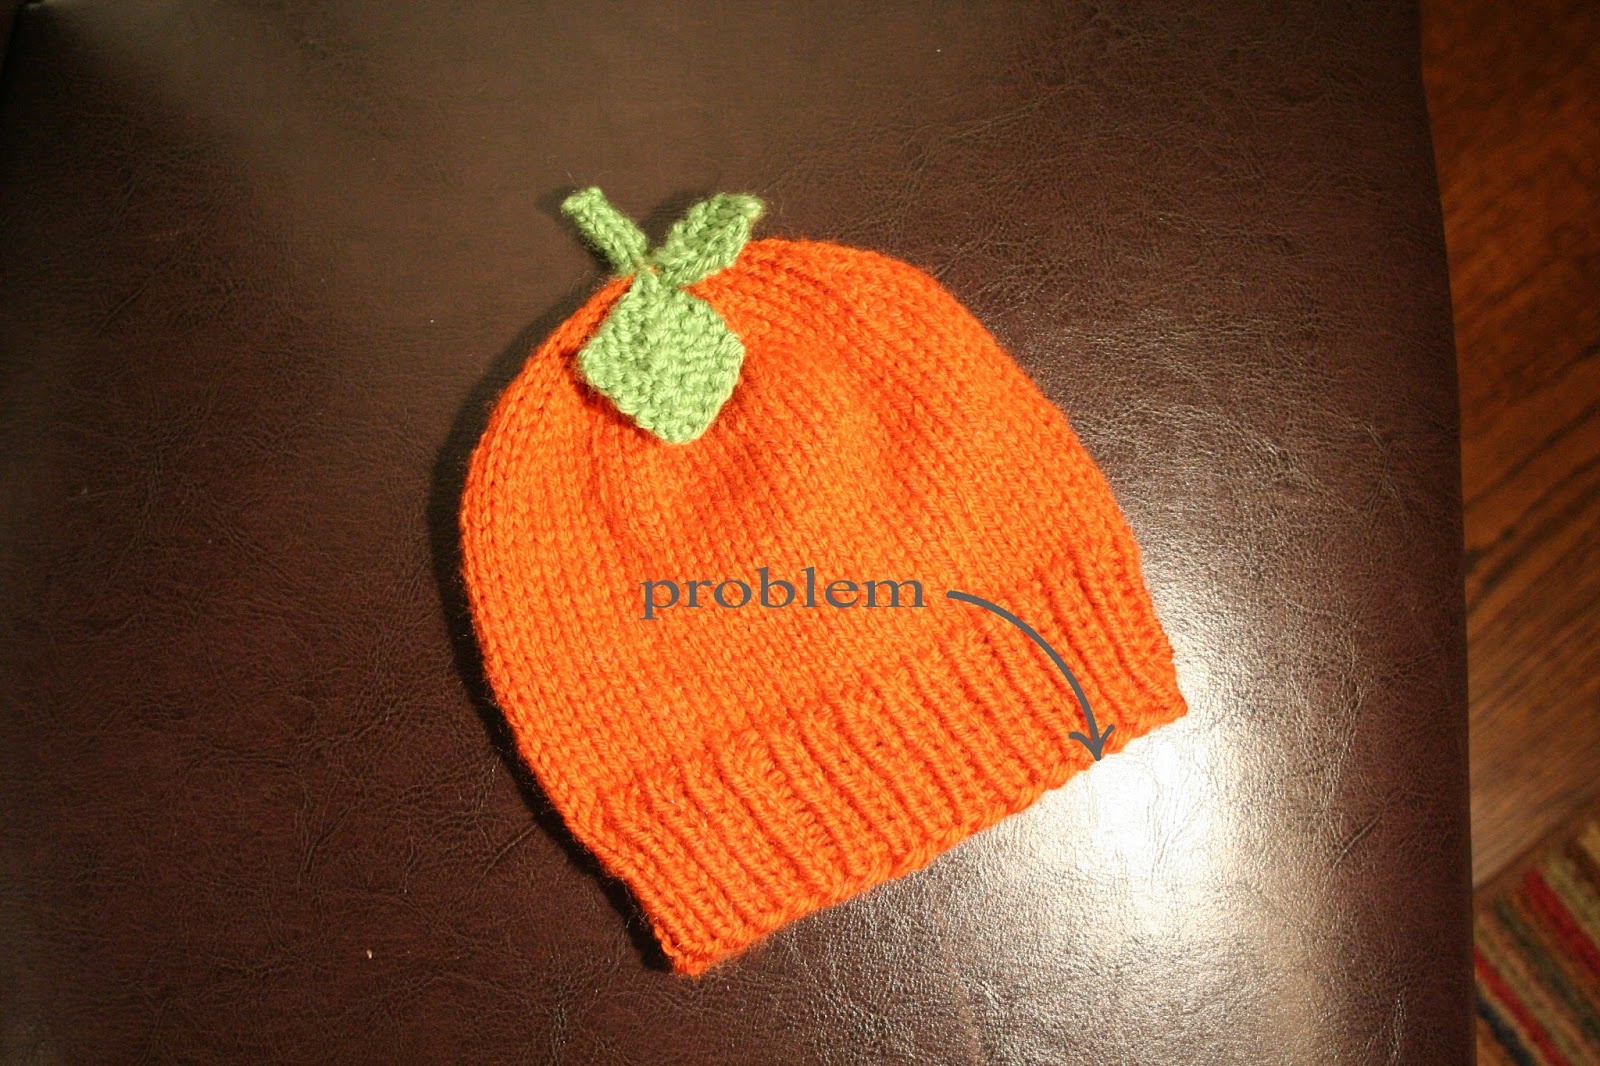
I mean, I guess it's a little better than just putting my little hats on my white desk and shooting from above. But not much. I think maybe my biggest problem was scale. Even for the baby hats I'm mainly working on, an 11x17 sheet of paper wasn't big enough so that I wasn't catching the edges of the cardboard in the shot, which just seemed to throw off the colors even with my feeble attempts at editing the photos after the fact. Also, I even went ahead and started writing up a listing for this cute little pumpkin head hat, and that little leaf just seemed so feeble! It was late, and I decided that it really needed more work before it was ready for sale, so I knew I'd have to retake the pictures anyway, so I might as well try to make them better.

I poked around a bit on Etsy to see what other people were doing. Of course the cutest and most common photo set up was the hat on an adorable baby's head. Duh! And I even have one of those lying around. However, I've taken a stance of not wanting to splash my baby all over the internet. We've not posted a single picture of her on line, even on Facebook. (We do all our family photo sharing via emails and texts.) So....it really didn't seem like a good idea to bend my rules to sell something! Then I saw some pretty attractive shots set up either outside, or in a little vignette somewhere in the house. I opted against an outdoor option because I work for a living and most of my spare time - when I do this stuff - is in the dark. So somewhere in the house it is!

We have espresso colored dining chairs and off-white curtains, so I thought that might be a nice and somewhat consistent background I could use for most of my items.


Except, well, reflection. No matter where I aimed my lamp I just got this hot spot on the not-leather leather-ish fabric of the chair. And then I thought....wait....couldn't I just take that curtain and use it like a photo backdrop?


I think....win?!


Yeah, it's still way less good than a professional would do. I think ultimately if I keep this up with any level of success, my best bet would be to swap props for photos and have a pro shoot my knits. But this is not that time, and if we're going to go, we're going to go grass roots.

Does anyone have any other tips for product photography that a total photography neophyte like me could try to pick up?

And also, what do you think of the new hat? I added a second, larger leaf that I think balances it out a little. I can't wait to see my little one sporting it all next month!!