Monday, October 5, 2015

What I crafted on my summer vacation

A summer break from the blog wasn't something I'd planned to do, but I did and there you have it. Early summer had me feeling tired and uncomfortable and just not really in the mood to chat or share. Mid summer saw some incredibly high highs, and some very confusing and unexpected lows. The good news is that we've all survived and daresay are even thriving. We still have some fallout to deal with, but I'm hopeful that it will be resolved in short order and someday we can look back on that particular chapter as a funny NOT FUNNY moment in an otherwise good story. Finally, late summer and the beginning of fall have been full of adjustments, with a few more upcoming. I've been wanting to get a post up for a little while, just to catalog the projects I've finished recently. (And not so recently!)

The rest of these are in no particular order, and most will probably not have much detail, but I'm starting with the big one. Also, glamour shots of finished objects have really not been high on my priority list.

The quilt. The hand pieced twin sized quilt is FINISHED! I was so thrilled to finish it in time for an August birthday gift, and more thrilled that the birthday girl loved it. You can't really expect much of a reaction when giving anything to a three year old, and you should really lower those expectations that much more when you're giving something both handmade and utilitarian, so it was really nice to see her face light up for her "pink blanket." I'll not take offense that the favorite and most notable feature is the plain ol backing fabric! In honor of that, I've filed all of those quilt posts under "pink blanket," and that little exercise showed me that I first posted about that project on August 26, 2014, which is actually kind of cool as I gifted it on August 19, 2015. And that's why I do this. :)

All ready to make the quilt sandwich:


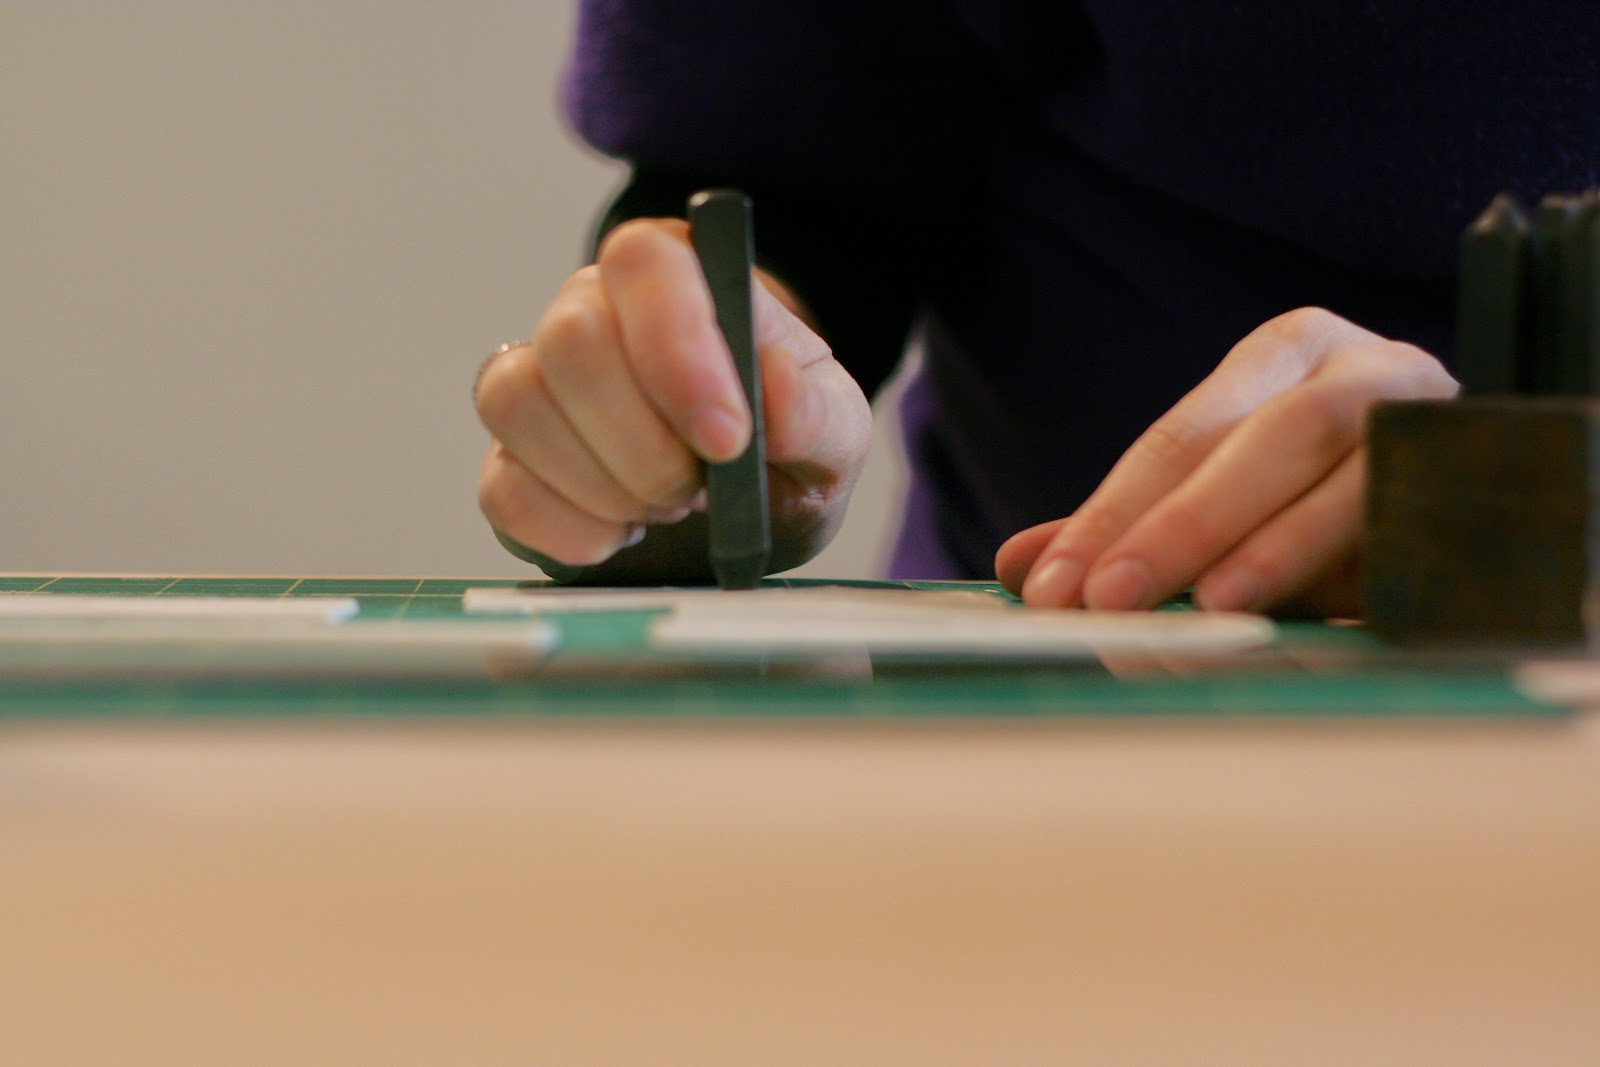
The surgery and patchworking required when discovering that no, in fact your backing fabric was NOT cut to the lengths you requested:


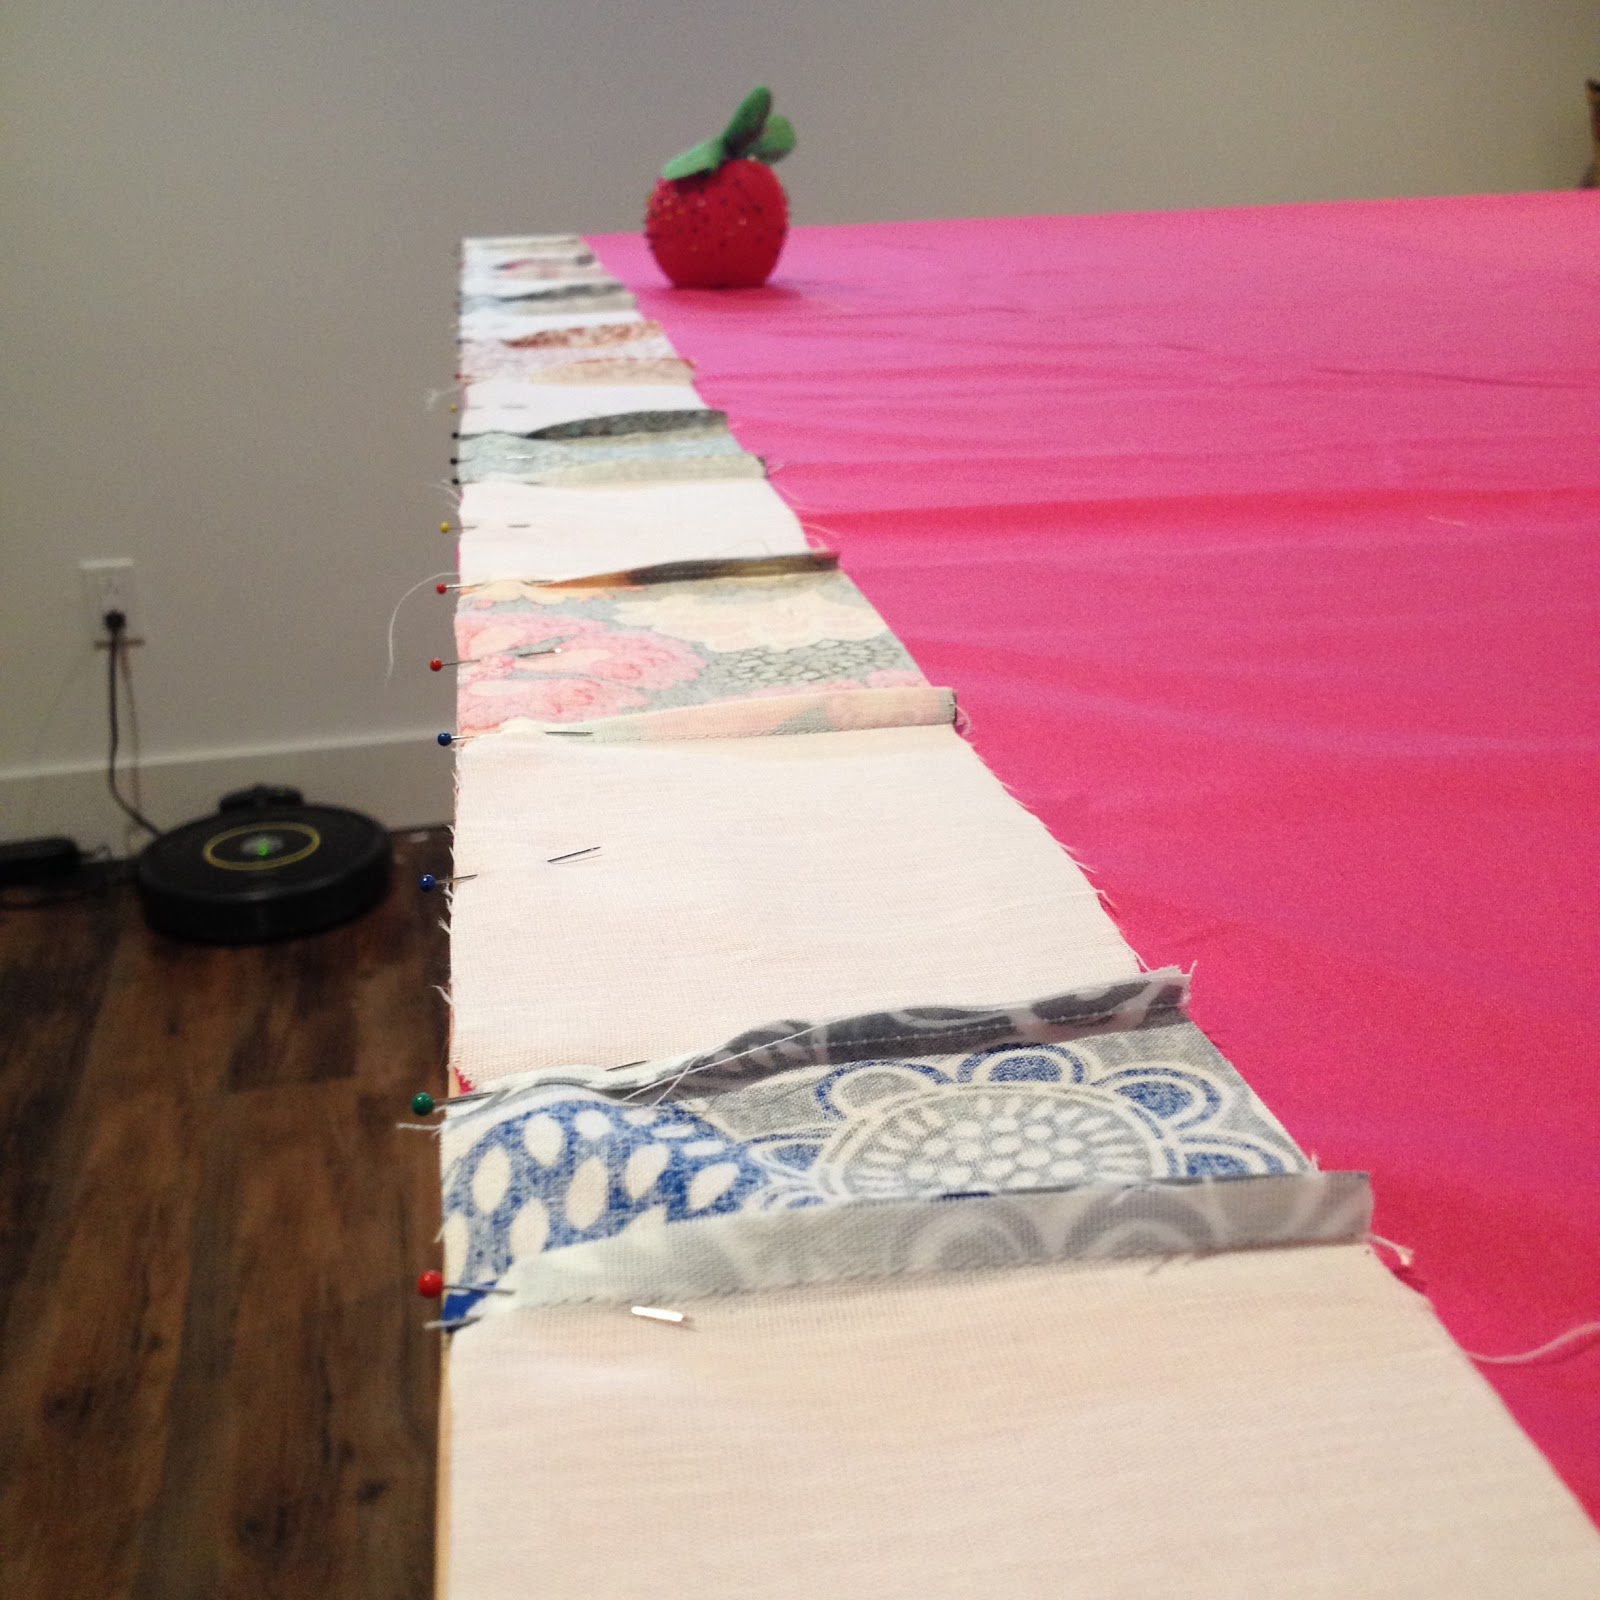
Pinning, and happily discovering that your table is the same width as the quilt. I still ended up with a ton of puckering despite my best efforts. Perhaps next time I'll try spray basting as well as pinning.


I embroidered a little message on one corner, which turned out ok. I just traced over my handwriting in disappearing ink. It's not perfect, but I think will be nice to remember in years to come.


Pretty much the best reaction one could hope for:


 Where the quilt lives now:


A collection of friends I found in the bed before I made it. I love how you can see some of the same fabrics in their clothes used in the blanket as well!


Back in May, I had three projects on the go, and they are all done now!

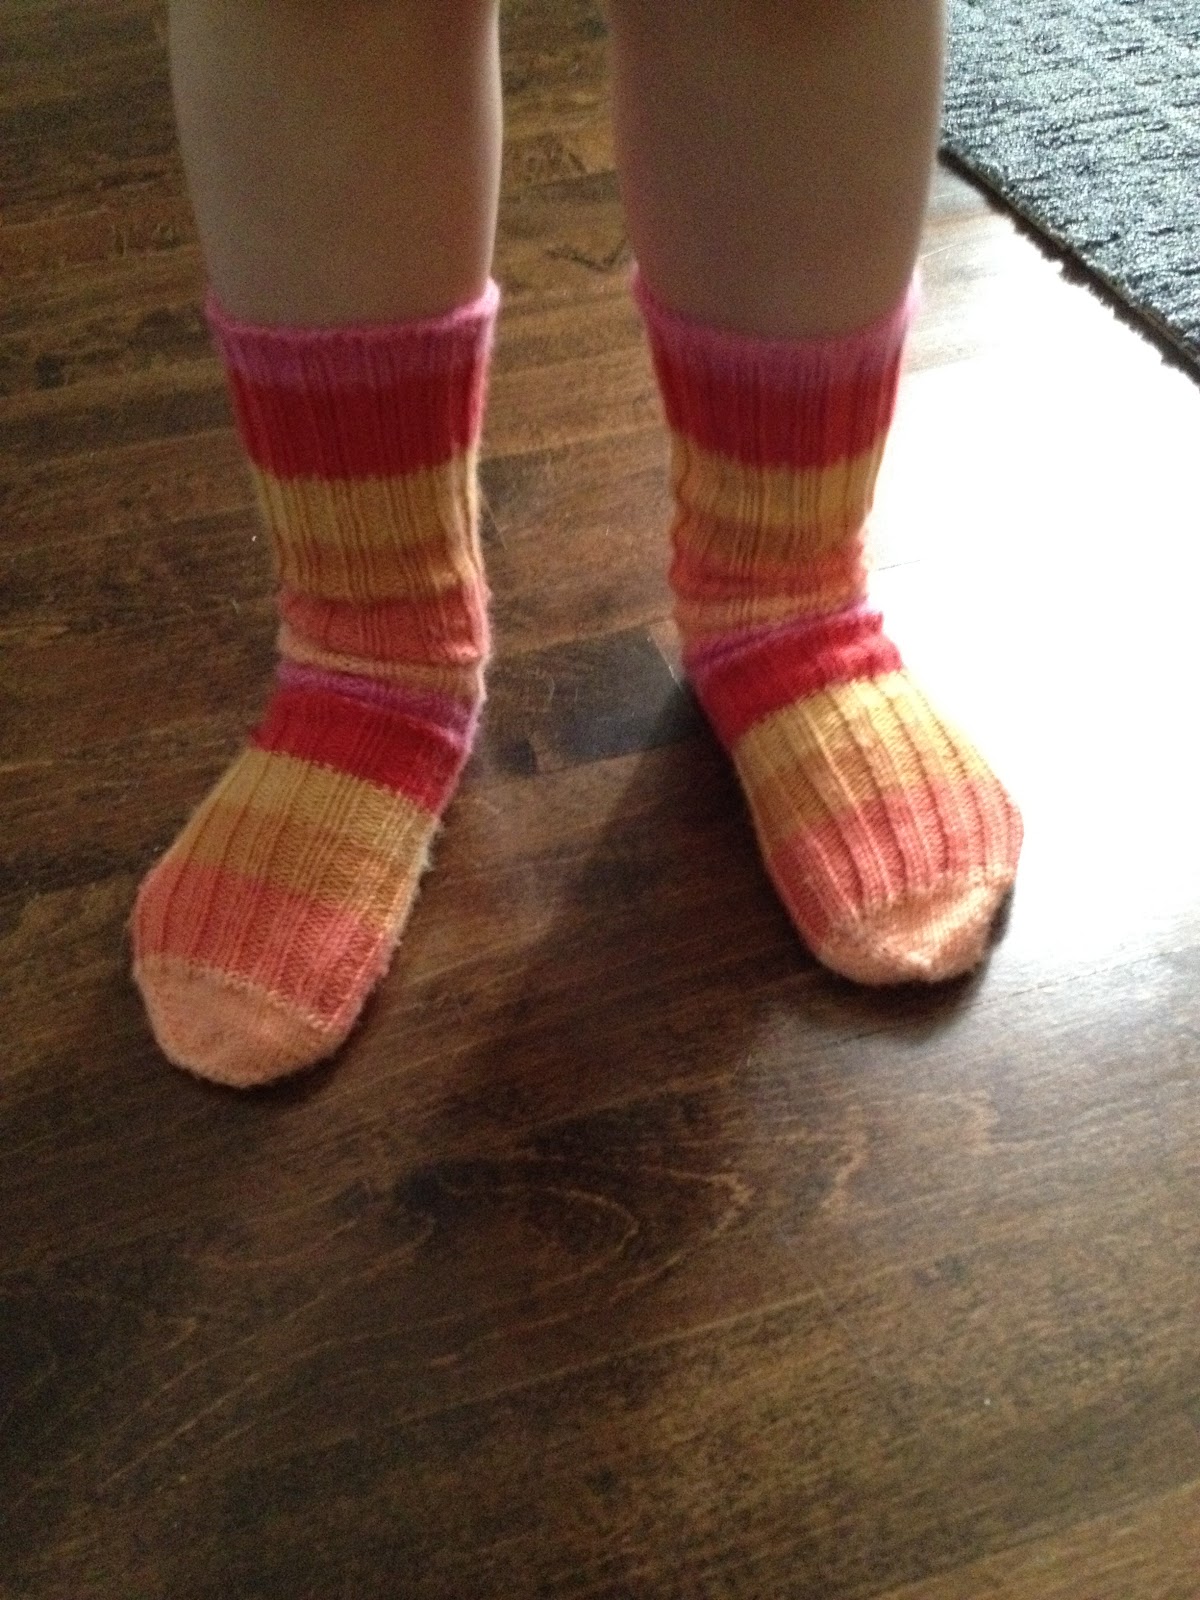
Finished toddler tube socks:


The ribbing makes them look so skinny just laid out, but they do actually fit feet. I think that they could stand to be maybe 4 stitches bigger around. If they actually see some wear, I'll do that next time.


 Here are the textured gray socks from Lara Neal's Sock Architecture: (affiliate link)


I was concerned that they were extremely tight the first time I put them on back when I finished them this summer. However I've washed and worn them since (yay fall weather!) and they were great. I think it was a combination of swollen ankles and humidity, so note to self, don't try on wool socks in the summer!

I also finished my Brooklyn Bridge cardigan. Everyone said I was crazy for knitting a black sweater, but it turned out ok in the end. One thing I didn't foresee was exactly how terribly my skeins matched. (This is softball merino wool (I think) purchased from Newton's Yarn Country at Stitches in 2014) I tried alternating skeins, but honestly that just left me with stripes. I can see how that technique works when there is variation in the yarn, but it just wasn't a go with a solid color. So I just kept knitting and planned to dye the entire cardigan black in the end.


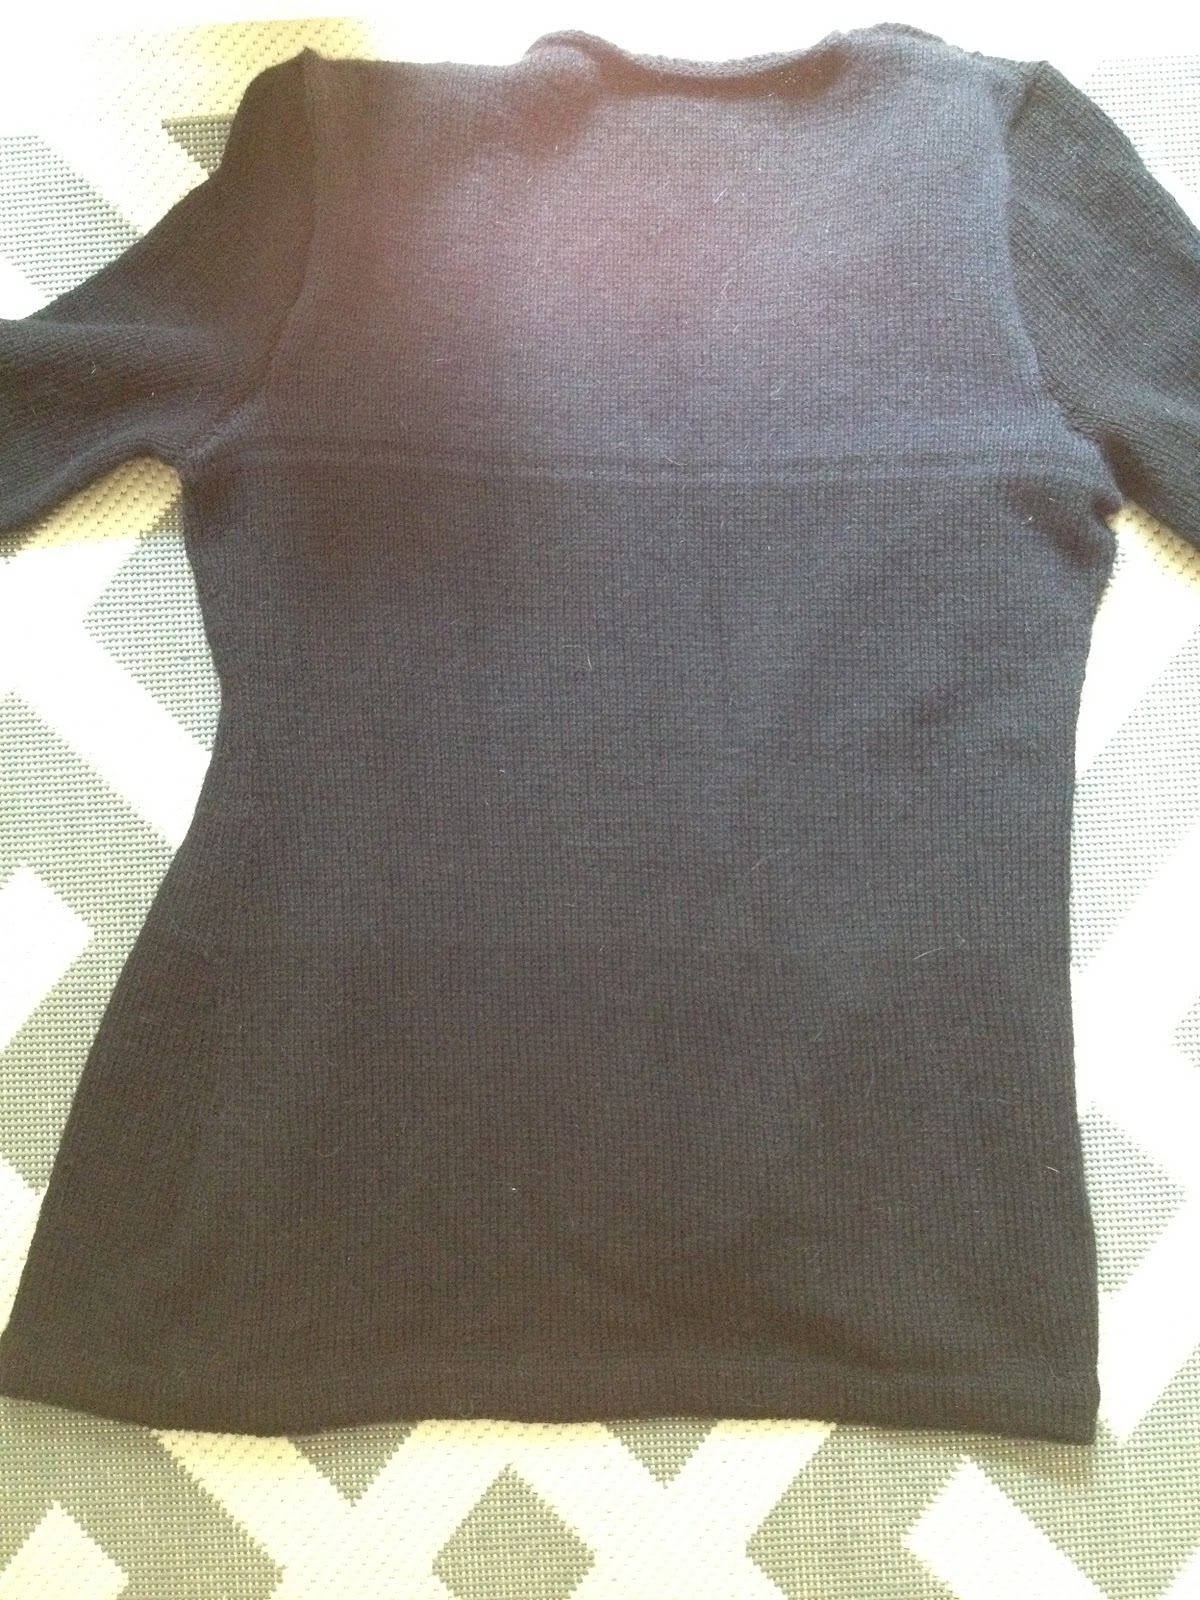
I stupidly didn't get a clear full shot of the sweater (I tried, they were blurry and I didn't notice until I downloaded and I'm too lazy to set it up again). I won't say my efforts were 100% successful. I can still see the lines, but you can sort of see that the sleeve matches the rest of the sweater a little better in the shot above. I still have half a bottle of the Rit dye I used, so maybe I'll try it again someday. We actually had some photos taken yesterday and I wore this sweater because it was way colder out than I'd originally planned, so maybe there will be a better full shot in those that I will try to put up. Looks notwithstanding, this sweater was WARM! It's just fingering weight, but it's a wool angora blend, and I was so comfortable. The only alteration I made to the pattern was to omit the hood. I wish I'd decreased the tops of the side panels a bit more gradually to meet up with the back, but overall I'm pretty happy with my adjustment!

While on a fingering weight yarn phase, I knit up Baby and Kiddy Vertebrae sweaters. The idea is that by basically just knitting sleeves and a back, kids who tend to overheat may be more comfortable, and it may be the right amount of warmth for a baby when you wear them in the carrier as their fronts are facing your skin and already pretty warm. I will say that I think these are cute on the kids, but I'm not sure how I feel about making more non-closing cardigans in the future. (This is foreshadowing) The yarns I used are Araucania Huasco / Botany Lace for the blue and Manos del Uruguay Alegría for the pink. The Manos was a pleasure to knit and SO soft to wear. The Araucania....well it bled all over my hands as I knit, and despite washing many times AND trying the citric acid soak that the Knitmore Girls have had good luck using, the water still runs blue. Sigh.


I had a request for a kitty Halloween costume, so I worked up a pretty little hat in an effort to use up some of my Knitpicks Chroma. I also crocheted an owl hat a few years ago that is much loved and way too small now, so I knitted Hootie Hat the second. I enjoyed the top down earflap pattern from Jane Richmond, though I wish I'd used a looser castoff on the brim. I also wish I'd placed the eyes while the hat was worn - knitting stretches a lot more than crochet, so the final product is a bit more wide-eyed than planned while on the head!


Continuing my Chroma stash busting, I decided to whip up a kindergartener cowl. I just don't love the idea of scarves for kids, which is why I wrote my Howard Hoodie pattern with the attached neckwarmer last year. I just feel like it's a recipe for the loose ends getting pulled and choking the wearer! The Howard will still be in our rotation for sure, but I thought I'd give a cowl a shot. It's nothing fancy, just a simple stockinette tube.

 
I couldn't decide whether to use the blue green ball (which matches the hootie hat) or the pink purple ball (definitely the more favorite colors) so I used both! I just striped them and switched colors sort of randomly. I carried the yarns up, but almost wish I'd cut them and woven in ends as you can see the carried yarns due to the rolling stockinette if the "seam" isn't in the back. As for length....I just kept going! I know it will roll, so I wanted it to be long enough to cover the neck when all scrunched up.


 If you're still with me (I know this is long!), I've got one last project to share. I've been wanting to make the Rocky Coast Cardigan by Hannah Fettig for several years, and late this summer I just got a yen to cast it on and knit knit knit. Seriously, I knit it in less than a month.


The yarn (discontinued Mirasol Qina) was really nice to work with, and will be really warm in an 80/20 alpaca bamboo blend. But it won't be in this sweater. Yep, this baby is getting frogged. (Unraveled, for those non-knitters.) You see, while I like a long cardigan, the loose gauge of this knit just stretched way too far for my liking. And this other point isn't really the fault of the pattern, but more a combination of my not reading or realizing that it's not just an open front cardigan....but that there actually isn't enough fabric for it to ever close. I don't tend to button my cardigans, but I DO like to be able to at least pull the front panels together. This doesn't come close across the bust, and comes way less close across the bum, and I will never wear it. So it hasn't happened yet, but this will be pulled apart and grow up to be something else. I don't consider it time wasted though. It was a learning experience, both for what I like in a sweater, and with all those cables, I learned to cable without a cable needle so that's good. And it passed the time, which is a lot of what I was asking from it. You win some, you lose some!

Thursday, October 1, 2015

How tired am I?

I firmly believe that a continuous lack of decent amount of consecutive hours of sleep is a very effective form of torture, and a device for seeing exactly how stupid and clumsy you can be.

I keep my compostable food scraps in a gladware container in the fridge, because this limits how full we can stuff the bin before taking it outside, and it keeps the scraps from smelling or collecting fruit flies. However. We also keep food leftovers in gladware containers in the fridge.

As I was making my lunch today, I realized that I'd dumped the coffee grounds that were intended for compost into the container holding the last dozen or so mini pumpkin muffins instead. This was annoying, but there were still a few that were untouched by the grounds and seemed salvageable. I scooped them out and put them into a fresh container. And then I knocked that container on the floor.

That was very annoying.

I'm so tired.

Tuesday, June 30, 2015

All is not lost


The metal forked piece in the top image that was slowly scraping away parts of my sewing machine has been replaced by the actual plastic forked piece that is made to work with my model of machine (what a concept!). I am happy to report that the machine still sews with this custom made foot, and I may actually end up finishing this quilt before the end of summer. Hooray!

Wednesday, June 24, 2015

Brand matters

Why?


Well, because your walking foot probably shouldn't wear a groove into the metal parts of your sewing machine like this.


Ohhhh, so many curse words.

You see, I bought this foot several years ago (maybe 5?) when I made my first and only other quilt. Like you do, I just went to a local Joann's, bought the walking foot they had on the rack, and hooked it up to my machine. It screwed right in, and I thought nothing of it.

Fast forward to recently, and I ran into a situation that should have been a sign...but I totally missed it. I wanted to buy some more empty bobbins, and again, I just went to the local Joann's, picked up a multipack, wound one up, and immediately got frustrated when it just didn't seem to fit quite right. I compared it to one of my other bobbins, and noticed it was quite a bit taller. Huh, I thought. Ok. So I exchanged it for the other size bobbin pack at Joann's, wound THAT up, and while it fit better, it still wasn't an exact fit, and the bobbin jammed up and made a mess. I untangled it, and went back to return the second pack. This time I asked the lady working the sewing machine corner what was up. She informed me that they only sell accessories for Simplicity and Husqvarna sewing machines. I have a Brother. Still, no lightbulb moment for me.

I am finally to the quilting it all together point on my hand pieced quilt, and I was swimming along just fine with sort of straight line quilting, sort of an inch apart....when all of a sudden my walking foot just stopped walking. I was confused. The bobbin hadn't run out, the needle was threaded...what gives. I remained confused for a while, re-threaded the whole works, got through another couple inches, and again, it just stopped! This time the little arm thing fell off the screw thing it was (apparently) eating away...but I still didn't see that. I removed and reinstalled the foot, tried again, and again, the arm thing immediately fell off the screw thing.

That's when I noticed the groove that probably shouldn't be there. That's when I flashed back to the bobbin situation....and THAT'S when I figured out that, huh, that walking foot probably isn't a universal accessory.

Sure enough, they sell a specific walking foot to attach to my specific brand and model of sewing machine, and I am a moron.

I have since ordered that specific foot, and am avoiding actually trying it out because I'm afraid that I wore the screw thing away too far and that it won't work and I'll have to buy a new machine if I want to continue using a walking foot. This bums me out because first, the rest of the machine still works just fine. Regular presser feet don't rely on that screw thing, and the screw thing still holds the needle in as it's supposed to. Second, I have absolutely no idea what machine I'd want or need, and there are so many options out there that I feel overwhelmed by the variety and potential cost of replacing my otherwise functional machine.

So stupid. Use parts made for your machine. In this case....brand matters. Or at least MATCHING brands matters!

Wednesday, June 3, 2015

Newbie knitting chart mistake

As it turns out, you can't just knit a chart from top to bottom instead of bottom to top as written.

I think I mentioned before, but I'm new to charts, and suddenly find myself knitting two patterns with charts at the same time. I'm working on the Uncommon Dragon socks from Lara Neel's Sock Architecture (affiliate link). The pattern is one of the few in the book written top down only, as the pattern flows right into the gusset, which I'm guessing isn't possible / as easily possible when working toe up.

In hindsight, I'm not really sure why I insisted on doing these toe up. My inclination is to use up as much yarn as possible and make the socks as tall as possible, which is why toe up appeals to me. As this is only my.....fourth pair of adult sized socks, I'm still getting used to exactly how much yarn is a good sock for me. However, I do know that it definitely fits into less than 100 grams, so it's not like I would run out doing these cuff down. In any case, I'm over halfway through the foot, so I'm not going to rip out now!

Again, in hindsight, I'm not even sure why this matters, but I foggily decided that I'd like the pattern to be oriented the same way as the original, even though I was knitting it "backward." In my head, I could just knit the rows in the opposite order than what was written, and that would work out. However....as I kept waiting for the pattern to emerge....it just didn't. Yes, some kind of texture was showing, but it didn't look like anything specific. I thought that perhaps it was just a poor pairing of yarn and pattern.

I thought about it more though, as I was working the chart on my other charted project, and I really started paying attention to the directionality of my decreases, and it hit me that THAT is probably my problem. For kicks, I decided to do a couple of repeats in the correct order to see if the pattern would look better. I marked the row where I made this switch, and sure enough, this pattern DOES actually show up in this tweedy yarn if you knit it as written!


An interesting experiment, which I'm sure has been done by someone before, would be to see if you also knit the pattern upside down AND left to right if it would actually show up as its reverse like I originally intended. Now that the pattern is showing up nicely at the top of the foot, I'm not sure that
I want to frankenstein this particular pair of socks any more than I already have. On the other hand....they're just socks, and I'm sure no one but me or other perceptive knitters would even notice! (and another knitter would totally get it if I explained) Maybe I'll throw in a lifeline and knit a repeat upside down and mirrored....I can always rip it back if I don't like it or if it totally doesn't work out!

Update: I tried it. It didn't really work. The pattern immediately disappeared, and actually was really frustrating to knit. Not surprisingly....everything felt backward! I threaded in a lifeline intending to rip it back....but ultimately I just left it alone and switched back to the normal stitch pattern and now these guys are ready for their heels! Oh well, they're just socks.

Monday, June 1, 2015

Cozy Cape Cottage Exterior - Spring 2015


My husband has been wanting some photos of the exterior of our house for quite awhile now that it's basically finished. (yeah, there's still some actual "finishing" stuff that needs to happen, maybe it will, maybe it won't! And landscaping, not our forte, will always be a work in progress.) Our crabapple tree, which has been sort of sickly for a few years, was starting to bloom a couple of weeks ago, so I walked around across the street taking pictures and feeling sort of embarrassed about it!


The different colored patch of grass at the bottom of the photo above is where the city laid sod last year after upgrading our gas lines. Hopefully if we overseed the yard for the next couple seasons it will eventually blend in!


(can you spot the puppy watching me from the window?)


I read somewhere once that chives are a good companion plant for crabapples, so I planted some by our sick tree. Maybe I cured it?! (probably not, but I do love harvesting them for sour cream and chive baked potatoes!)


These last couple of images show some of our "green" upgrades. We have two rain barrels, one next to the front door (my husband tried to fight me on it, but I insisted, and I think it looks fine) and one off the back of the garage. This way I don't have to haul the watering cans too far. We use Save the Rain (affiliate links) diverters to allow rainwater to bypass the barrels and just go down the gutter when they are full. This happens to us a lot - if we're getting a lot of rain, there isn't much need to use the water in the barrels, so they fill up in the spring! I just keep tabs on the water level as I use it later in the summer, and when it's getting low, I just flip down the diverter and it refills with the next rainshower. We've had these for several years now, and they work great.

You can also see our retractable clothesline in that last photo of the garage. Admittedly I don't get to hang our laundry out as much as I'd like - our backyard is really shaded and clothes don't quite dry if I try to hang them out after work, which limits me to dry weekend days in the summer only. (I've tried in the winter, and again, things just don't get dry even after a whole day out there!) We have this same one in our basement which I use year round. The link above also includes the pole, which is across the yard not pictured. I just have to stretch it out, and I've got a ton of drying space! We leave the clothesline box up all year (according to Amazon I bought this in 2009 and it's holding up just fine out there!), and we bring the pole inside the garage in the winter. The base is anchored in concrete in a planting bed, and there is a plastic cover that screws on to keep it from filling up with water when the pole is not attached. Then in the summertime, we just bring the pole out and it clips onto the base. This was a compromise between us, because I wanted to be able to dry clothes outside and my husband didn't want to look at or duck under lines all year - this system has been working out very well for us!

Lastly, you can see a peek of our compost bin next to the back door. (sort of - it's black and in shadow!) We have this model through our local sewerage district. They've been doing annual one day sales for a few years, and I was happy to upgrade to this "real" bin after my makeshift "plastic bin with holes drilled into it" completely fell apart after a few years of use. Ideally I'd have a second one so I could let the compost age for another year, but this works well enough that we have enough to add to our small garden. My husband wants to build a fancy 3 bin system behind the garage, but that's been an idea for several years now, so we'll see! For now we just have this one and a large brush pile behind the garage. I do love having this right by the back door. I think we'd be pretty unlikely to use it if we had to walk behind the detached garage in the snow! Again, we've been doing this for several years, so it's a pretty road tested system for us. We don't notice any smell from it, and we probably only turn it once a year when we sift out the finished compost in the spring. I do notice some gnats, but only when I open the lid to toss stuff in a couple times a week...or if I cook lol! We sit on the patio very nearby the bin, and there definitely aren't a bunch of gnats swarming around when the lid is on.

I wasn't actually planning to go into a lot of detail about this yard stuff, but I guess I did, so I hope it's helpful!

Friday, May 22, 2015

DIY Garden Markers

I've been wanting some re-useable garden markers for several years now. I've tried the popsicle stick thing in the past, and even with a sharpie marker, they were illegible by the end of the season. My grandma always sticks the seed packets in the ground, but mine always seem to get carried away by birds or something, and then I just have to wait a month or so till the plants get bigger to see what's what. I thought about buying some, as there are plenty of cute ones all over Etsy, but wanted the control to decide which herbs and veggies I wanted to grow rather than buying a pre-made set. I suppose I could have requested a custom set...but then I found these:
 

I've casually had my eye out for a long time for a set of letter stamps, and I was seduced by this full set of alphas and numbers at a local antique shop. I don't know what my ultimate purpose is for owning letter stamps, but because these are metal, I have the flexibility to press them into soft clay, hammer them into wood, maybe stamp them with ink or paint...the guy at the shop said they could even be heated up and burned into leather. I suppose it's that versatility that gave me the push to buy these rather than just something at a craft shop. Plus....they look pretty cool in their boxes.


I rolled out a bunch of markers with Sculpey clay, stamped them, and baked them.


I baked them according to the directions on the package, but after they had cooled....they were still super flexible. That wasn't really my goal.


 I thought, well, maybe they'll firm up if I cook them longer? Nope, not so much. They got really stinky, which is probably not a great sign, and they started changing color. At that point I just gave up. I did a little bit of research (not sure why I didn't do that before I started!), and found that if this sort of clay is thin enough, it will pretty much always be flexible. I did a little experimenting with markers two and three times as thick as my first attempt, and it turned out that triple thick was the charm.


The good news is that in addition to making markers for myself, I'd planned to make them for my mom for mother's day as well. This will be the first year that she can really do a garden at her new house because the yard was put in toward the end of summer last year. I decided that I would keep the beta test set for myself, and remake hers more sturdy. I had always planned on painting them, so the discoloration of my first try didn't really bother me. (I do wish that the depressed lettering stood out a bit more - I'd hoped that if I dragged the brush lightly enough that it would float over the impressions, but that didn't quite work. I'm interested to see how legible these will be at the end of the season. I think sitting in the dirt might actually make the lettering stand out more!)

I paired these with a potted planter of annuals for her front porch, and it turned out to be a nicely themed mother's day gift that I knew she would really love. I tried to anticipate what she'd plant based on what she's been talking about and what she had at her old house. If there's anything missing - she knows where they came from, and I can always make more now that I have the system down pat!

Thursday, May 21, 2015

A baby shower extra

As I mentioned in this post, I went to a baby shower for a dear friend a few weekends ago. She asked me to make her some pillowcases for her nursery with some fabric she'd picked out, and I was happy to do that.


As I laid out the fabric I needed for the pillowcases, I was excited to see that I had some fabric left over. I know that she isn't much for sewing, so she wouldn't have any need for the extra fabric. I knew I'd pinned a bunch of cute baby clothes on Pinterest, and was pretty excited to actually DO one of the many things I've pinned! (I used this pattern)


I put the picture above in a previous post - I was a little afraid she would catch on to my subterfuge.


She pulled out the pillow and the extra case, and was all, oh yes, I knew about this....and then she noticed the little dress and was so surprised! I paired it up with some sweet bumblebee sheets from the registry, because I'm a big believer in getting at least one thing that the new mother or bride to be picked out.