Tuesday, September 30, 2014

Getting closer...the basement studio

As I tend to do from time to time, I've totally switched gears with the aesthetic for the basement studio from my last update. While I totally love and appreciate the all white, Scandinavian look...it's just not MY look. I was just afraid of the whole space looking far too cold and "basement." Yes, I probably could warm up the space with white floors with enough textiles and wood, but this has sort of cost quite a bit more than I already loosely planned to spend. I also could have epoxied the floor and redone it with a laminate if I decided I hated it, but again, that's both more money and more time, another thing of which I've spent more than I hoped!

So. I changed my mind.


We decided to go the safe route, and put in a wood-look laminate (I can't find a link, but I picked it up on a sale at HOBO for about $1.50/square foot). I debated back and forth in the store for quite a while between the wood we chose, which has the same tone as the rest of our house, and something more like a wide, rustic plank, and a couple of white washed options. In the end I decided it made most sense to match the rest of the house. Installation was pretty easy. In fact, the hardest part was just getting all the drywall mud and dust and general construction yuck off the floor! Our floors are not at all level, so we filled in the obvious holes as best we could. I do have some concerns about the adhesive - these were peel and stick, rather than a product with a separate adhesive. We walked all over it many times, and used a roller as well, but I can still feel a few spots that aren't perfectly adhered. I think we will wait and see if anything pops up, and maybe consider a separate adhesive to re-stick some of the looser pieces.

So with the flooring and trim largely done, I got a very large dose of impatience, and apparently some sort of super strength delusions, because I decided that it was perfectly feasible to move these into the room all by myself.


If you know me in life, you know that I'm not what you might call muscular. And if you know these couches in life, you know that the bigger one has a couple of recliners built in, which makes it about a billion pounds.


It was a bit of an experience, but I managed the little one without too much trouble. The bigger one? Well, I don't have any pictures because if I'd stopped to document the process it's possible I may have been crushed and killed. There was a lot of sweating, relatively little cursing, and I only got pinned into weird places about twice. But I did it!

With the couches in place, I could start bringing in some of the other furniture. I placed the rug that was in the current sewing room (which still has some residual oxy-clean spots from a red wine incident which was too aggressively treated and not at all well enough rinsed. I'm working on it.) as well as the filing cabinet, sewing table (the long one) and computer desk.


Yeah, that's not going to work. The current setup is the same, but without the computer desk, and fits just fine on the rug. When I drew up the plans, I was lazy and didn't bother to actually measure anything and just guessed at the dimensions. And apparently I guessed wrong.


Nope. Weird dead corner, and completely non-functional file cabinet.


Hey, ok! Not terrible, this could work! (I don't actually love, or even like the file cabinet, but we do need somewhere to file household things, so it stays somewhere in the works. In fact it's moved again since this was taken, but the work surfaces are still there.)


Oh....just look at all of that space to lay things out, free of computer and associated cables!


And the soon to be (I hope) someday best part....planning for the cutting table!!!

(I'm testing out sharing my posts with a few link parties. I've linked up to Kathe with an E, Pam's Party and Practical Tips and Vintage Paint and More.)

Thursday, September 25, 2014

Hey...if you work on things, they get finished!

Remember, uh, last week, when I said I wanted to finish three things by the end of the year?

  
Well as it turns out, if you knit them, they grow!


(it is not wise to take finished object pictures at night. These colors are crazy different! True to life is probably the progress photo at the top of the post.)

It only took a couple of days of actually knitting on my Wonderful Wallaby to finish it! I picked it up just above the underarms on Saturday night, and grafted together the top of the hood and wove in the ends on Tuesday night! I used a discontinued yarn that I got in a Ravelry de-stash. It's a DK weight, whereas the pattern calls for worsted. I knit the 4T size knowing that would affect the finished size. It came out more like a 3T, but that's ok because the recipient is only 2.

Now, if you've knit the Wallaby before, you might notice that I made a mistake on the placket at the neckline.


I read the directions quickly, and where the directions told me to purl the center stitches every other row, I decided to just not read that and overachieve and purl every row. Once I started doing the garter stitch on the edge of the hood, I realized that I SHOULD have been doing garter stitch all the way down the neckline. Whoopsie. I didn't feel like ripping back all that way....so I decided that the rolling of the placket would just help keep the neckline open. Like, uh, a design feature? Plus, it's a toddler sweater, and we all know toddlers hate sweaters anyway. 

Anyway, now I have my entry into the Commuter Knitter Finish-a-long! #ckfal2014 - yay!


Tuesday, September 23, 2014

New scarves in the shop!

As I mentioned a few weeks ago, I've been working on a new product line for my shop....and they're finally up for sale!


I was starting to think these things were nothing but trouble...but then I got a rhythm going and got a couple done, and I've changed my mind! I've worn both the prototypes out and about, and have gotten a bunch of compliments, so I'm excited to see how they'll do on Etsy. (I should really get a dressmakers dummy for photography....I was hoping to wait for a really good hair day to take these shots, but it just wasn't happening. Had to settle for a so-so day!)

I struggled quite a bit with pricing these. I asked for a few suggestions and got about a $40 range! I know I've been pricing my handknits pretty low for the amount of work they entail, so I'm planning to start bumping those up bit by bit. I don't want to scare people off, but I really should charge what they are worth. Yes, handmade does cost more than picking something up at Target, but there's good reason for that. An actual person is sourcing materials, perfecting techniques, and personally, I'm happy to take requests so that people get the exact thing they are looking for. A friend asked on facebook just today if I'd consider making a scarf in a gray with gold snaps - the answer is sure! I can work on that!

In the end, I priced them pretty much right in the middle of the range of what people thought they were worth, and we'll go from there. I guess that's a good reason to get one now if you like what you see - stock is going to change, and pricing might as well! If you want more details, please take a look at my shop, cozycapecottage.etsy.com. I just have these 4 listed for now, so get em while they last!


Thursday, September 18, 2014

Garden Fresh Tomato Soup

Consider this a mini/end of season update. Things are winding down here in the Midwest. We seem to have barely started the hot, humid part of summer, and then we abruptly transitioned right into a crisp, cool fall. Strange weather, but it's been really good for my garden. I usually lose steam about, oh, June 15, so I consider the fact that I'm getting out there now and then to pick up a few ingredients for dinner to be a total win.

For example, I grew these carrots:


I grew these tomatoes:


 I grew this basil:


All of which simmered together (along with veg stock I made and froze last year!) to make this soup:


Want the details? This is my favorite tomato soup recipe, and I've been making it for several years. It's based on one I pulled out of our Sunday newspaper (and it looks like they adapted it from Ina Garten) probably....4 years ago? Pair it with grilled cheese and you basically have my favorite meal.

~~~~~~   ~~~~~~   ~~~~~~   ~~~~~~   ~~~~~~   ~~~~~~   ~~~~~~   ~~~~~~   ~~~~~~   ~~~~~~

Garden Fresh Tomato Soup

3 tablespoons olive oil
2 onions, chopped
3 carrots, scrubbed and chopped (or however many you are trying to use up!)
3 cloves garlic, chopped
4 lbs tomatoes, coarsely chopped (about 5 large big boy type or 20 small roma - I prefer roma)
1 1/2 tsp sugar
1 tablespoon tomato paste
1/4 cup chopped fresh basil
3 cups stock (veggie or chicken)
1 tablespoon kosher salt
2 tsp freshly ground black pepper (use just a pinch if not grinding fresh)
3/4 milk (buttermilk if you have it)

(I frequently double this recipe and freeze the leftovers!)

Heat oil in large pot over medium heat. Saute onions and carrots for about 10 minutes or until tender. Add garlic and cook for 1 minute. Add tomatoes, sugar, tomato paste, basil, stock, salt and pepper, stir well. Bring to boil, then simmer for 30-40 minutes, stirring occasionally.

Remove from heat and stir in milk.

Process through a food mill and discard pulp if you are fancy enough to have such a gadget. I am not, so I process batches in my blender and then run them through a sieve and discard pulp. (I push the liquid through with the back of my large ladle to make it go a little faster.) Return soup to low heat until hot enough to serve. Garnish as you wish - I prefer a nice grilled cheese sandwich with a hint of spicy mustard.

~~~~~~   ~~~~~~   ~~~~~~   ~~~~~~   ~~~~~~   ~~~~~~   ~~~~~~   ~~~~~~   ~~~~~~   ~~~~~~

And since I'm one of the only ones in my house who eats this, a double batch usually lasts me till spring! I'm hoping that if I pull the rest of the tomatoes that are still green on the vine I'll have enough to make one more batch this year, otherwise I'll turn them into sauce. It's funny, while tomato soup has ALWAYS been my go-to comfort meal, I really hate actual tomatoes!


Tuesday, September 16, 2014

Commuter Knitter - Finish-a-long

I was listening to one of my favorite podcasts the other day, Commuter Knitter, and she mentioned the idea of doing a knit along (called a KAL in the knitting world) for finishing all those projects that have been languishing on the needles for awhile. Now as a listener with three projects that seem to be taking forever and a day, coming up on fall when I'd like to actually be wearing them...that sounded like a great idea to me!

Here is Jen's introduction to the as yet to be named "-along," but which I've been calling a finish-a-long (a FAL?) in my own head, as follows in her ravelry group:

Do you need some extra motivation to finish some of those languishing WIPs off the needles? Did you start a KAL and then run out of steam when you didn’t finish by the end-date? Have you found a long-lost project that fell behind the couch? Or do you get distracted by the shiny to cast on ALL the things? Then feel free to join us for a year-end finish-along.
Guidelines:
WIPs should have been started prior to 9/1/2014 and finished between 9/9/2014 and 12/31/2014
One post per person in this thread - just add all of your FOs to the post
Please include a photo and a link to your project page with all the details of your project
Feel free to double/triple/whatever dip into other KALs as applicable
Prizes will be drawn just after 1/1/2015. More details to come.
 So basically, get motivated to finish the things I've been working on anyway, and have a chance to win a prize? Well ok!

Here's the status report on my never-ending works in progress. All 3 were started back in June, so I guess maybe they haven't been going on forEVER....but it still feels long. Note to self, don't cast on so many things at EXACTLY the same time!


I've been putting the most effort in recently on the Wonderful Wallaby sweater. I joined the sleeves last week, so all that's left is to knit the shoulders, collar and hood.


As for my troubled Bleecker Street Cardigan, which I would LOVE to have finished, I'm mad at it again. The sleeves and back are finished, so I just have the fronts to go. I absolutely would have started them....but I noticed ANOTHER MISTAKE on the sleeves. Argh! Why does this stitch pattern keep biting me?! I got one stitch off again, right at the decreases. I pretend I can't decide if it matters enough to rip them back....but it totally bothers me and I probably will. Bright side I guess is that it's on the decreases....so the rows are getting shorter. Still annoying, still can't believe I biffed it up again.


The last project is just a simple pair of socks. They aren't anything exciting, but I'd just like to have them finished! It's getting cold little by little, and I can't wait to wear them!


Now, the only snag in my finishing plan is that knit season is heating up, and so is my Etsy shop! I'm starting to get the first orders of my busy season rolling in, so I've got some business orders on the needles and those always come first. (These are the always popular cottage slipper socks - they are seriously the coziest thing!) I don't mind it at all of course - it's exciting and flattering every time someone chooses me out of all the hundreds of shops out there! It just means that I have to knit like the wind!


Thursday, September 11, 2014

things to fill with other things

While I wish I was the kind of person who does, I almost never go to antique or thrift stores. Mostly, I don't have the time or patience to hunt through...but finally, I've had success! I've been wanting to find some little things to go in the studio, and I scored!


I opted against the corks...I have enough of those already.


For the past....oh, year or so, I've co-opted one of our laundry baskets to hold all of the burlap sacks I've collected for projects and have yet to deal with. I found a large wicker basket with a wood bottom that worked out just perfectly! And hey, I can stop sorting one of our loads of laundry on the dirty floor!


While backyard chickens is a dream I toy with from time to time...I decided to use the vintage egg basket for, well, yarn. Currently it's holding the stash I picked up at stitches midwest this year that I just wanted to get out of my reusable bag, as you can probably tell by the artful arrangement. The basement studio, while far from actually being "finished," is actually getting crazy close to ready to move in the big furniture, and I think these two baskets will be a great start to the "effortlessly put together and collected over time" look I'd love to achieve. Until then, these cute baskets will be unceremoniously shoved into the closet, which I call crazy overstuffed and my sister called organized. Ha!

Tuesday, September 9, 2014

New product line...soon

If you follow me on Facebook or Instagram, then you already know I've been working on something new.


My sister had a double edged idea...she wanted to make these scarves that snap, sort of like the yoga ones from lululemon, and she wanted to learn to sew.

The sewing lessons went well.


The scarves themselves....well, it's been a lot of trial, and a LOT of error.


Let me just go ahead and say a couple of things about snaps. #1. It totally doesn't work to use lightweight snaps on either leather or faux leather. #2. It also totally doesn't work to try to punch the holes through on a hardwood floor. It worked MUCH better the following day when I did it outside on the concrete patio. It would probably work much better than that if I had use of a snap press, but I don't like to invest in a lot of equipment if I'm not sure if a product is going to sell or not. #3. Leather and my sewing machine hate me right now.

In the end, I really liked the results of the test scarves pictured above, but they were too long. I was so focused on getting the leather and snaps attached, that I made a rookie mistake and didn't test out the length! They definitely work, but need to wrap around 3 times which is just uncomfortable. I tried making a couple of scarves with a real leather trim, but it's thicker than the faux stuff (which actually looks surprisingly good!) and my sewing machine seems to hate. it. so. much. I spent a few hours on Sunday afternoon having my new, ingenious method of attaching the trim just not work SO hard...and then a lot more hours Sunday evening having my bobbin skip and thread break and just general horrible things happen to me, which I solved with wine and aimless internet surfing, throwing things and avoiding the sewing room since then. Healthy coping skills!

As soon as I can face it, I'm going to try my easier method of attaching the trim with the faux leather to see if it's in fact easier. I managed to improve the snap attachment method, so surely I can do the same with the sewing...right? And if not, well.....hey, one of a kinds pictured above!!!!

Thursday, September 4, 2014

Basement studio update, and a long winded decor discussion

Suddenly it's been a while since my last basement remodel update! It's been a little over two months since then, and while sadly, we aren't finished yet, we have made progress. And I've finally chosen a paint color....which I'm happy with and already second guessing.

So, as a refresher, this is the plan:


 This was the room at the end of June:


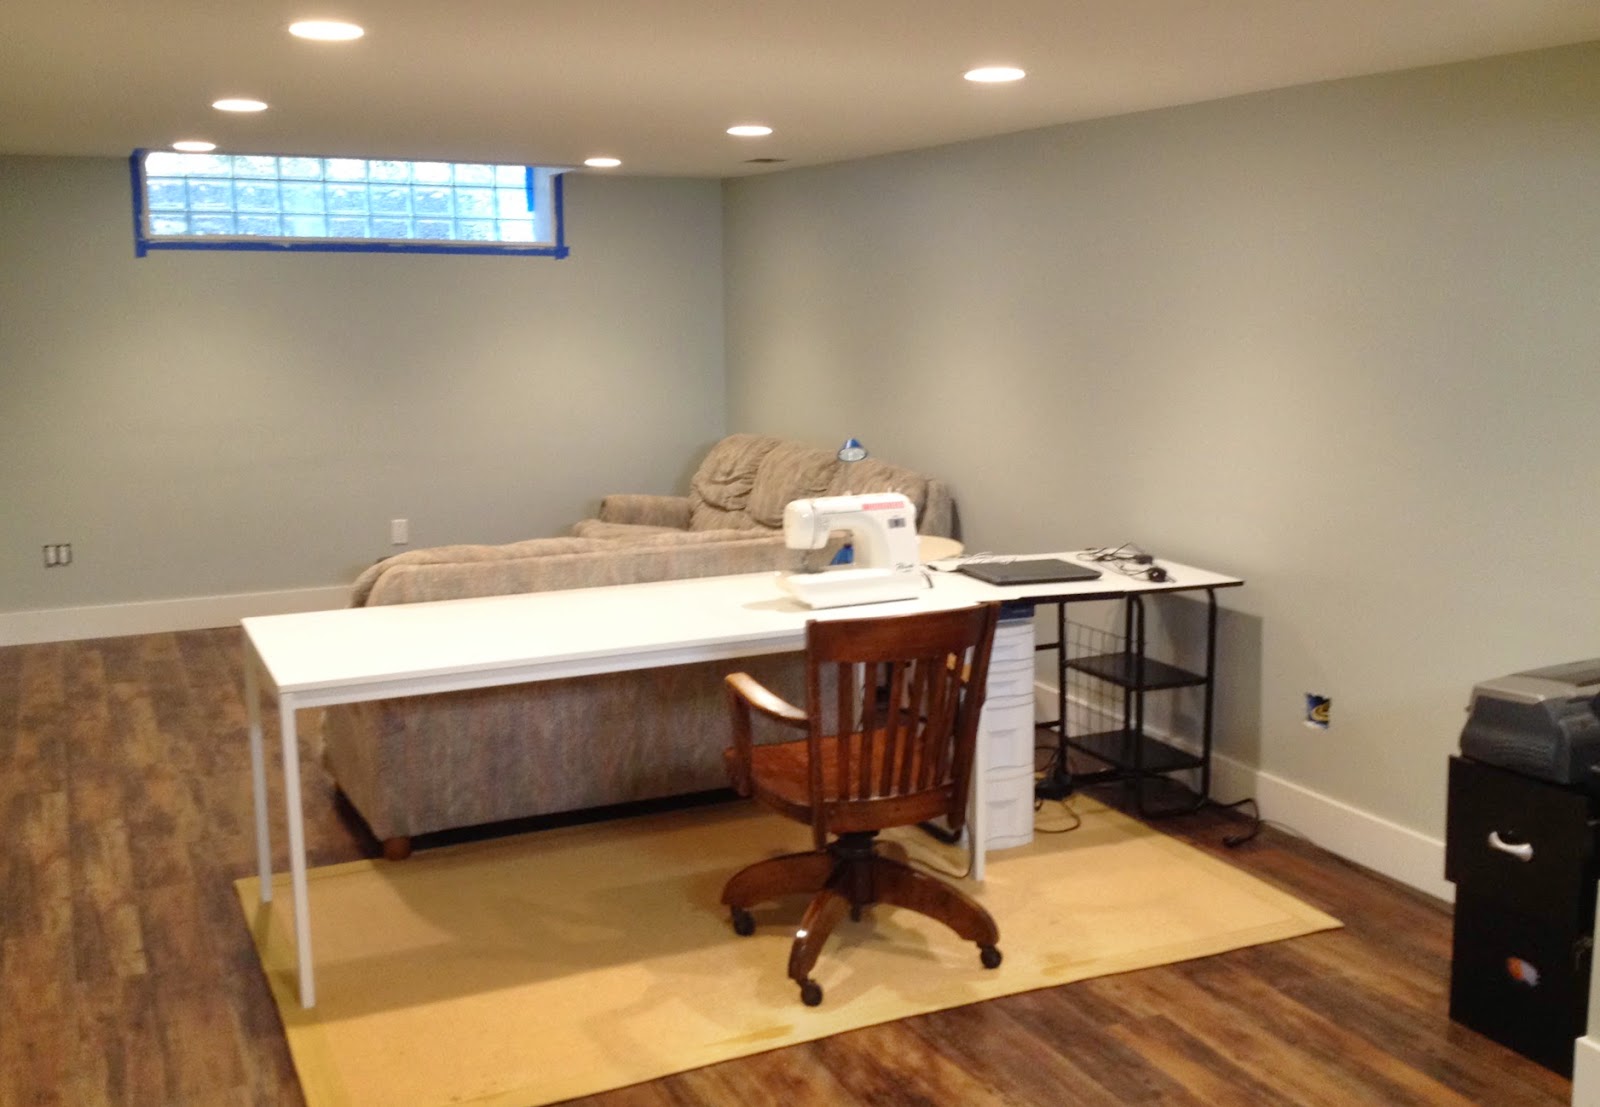
And this is the room today (by the way, the colors all look ridiculous because the room is currently lit by a single bare bulb, and these were taken at night, because, you know, life):


Looking toward the den area

Looking back at the sewing studio area


The only actual feature in the room right now - the removable bench/water meter casing (bench pulled out in the foreground for easier mudding) and future shelving area. You can also see a peek of the windows and how they are framing up so far. My husband has been taking on most of the work lately, and I think the plan is to frame those out with wood.

If you can't tell, the difference is walls. :)

Ok, the difference is actually electrical, heating ducts, sheetrock and 3 layers of taping and mudding of the joints. So I suppose that's an amount of work that makes sense to have taken 2 months outside of work and other such life.

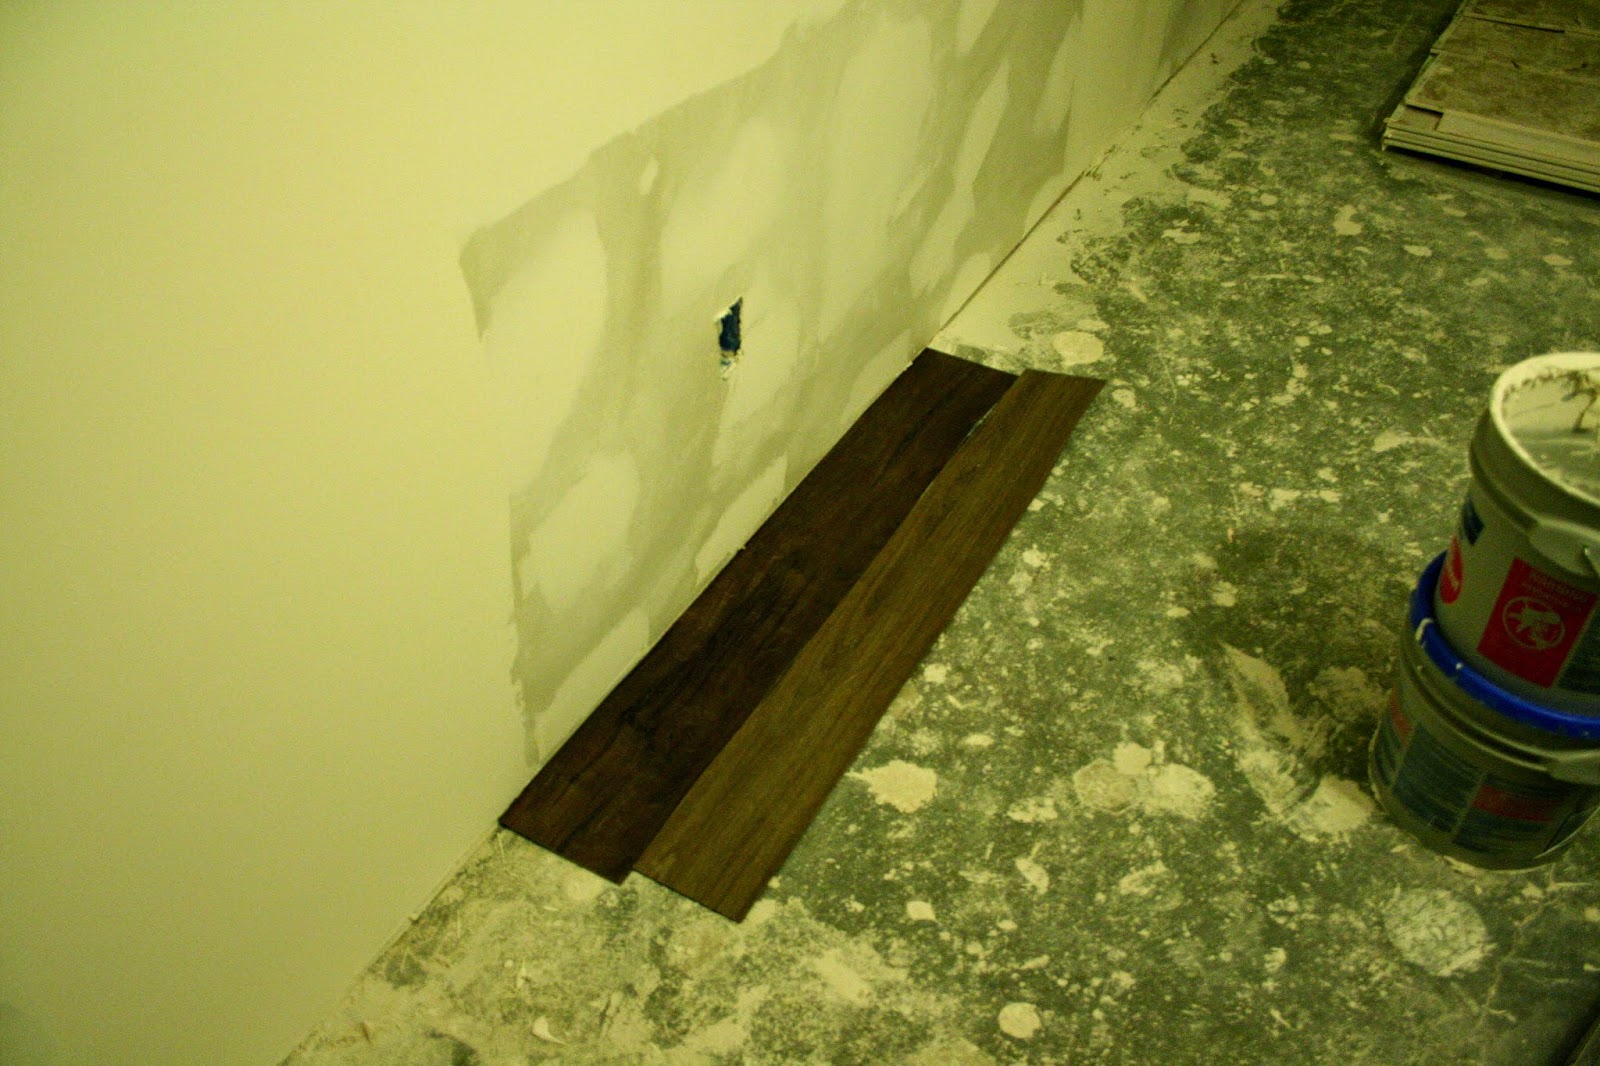
As far as my decor plan.....man, this has been really hard! I don't want to sink a ton of money into finishes, so we're doing a lot of re-use of things we already have. While we've not had any water issues in the basement to date, I also hadn't planned on putting a lot of money into the finishes. My idea is to epoxy the floors (though a wood look vinyl has been suggested and is VERY tempting....), and I've chosen white from the standard Drylok colors.

 (Here you can see two samples that my sister brought over last night which are out of my price range, but again, very tempting! These run about $5/square foot, so she's going to look into some that run more like $1-2/square foot.)

I've discussed this before, but my rationale is that the gray floor tones would look SUPER basement/prison-ey, and I just don't like the tan, which leaves white! I also plan to paint the ceiling and parts of 2 walls white (Decorator White, rumored to be the perfect white) so I can have a nice, clean photography backdrop. Obviously, all of this WHITE plus the idea that I'd like to keep the wall color light because this is a basement after all and I don't want it to look like a cave, well, it all makes me nervous that the space is going to look super cold.

From my Pinterest board, this is the inspiration I've tagged on white floors that look really nice:


This is one of few I found that's a finish similar to what I am hoping to achieve, and while I like it, honestly it could use a rug or two.


While the fire certainly helps to warm up the room (har har) the major factors are probably the wood table and chair legs, wood columns and exposed brick. Now here's a weird thing....we actually have a chimney in our basement that has a very similar finish...that we drywalled over. Why? Well, we didn't want to have to bother with exposed steel beams and pipe columns in the room, and the chimney is on the OTHER side of the beam. So to expose it, we would have had to jog the wall just to expose the brick. Because we don't currently plan to add a fireplace (but how AWESOME would that be??!), it seemed like we'd be trying too hard just to expose the brick.


Again, great exposed brick, cool planked wall feature (and an odd little fridge nook)


Oh vintage rugs. If only, if only.


Great light and wood furniture go a long way.


Again, the use of natural wood is key, though the soaring ceilings certainly help.


Love the cushy rug, love the layering.

A common theme I've noted from my inspiration images is that the majority of white floors I love are painted wood. So in addition to the vinyl wood samples my sister is getting, I've asked her to look into a whitewashed vinyl wood look as well. (By the way, my sister is an interior designer, so sadly not everyone has a sister like that at their disposal!) I'm definitely on the fence about this flooring situation, but I figure that if I decide to go vinyl (which can be glued down to below grade floors unlike a lot of laminates) I can always use the white epoxy (which I already purchased, argh) in our garage which is always crazy wet and could use a moisture barrier.

Anyway, as for the rest of the room. I so wish I'd gotten a decent picture of my couches (one couch and one sofa), even though my sister says they are basically a neutral, it would have still helped me for color selection. I really thought I could find a similar couch online because they sort of scream standard 90's to me, but I couldn't! So....well they look like this right now:

Great visual, right?

Luckily they really ARE sort of neutral, unlike my mom's other 90's couch, which was a green and red and white plaid that we aren't going to talk about. She has really good taste otherwise, so we'll just blame that on the selection that was prevalent at the time! However, as inspiring as that jenga couch configuration above is, as it crowds out my laundry space, perhaps this is a little more helpful for a mood board sort of discussion:


It's got a little bit of everything, gray, white, blue, and peach....I don't plan to highlight the peach. :)


So this is the paint color we chose. It's Silver Strand by Sherwin Williams, and while its description as a "cool neutral" makes me a little nervous, it didn't look that cold in the space. While I AM Scandanavian, I haven't quite developed that all white aesthetic that they do so well, so I'm hoping this "almost color" on 2/3 of the walls will work.

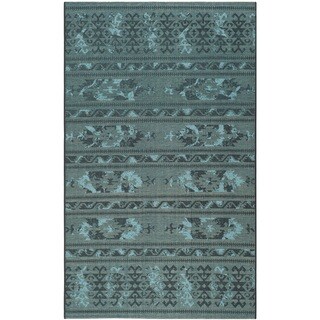
I want to find some kind of great rug to ground the seating area. I'm sort of thinking something in a blueish tone, and I love the idea of a traditional looking rug.

Option 1

Option 2

Option 3

Then there's the overdyed rugs that I've considered for YEARS....

Option 4

Option 5

Decisions, decisions.

So additionally in the space, I'll have my sewing table, which is the Melltorp from Ikea, and a refinished desk chair from a few years ago (it's holding up well Sara!)


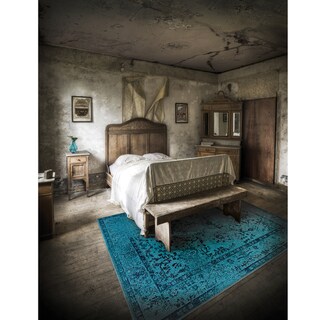
Both of these will sit on this rug


The other pretty large thing is the sewing area will be the yet to be built cutting table, which I'll build from Ana White's tutorial.


I can't decide if I want to do the base in white or navy, but I'm pretty sure I'll do the top in a stained wood.  I'm going to put it on casters so that I can shove it around as needed, and my sister made a great suggestion to put a groove in one side for cutting straight lines in fabric! I wonder if I can get ahold of one some kind of metal to put in there like you see at craft store cutting counters? I'll have to do some research on that. Then the shelves will be the same wood tone as the cutting top.

I've done very little planning for what will actually go on the walls themselves, and I could ponder it here...but this has gone on long enough and surely I've lost most of you by now! Hopefully by my next update I'll have painted walls, a finished floor, and I can move in the basics! I doubt the room will be "pin-worthy" for quite some time, but it will be exciting just to spread out if nothing else.