Tuesday, June 30, 2015

All is not lost


The metal forked piece in the top image that was slowly scraping away parts of my sewing machine has been replaced by the actual plastic forked piece that is made to work with my model of machine (what a concept!). I am happy to report that the machine still sews with this custom made foot, and I may actually end up finishing this quilt before the end of summer. Hooray!

Wednesday, June 24, 2015

Brand matters

Why?


Well, because your walking foot probably shouldn't wear a groove into the metal parts of your sewing machine like this.


Ohhhh, so many curse words.

You see, I bought this foot several years ago (maybe 5?) when I made my first and only other quilt. Like you do, I just went to a local Joann's, bought the walking foot they had on the rack, and hooked it up to my machine. It screwed right in, and I thought nothing of it.

Fast forward to recently, and I ran into a situation that should have been a sign...but I totally missed it. I wanted to buy some more empty bobbins, and again, I just went to the local Joann's, picked up a multipack, wound one up, and immediately got frustrated when it just didn't seem to fit quite right. I compared it to one of my other bobbins, and noticed it was quite a bit taller. Huh, I thought. Ok. So I exchanged it for the other size bobbin pack at Joann's, wound THAT up, and while it fit better, it still wasn't an exact fit, and the bobbin jammed up and made a mess. I untangled it, and went back to return the second pack. This time I asked the lady working the sewing machine corner what was up. She informed me that they only sell accessories for Simplicity and Husqvarna sewing machines. I have a Brother. Still, no lightbulb moment for me.

I am finally to the quilting it all together point on my hand pieced quilt, and I was swimming along just fine with sort of straight line quilting, sort of an inch apart....when all of a sudden my walking foot just stopped walking. I was confused. The bobbin hadn't run out, the needle was threaded...what gives. I remained confused for a while, re-threaded the whole works, got through another couple inches, and again, it just stopped! This time the little arm thing fell off the screw thing it was (apparently) eating away...but I still didn't see that. I removed and reinstalled the foot, tried again, and again, the arm thing immediately fell off the screw thing.

That's when I noticed the groove that probably shouldn't be there. That's when I flashed back to the bobbin situation....and THAT'S when I figured out that, huh, that walking foot probably isn't a universal accessory.

Sure enough, they sell a specific walking foot to attach to my specific brand and model of sewing machine, and I am a moron.

I have since ordered that specific foot, and am avoiding actually trying it out because I'm afraid that I wore the screw thing away too far and that it won't work and I'll have to buy a new machine if I want to continue using a walking foot. This bums me out because first, the rest of the machine still works just fine. Regular presser feet don't rely on that screw thing, and the screw thing still holds the needle in as it's supposed to. Second, I have absolutely no idea what machine I'd want or need, and there are so many options out there that I feel overwhelmed by the variety and potential cost of replacing my otherwise functional machine.

So stupid. Use parts made for your machine. In this case....brand matters. Or at least MATCHING brands matters!

Wednesday, June 3, 2015

Newbie knitting chart mistake

As it turns out, you can't just knit a chart from top to bottom instead of bottom to top as written.

I think I mentioned before, but I'm new to charts, and suddenly find myself knitting two patterns with charts at the same time. I'm working on the Uncommon Dragon socks from Lara Neel's Sock Architecture (affiliate link). The pattern is one of the few in the book written top down only, as the pattern flows right into the gusset, which I'm guessing isn't possible / as easily possible when working toe up.

In hindsight, I'm not really sure why I insisted on doing these toe up. My inclination is to use up as much yarn as possible and make the socks as tall as possible, which is why toe up appeals to me. As this is only my.....fourth pair of adult sized socks, I'm still getting used to exactly how much yarn is a good sock for me. However, I do know that it definitely fits into less than 100 grams, so it's not like I would run out doing these cuff down. In any case, I'm over halfway through the foot, so I'm not going to rip out now!

Again, in hindsight, I'm not even sure why this matters, but I foggily decided that I'd like the pattern to be oriented the same way as the original, even though I was knitting it "backward." In my head, I could just knit the rows in the opposite order than what was written, and that would work out. However....as I kept waiting for the pattern to emerge....it just didn't. Yes, some kind of texture was showing, but it didn't look like anything specific. I thought that perhaps it was just a poor pairing of yarn and pattern.

I thought about it more though, as I was working the chart on my other charted project, and I really started paying attention to the directionality of my decreases, and it hit me that THAT is probably my problem. For kicks, I decided to do a couple of repeats in the correct order to see if the pattern would look better. I marked the row where I made this switch, and sure enough, this pattern DOES actually show up in this tweedy yarn if you knit it as written!


An interesting experiment, which I'm sure has been done by someone before, would be to see if you also knit the pattern upside down AND left to right if it would actually show up as its reverse like I originally intended. Now that the pattern is showing up nicely at the top of the foot, I'm not sure that
I want to frankenstein this particular pair of socks any more than I already have. On the other hand....they're just socks, and I'm sure no one but me or other perceptive knitters would even notice! (and another knitter would totally get it if I explained) Maybe I'll throw in a lifeline and knit a repeat upside down and mirrored....I can always rip it back if I don't like it or if it totally doesn't work out!

Update: I tried it. It didn't really work. The pattern immediately disappeared, and actually was really frustrating to knit. Not surprisingly....everything felt backward! I threaded in a lifeline intending to rip it back....but ultimately I just left it alone and switched back to the normal stitch pattern and now these guys are ready for their heels! Oh well, they're just socks.

Monday, June 1, 2015

Cozy Cape Cottage Exterior - Spring 2015


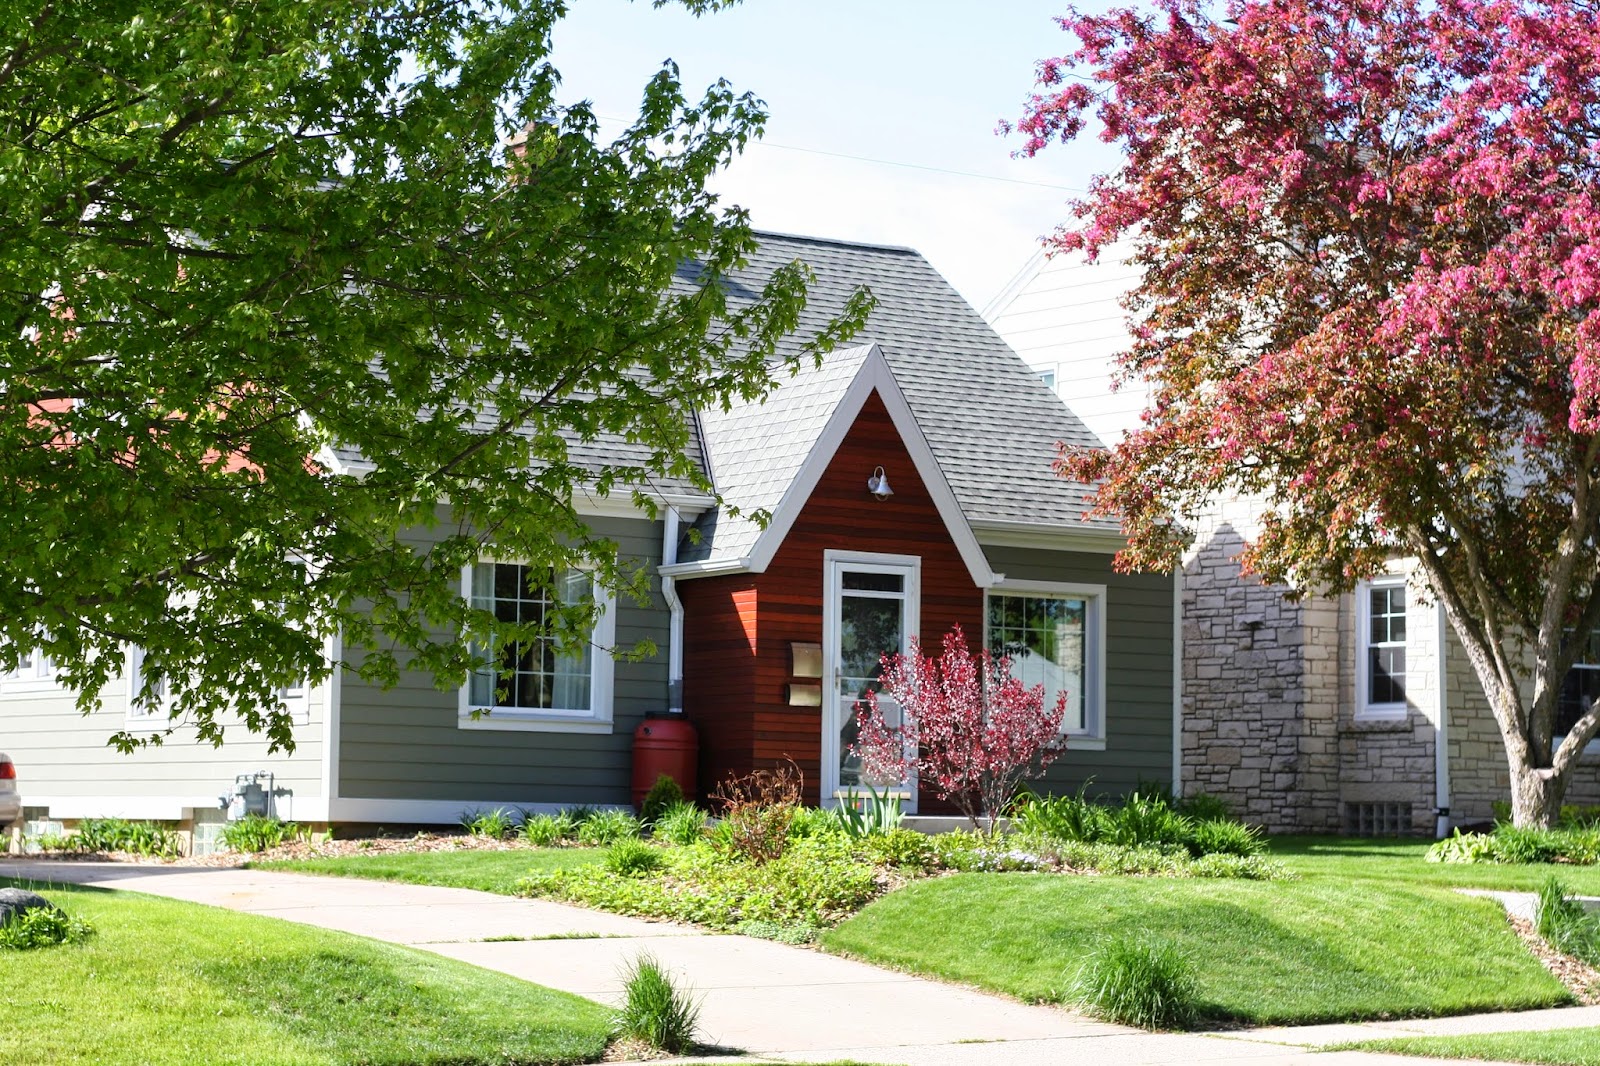
My husband has been wanting some photos of the exterior of our house for quite awhile now that it's basically finished. (yeah, there's still some actual "finishing" stuff that needs to happen, maybe it will, maybe it won't! And landscaping, not our forte, will always be a work in progress.) Our crabapple tree, which has been sort of sickly for a few years, was starting to bloom a couple of weeks ago, so I walked around across the street taking pictures and feeling sort of embarrassed about it!


The different colored patch of grass at the bottom of the photo above is where the city laid sod last year after upgrading our gas lines. Hopefully if we overseed the yard for the next couple seasons it will eventually blend in!


(can you spot the puppy watching me from the window?)


I read somewhere once that chives are a good companion plant for crabapples, so I planted some by our sick tree. Maybe I cured it?! (probably not, but I do love harvesting them for sour cream and chive baked potatoes!)


These last couple of images show some of our "green" upgrades. We have two rain barrels, one next to the front door (my husband tried to fight me on it, but I insisted, and I think it looks fine) and one off the back of the garage. This way I don't have to haul the watering cans too far. We use Save the Rain (affiliate links) diverters to allow rainwater to bypass the barrels and just go down the gutter when they are full. This happens to us a lot - if we're getting a lot of rain, there isn't much need to use the water in the barrels, so they fill up in the spring! I just keep tabs on the water level as I use it later in the summer, and when it's getting low, I just flip down the diverter and it refills with the next rainshower. We've had these for several years now, and they work great.

You can also see our retractable clothesline in that last photo of the garage. Admittedly I don't get to hang our laundry out as much as I'd like - our backyard is really shaded and clothes don't quite dry if I try to hang them out after work, which limits me to dry weekend days in the summer only. (I've tried in the winter, and again, things just don't get dry even after a whole day out there!) We have this same one in our basement which I use year round. The link above also includes the pole, which is across the yard not pictured. I just have to stretch it out, and I've got a ton of drying space! We leave the clothesline box up all year (according to Amazon I bought this in 2009 and it's holding up just fine out there!), and we bring the pole inside the garage in the winter. The base is anchored in concrete in a planting bed, and there is a plastic cover that screws on to keep it from filling up with water when the pole is not attached. Then in the summertime, we just bring the pole out and it clips onto the base. This was a compromise between us, because I wanted to be able to dry clothes outside and my husband didn't want to look at or duck under lines all year - this system has been working out very well for us!

Lastly, you can see a peek of our compost bin next to the back door. (sort of - it's black and in shadow!) We have this model through our local sewerage district. They've been doing annual one day sales for a few years, and I was happy to upgrade to this "real" bin after my makeshift "plastic bin with holes drilled into it" completely fell apart after a few years of use. Ideally I'd have a second one so I could let the compost age for another year, but this works well enough that we have enough to add to our small garden. My husband wants to build a fancy 3 bin system behind the garage, but that's been an idea for several years now, so we'll see! For now we just have this one and a large brush pile behind the garage. I do love having this right by the back door. I think we'd be pretty unlikely to use it if we had to walk behind the detached garage in the snow! Again, we've been doing this for several years, so it's a pretty road tested system for us. We don't notice any smell from it, and we probably only turn it once a year when we sift out the finished compost in the spring. I do notice some gnats, but only when I open the lid to toss stuff in a couple times a week...or if I cook lol! We sit on the patio very nearby the bin, and there definitely aren't a bunch of gnats swarming around when the lid is on.

I wasn't actually planning to go into a lot of detail about this yard stuff, but I guess I did, so I hope it's helpful!