Tuesday, May 27, 2014

Why I create

So about a week ago, I found a new to me blogger, and she wrote a post that got me thinking - why DO I create? She's hosting a link up thing, and I flipped through several of my recent posts, thinking that I have to have addressed this, but I really haven't! So here it is - get ready for a potentially disorganized pile of thoughts.

So why do I make things? A very short version is probably that I've always been a creative sort, and I like having meaningful things.

For the longer version, well here we go. I can't remember a time when I WASN'T making something. I have this memory of when I was probably about 6 years old, trying to make my Barbies clothes on a little knitting loom. If memory serves, I believe it was this one:


I don't remember if I ever finished that beautiful sparkly ball gown, but I remember enjoying the knitting. Though come to think of it, I'm not sure I even knew that it really WAS knitting, since it's not on needles like you imagine, but I thought it was pretty cool. I may have also had a sweatshirt like the one pictured on the box, so maybe my opinion of "cool" is somewhat suspect. What can I say, it was the 80's. We rented the lower apartment of a duplex for a few years when I was little, and our upstairs neighbor was an occupational therapist for kids, and I remember that she had an entire ROOM full of craft supplies. Even now, on the cusp of getting my own craft space, that seemed like such a luxury! I definitely remember making one of those puffy paint applique sweatshirts at her house!

While my neighbor was definitely a crafty influence in my life, of course the larger influence were my parents. My mom taught me to sew in high school, and tried teaching me to knit then as well. Knitting wasn't something she did frequently, so I'm not sure where I got the desire to learn. In any case, I think I sort of learned the basic stitches, but it didn't really stick. A few years later, I decided to take up yarn again, but decided to crochet, as one stick seemed easier to manage than two. I didn't know anyone who could teach me, so I taught myself from books, and everyone got an itchy acrylic scarf for Christmas that year! A few years after that I decided to try knitting again, and thankfully YouTube had come around by then. It was so much easier to watch a video than to decipher those drawings in books! While my dad isn't much for sewing (though he CAN patch all the clothes my mom would rather he toss!), he has done a lot of creating himself. My parents still have a dresser and a few other furniture pieces he's made - things I didn't even know were handmade until years later. I helped him a little with building a deck at one house, and he built a pool house himself at another. Truth be told, it was supposed to be a shed for the heater, but it ended up having a bathroom, bar and a loft. I'm not sure if this was an expression of creativity....or a good reason to get out of a house with three teenage girls.....

My mom always made our Halloween costumes herself. I'm not sure I can remember wearing anything storebought....well ever, actually. (I take that back - I did buy a Dorothy costume when I was working at a daycare in college because I didn't have a place for my sewing machine at the time.) While I do remember a few rather stressful fittings on October 29th or 30th, I always loved that she made our outfits. They were totally different than anything anyone else had, and we could be anything we wanted. I mean...one year (possibly several) I was a purple unicorn with a pink mane and tail. You just don't find that at Target. A lot of kids probably had similar experiences, as I'm not sure pre-made costumes were SUPER common 20-30 years ago, like they are now. But for me, it really resonated. When you take the time to make it yourself, you get something totally unique, just for you, and made with love (and maybe some swear words and tears, but it's all part of the process). I'm absolutely thrilled to carry on the tradition of handmade Halloween costumes.


I love that I can have things in my home that are totally unique and made with my own hands.  It makes me really proud when people ask where I got that, and I get to say, oh that? Yeah, I made that.

(The chair....not the dog....obviously)

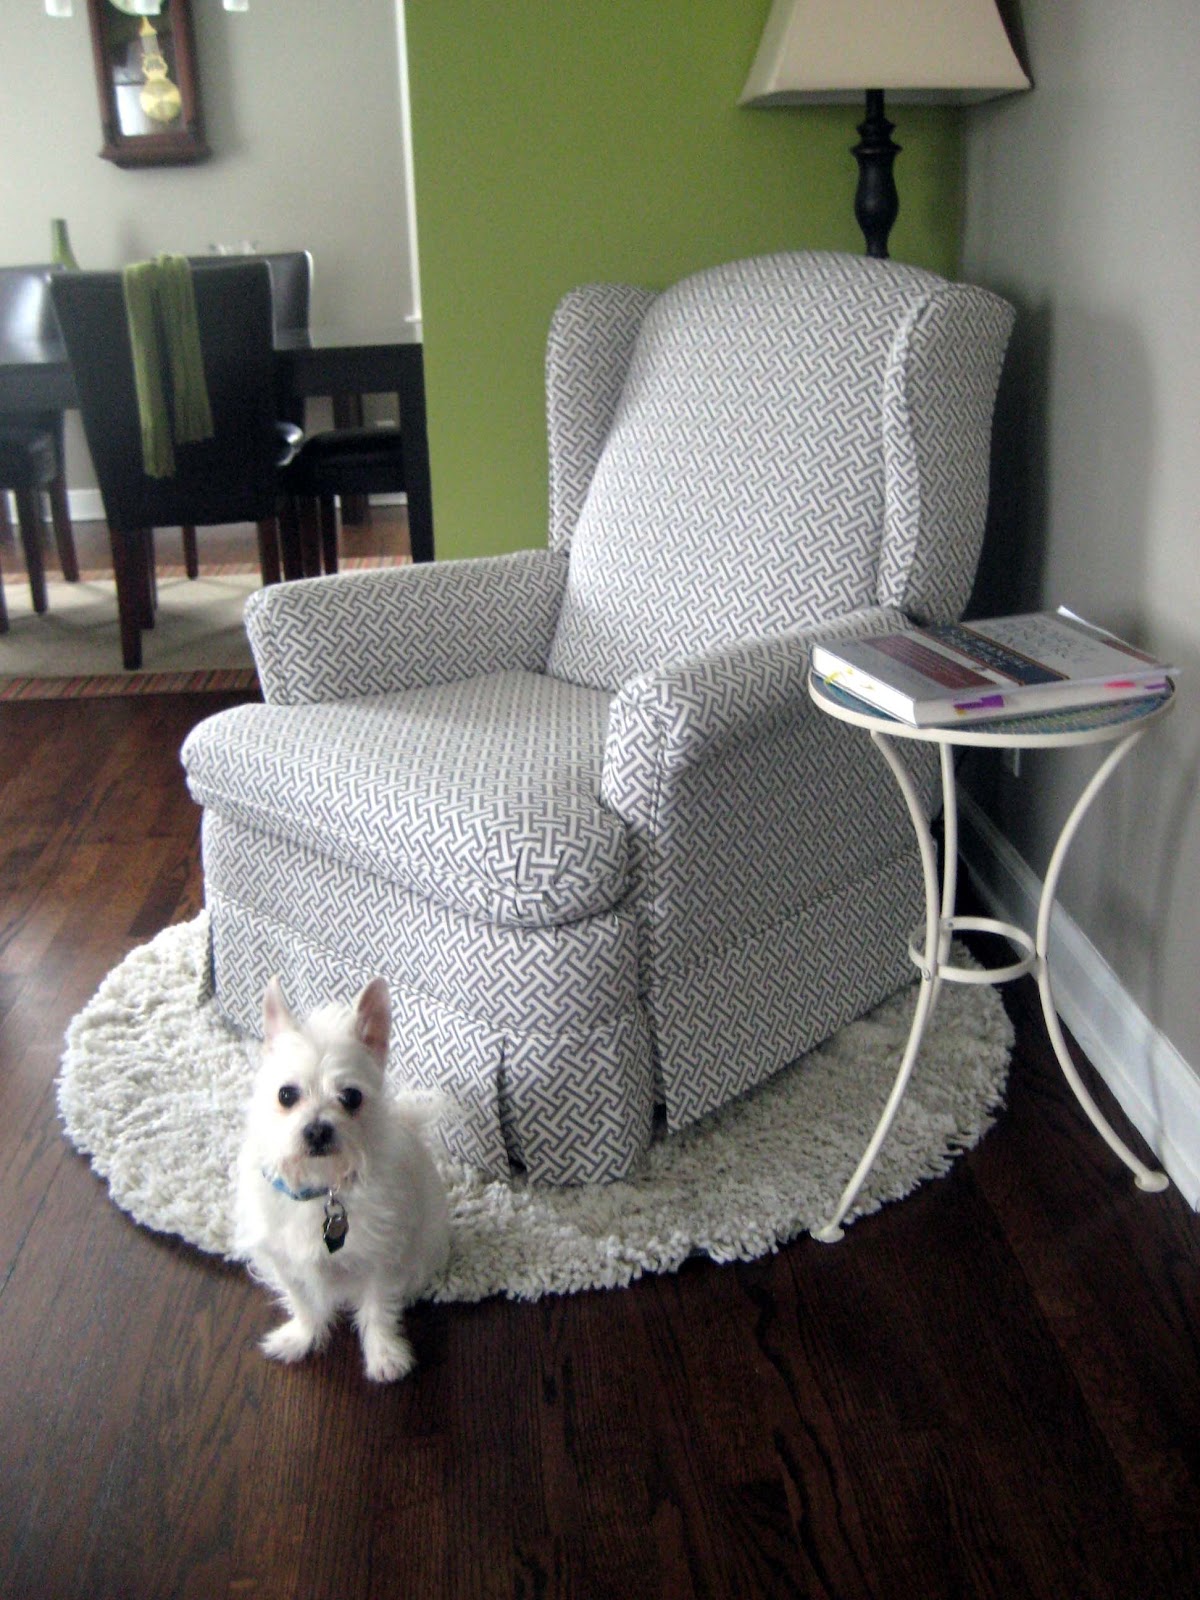
While just buying something to suit my needs is OBVIOUSLY much faster and more convenient, I love the rhythm of the making. It's fun to remember the time in my life when I made that thing. For example, that chair came to be reupholstered over a full month in the winter time and I found myself indulging in many hours of the Kardashians. (Canceling out something productive with something decidedly not?) Or the years before we insulated our house, and my feet were cold, which resulted in these:


Or the polar vortex of last winter, which had me gravitating toward the warmest, fastest things I could think of!


Making things is so a part of my core identity that it's even what I do for a living. (While my Etsy shop is a lovely hobby, it's not my day to day!) As is probably somewhat obvious, I loved my art classes as a child. I never had an opportunity to tell her, and I suspect she's passed by now, but my decision to become an architect all goes back to my fourth grade teacher, Mrs. Waldenberger. I believe it was part of a parent-teacher conference, and she commented to my parents that I was good at art, and something to the effect that you can't make much of a career as an artist, so I should be an architect. Done. Isn't it crazy, how something like that can shape your ENTIRE life? While it was never my path to be one, teachers really can make such an impact on young lives, and I was so lucky to have so many good ones. After that, I was the token girl (sometimes there were two....even three of us!) in the drafting classes in high school, and I went right on to a four year degree in architecture, followed up with a two year masters program, without even so much as a waver. It feels sort of destined. I shape space during the day, and I turn bits of string and cloth into useful, beautiful things at night. I write here, continuing a long history of hidden diaries as a child, and giving a bit of life to that fantasy of being Carrie Bradshaw, typing out stories at a coffee shop. I create because that's what I know. While I've sometimes envied the money that comes along with the finance or medical careers of some of my friends, I've never regretted my choice to land on the creative side of life. Yes, more money would always be nice, but I find that I'm pretty satisfied most days with how I've spent my time. And I suppose that's a pretty good reason to create.

Thursday, May 22, 2014

Hooded Toddler Towel


You know those adorable hooded towels you get for a new baby? You wrap them up all snuggly out of the bath, and it keeps their little heads warm while you tend to the rest of the dressing and diapering done. They're great....for about 8 months. Then you've got suddenly super long legs sticking out the bottom and it won't quite close around the middle, and a grown up towel just isn't as cute. So to solve that problem, I made a super big hooded towel.

On a whim when I was mindlessly filling up a cart or two at Ikea, I saw cute towel and washcloth sets. I grabbed one washcloth, and one of those enormous bath sheets. Then a few months later, when I was finally nearing the bottom of that pile of Swedish goods, I took that towel, washcloth, and about 20 minutes to make a toddler towel.

First, I folded the washcloth on a diagonal and trimmed one edge so that it was symmetrical.


Then, I pinned the washcloth onto one side of the towel, patterned sides together, like so:


I did a couple of seams along the edges, and then flipped it right side out.


And ta-dah! Giant hooded towel.


The enormous bath sheet might seem like a mistake at first, but then you realize that you can swaddle a two year old with this thing, and it makes more sense. (I contemplated cutting off that center hanging loop that bath sheets have, but I'm glad I didn't. If you hang this up by the hood, it's likely to drag on the floor!)

Tuesday, May 20, 2014

It's hard to be a perfectionist when you are not perfect

So my very good friend is having her first baby this summer, and of course, I wanted to knit something for her. The only problem with knitting something intricate and complicated is that my friend is an overachiever, and she's having twins.

So while she missed out on getting, say, something like this:

http://sewuniquetreasuresandgifts.ecrater.com/p/12823933/5-vintage-baby-layette-sets-knitting

it was the perfect opportunity to try a pattern I'd been waiting to do for awhile that I knew I'd have time to make two of. (In a size big enough to fit this winter, in case the weather ever remembers that it's spring, nearly summer.)


So make them I did! I did inverse colors, so the body of one is the same color as the trim on the other. I got all the way to picking up the final trim on the second hat when I noticed something. Can you see it? How about now?

Now?


I must have purled where I was supposed to knit. It would have been a lot of fiddling to rip it out. My knitting group said I should just put a flower or something on it.....and maybe if it had been closer to the front....but no. No this could not stand. Not for myself, and definitely not for a gift. In the end, I decided it would be easier just to knit a whole new one, and the defective one could become a quite serviceable stuffed animal hat here.


I put the pair of pixie hoods together with some of the best blankets ever from the registry - I ALWAYS buy at least one thing off the registry. She picked it out for a reason, right? It also just so happened - seriously, by accident - that the colors matched the hats exactly. I also included a pair of books, as books were requested by the shower hostess. I chose one of our favorites and another by the same illustrator. All in all, I think it shaped up pretty cute, and now the world knows that exactly one single wrong stitch will keep me up at night.

Thursday, May 15, 2014

Maybe I have a plan!

I initially opened my Etsy shop in November of 2012 because I had started making some knit hats for a few people, and it seemed like an easier way to transfer money on their end than to just go through straight paypal. I went ahead and made a few listings, both those hats that I'd made for them and one or two things that I'd made for myself and loved. My idea was that I enjoyed knitting, and this would be a fun way to support my hobby....by doing my hobby! My "business model" was not to kill myself by making a bunch of stock that I'd have to front money for and keep on hand, but that I could just knit a sample for photographing and listing, and then make subsequent items as people ordered them. I considered the fact that I had any sales at all before Christmas - and from outside that initial group of people! - to be a huge success.

Life happened a few months later, and I took an extended hiatus from the shop. At the end of last summer, I just had this urge to be creative again. I started small, by writing and doing some personal projects. It didn't take long, but I ended up re-opening my shop just a few weeks later. Same idea, no real stock, just make orders as they come. Surprising me again, some orders did come! Throughout the holidays last year, my busy season, I enjoyed what I was doing, but didn't really have a plan. I've never really had one for either the shop or this blog. But gradually, I felt like I could get a lot more done if I just thought a little ahead, put it down on paper.

I was listening to one of my new very favorite podcasts (Elise Gets Crafty) and they were talking about the importance of being consistent if you want people to tune in. Well, duh. You'll obviously get a lot more people reading if you both a) show up on some sort of reliable schedule and b) build up a backlog of posts that people might start finding you through search engines. I thought, well, that sounds like something I could do, blog more consistently. I'm definitely not going to set myself up for failure by making a grand declaration of blogging every.single.day, but maybe a routine might make sense.

Then, despite how fan-girly this is starting to sound, I read one of Elise's recent posts and she highlighted one of the ways she likes to stay organized. This reminded me of the sketchbooks I used to have during college, and the meticulously organized daily planners I'd toted around in high school and beyond. Despite how I love my iPhone and use technology daily to stay organized....there's just something about physically writing things down that makes them so much clearer for me, more memorable.


So, I started writing. And because sometimes the blank pages of a fresh notebook make me feel a bit uncertain, like I'm going to mess it up if I don't plan out what I want to say, I told myself to just start. It doesn't really matter, just start.


I've done a little blog organization. I thought about the things I've written about most, and went back through old posts to properly tag them. If you're on my home page, these links, along with the search box, are at the bottom of the page. I've even managed to finally write something in my "about me" page. I had a really hard time with that! I've chosen to be somewhat anonymous online, so I didn't want to go all out with my life story, but at the same time I wanted to give enough detail to describe the person behind the blog. I started about a dozen times, and fully rewrote it about half that many, so hopefully I've struck a decent balance.


I laid out a plan and a calendar to prepare for next year's (hopefully) busy season. This way I can track my efforts to pre-make some of my more popular items over the summer to take some of the pressure off of next holiday season. I've also started jotting down the to-do lists and ideas that keep my mind racing during wee morning hours. Top of the list, oh I can't wait to do that one! Since I do most of my shop work in the night time hours, I just don't have the lovely light that most Etsy-ers seem to have for their product listings. Once the basement is finished, I still won't have sunlight, but I'll have a space to set up some lights and hopefully take some halfway decent product photos! It's also highly probable that I simply don't have the skills that many other Etsy artisans do, but hopefully I can take what I've learned in the couple photography classes I've taken and not completely embarrass myself.


Finally, I've laid out a loose blogging schedule for myself. Yet again, in a rather timely, sort of getting weird kind of way, last week Elise blogged about, well, blogging. The gist of her post is that it's important to write things you feel passionate about. You really can't fake authenticity, and if you're writing just to get a post up, it's going to show. Just like it's boring to read something that feels forced, it's boring to write. Part of the reason I post somewhat infrequently is because I only want to write when I have something to say. I've found though, that just by outlining a schedule for myself, I think that I might have enough to say to check in twice a week. So tentatively, I think Tuesdays and Thursdays sound like decently achievable days to commit to. I hope that I can keep it interesting by varying topics by those categories I identified.

So I definitely don't have any sort of plan to quit my job and knit or blog for a living, but I feel good giving myself a bit of direction.

Tuesday, May 13, 2014

Basement Progress!

About a month ago, we were deep in the thick of basement demolition. Luckily, I've managed to do a bit of cleanup since then!

So we went from this

 to this


to this!


Super exciting, huh? Basically, we cleaned up the mess, and got to the super fun task of doing some of the "behind the walls" work. We're pretty lucky in that our basement stays pretty dry. The far right corner in the images above is one of two that makes me a bit nervous, so I was pleasantly surprised to see zero mold when we pulled up the carpet. I also knew we had one spot on the right wall that wasn't covered by drywall that had some efflorescence (the salt deposits left behind when water comes through the block) but was never wet, and one more was revealed when we removed the drywall. My husband pointed out that the location of those spots is a pretty good match to some large tree stumps we removed from the front yard several years ago, evidence of large trees planted far too close to the house. Those have been down for many years, and the stumps were pretty rotten when we pulled them out, so we think that any water that came through did so a long time ago, and we haven't seen any evidence since. Nevertheless, since we plan to cover all the walls again, we wanted a little insurance.

I washed down all the walls with soap and water, and then rinsed, and rinsed....and rinsed. Oh man it took so many passes to finally get clean walls, but the bottle of Drylok Etch I picked up from Home Depot said it needed to be applied on a clean substrate...so clean I did. After I put that onto all the walls, I filled any of the holes or cracks with Drylok Fast Plug. I planned from the beginning to paint the whole room with Drylok waterproofing paint, so I picked up 5 gallons for the three exterior walls of this roughly 500 square foot space....but then I read the directions and it said that it wasn't meant to be used on floors, even as an underlay coat - my plan was to put clear epoxy over the Drylok paint. So I ended up just painting the walls, and now I have 2 gallons to return. I did a little more research and found out that Drylock makes an epoxy as well, so I think that's what I'll go with for the floor. (I plan to use white. My husband thinks this is a mistake, but I'm going to go for it anyway. I don't want to go with gray, because that just looks like bare concrete or a garage, and I'm not so much into tan right now. He thinks it will show dirt or stains, I think it's epoxy and if it can stand up to tire burns, it should be ok for a craft/rec room.) I did end up painting a roller's width around the edges, since that will be covered by the sill plate for the walls and never walked on.

Speaking of wall framing....


The actual contractor with an actual truck was really surprised that we could fit 100 2x4's in our Prius wagon in the Home Depot pickup lane. We can't quite handle drywall sheets (we'll have to either rent a truck or arrange for delivery when we get to that stage), but the wagon has really served us well!


We dragged all our materials downstairs and got started! Immediately upon starting to snap our lines for the sill plates, we ran into a few roadblocks. Namely....water main and gas line. 


Yep, can't quite block those in easily. Or with a straight wall. We mulled it over for awhile, and like any architects....found that a picture was worth a thousand words. I grabbed the pencil and crudely scratched out my idea on that roller's width of white paint on the floor!


(I snapped a picture that was totally illegible when I uploaded it, so I added some darker lines) Basically, we need to maintain access to the water main on the floor, so we're going to build a bench that can be removed should we ever need to. Then, we'll bump out the wall a few inches to clear the gas line at the ceiling, and add some shelves in the resulting niche. Win-win, more storage, and it turns these problem spots into a "design element." Pro tip - any time you have to do something that might be weird....it's a "design element."

Another pro tip I've learned these past few weeks.....


keeping your bottle cap around keeps the sawdust out of your beer. Er, construction fuel.


Wing wall that will divide the bench and shelves for that "design element."


We got about this far on day one of framing, and got all but about 6 studs up on another day this past weekend. That gas line that necessitates the wall bump is also, conveniently, leaking. Yay! Our gas service was updated last year, so when the guy came out to replace the meter, he sealed off the leak with some kind of fancy tape. Technically this worked, so we're not in imminent danger or anything, but it should really get a permanent fix before we enclose it. We...well, the stronger of us....tried wrenching on the pipe leading to the leaking union, and it wouldn't budge. We're going to have our burly contractor neighbor come and take a look, but I think we'll end up calling in a pro for that, so that's one of the areas we haven't finished framing out yet. No need to make the job harder for the pipe fixers! We also didn't finish framing out the door until we actually purchased said door, because that made good sense. We've since picked one up, but it's nothing exciting. Just a plain, primed, flush door. It would be nice to get something paneled, but since the doors in the rest of the house are peeling hollow core doors....it didn't make sense to put the very nicest one in the basement! (Even as a plain flush door....given that it's not peeling up at the bottom....it's still the nicest one.)

But otherwise....we're almost fully framed! Next up, more very boring "in the walls" stuff like running new electrical, putting in air returns, redirecting the vents so that the heat comes in at floor level like it should (opposite of the rest of the house....), and insulation. Then comes drywall! That should be sort of a horrible job, but exciting in that it will then look like a room!

edit to add....I would be remiss if I didn't mention this ridiculous snafu. We just put up the last of the studs in front of this desk/work table. And I realized that because there is a large brick chimney to the left of this photo (you can see a peek of it at the bottom of the picture)....and a steel column touching the right side of the desk....that we had completely enclosed it. Whoops!

 
We decided that the path of least resistance would be just to unscrew the top from the base and shimmy it out that way....but man. Sometimes.