Showing posts with label home improvement. Show all posts

Tuesday, May 13, 2014

Basement Progress!

About a month ago, we were deep in the thick of basement demolition. Luckily, I've managed to do a bit of cleanup since then!

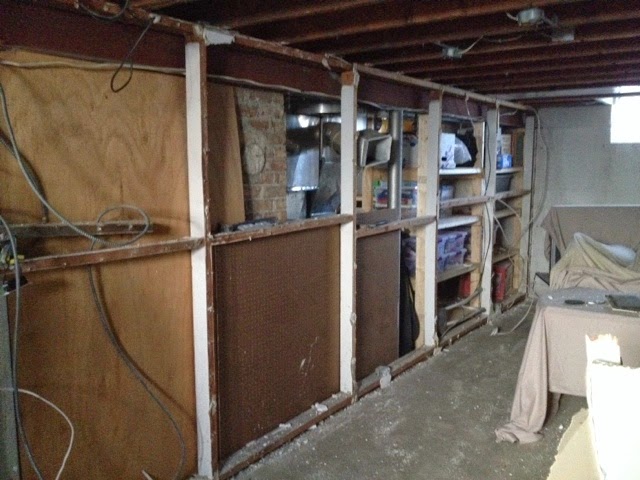
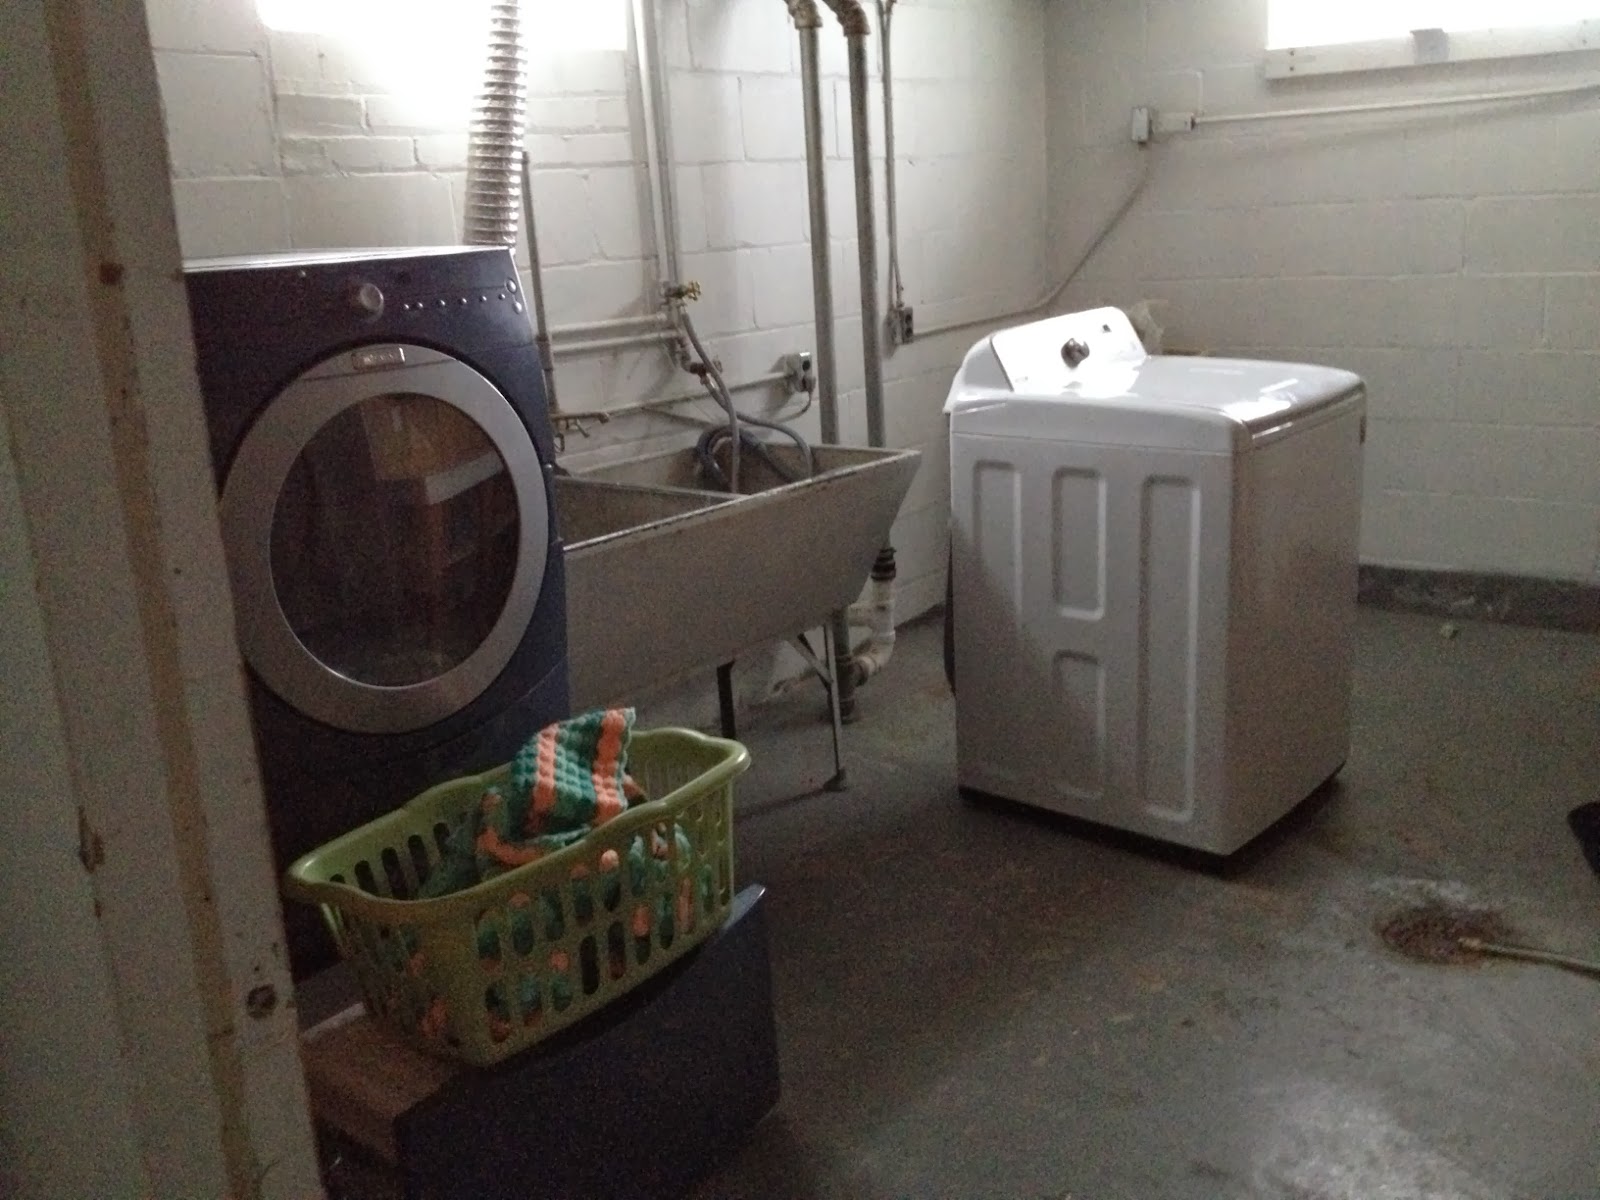
So we went from this
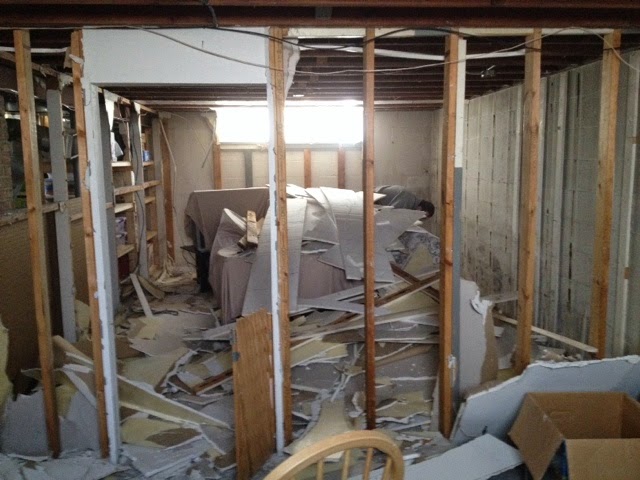
 to this


to this!


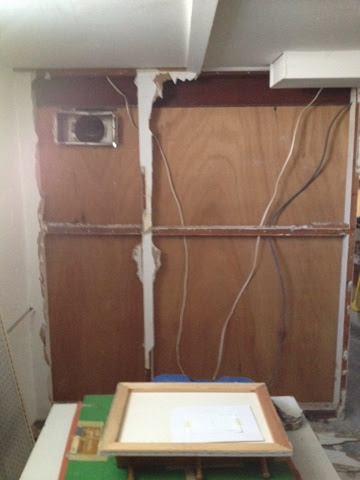
Super exciting, huh? Basically, we cleaned up the mess, and got to the super fun task of doing some of the "behind the walls" work. We're pretty lucky in that our basement stays pretty dry. The far right corner in the images above is one of two that makes me a bit nervous, so I was pleasantly surprised to see zero mold when we pulled up the carpet. I also knew we had one spot on the right wall that wasn't covered by drywall that had some efflorescence (the salt deposits left behind when water comes through the block) but was never wet, and one more was revealed when we removed the drywall. My husband pointed out that the location of those spots is a pretty good match to some large tree stumps we removed from the front yard several years ago, evidence of large trees planted far too close to the house. Those have been down for many years, and the stumps were pretty rotten when we pulled them out, so we think that any water that came through did so a long time ago, and we haven't seen any evidence since. Nevertheless, since we plan to cover all the walls again, we wanted a little insurance.

I washed down all the walls with soap and water, and then rinsed, and rinsed....and rinsed. Oh man it took so many passes to finally get clean walls, but the bottle of Drylok Etch I picked up from Home Depot said it needed to be applied on a clean substrate...so clean I did. After I put that onto all the walls, I filled any of the holes or cracks with Drylok Fast Plug. I planned from the beginning to paint the whole room with Drylok waterproofing paint, so I picked up 5 gallons for the three exterior walls of this roughly 500 square foot space....but then I read the directions and it said that it wasn't meant to be used on floors, even as an underlay coat - my plan was to put clear epoxy over the Drylok paint. So I ended up just painting the walls, and now I have 2 gallons to return. I did a little more research and found out that Drylock makes an epoxy as well, so I think that's what I'll go with for the floor. (I plan to use white. My husband thinks this is a mistake, but I'm going to go for it anyway. I don't want to go with gray, because that just looks like bare concrete or a garage, and I'm not so much into tan right now. He thinks it will show dirt or stains, I think it's epoxy and if it can stand up to tire burns, it should be ok for a craft/rec room.) I did end up painting a roller's width around the edges, since that will be covered by the sill plate for the walls and never walked on.

Speaking of wall framing....


The actual contractor with an actual truck was really surprised that we could fit 100 2x4's in our Prius wagon in the Home Depot pickup lane. We can't quite handle drywall sheets (we'll have to either rent a truck or arrange for delivery when we get to that stage), but the wagon has really served us well!


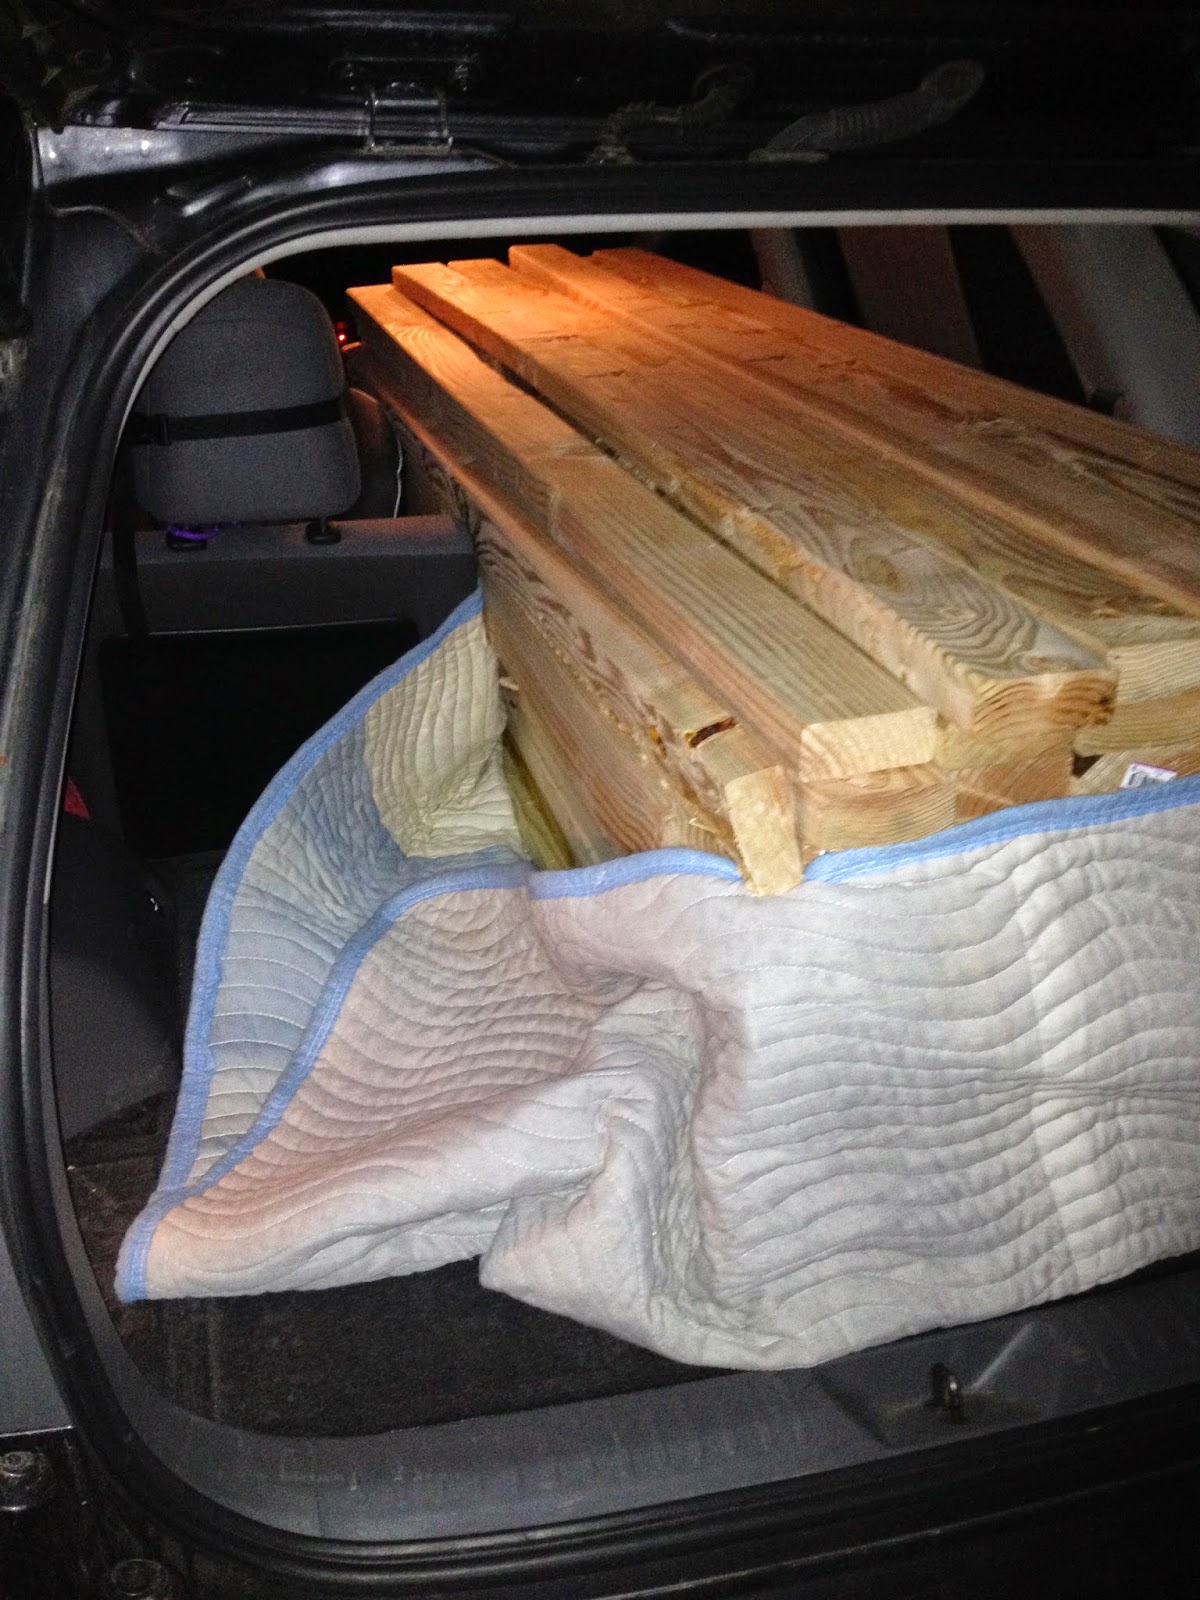
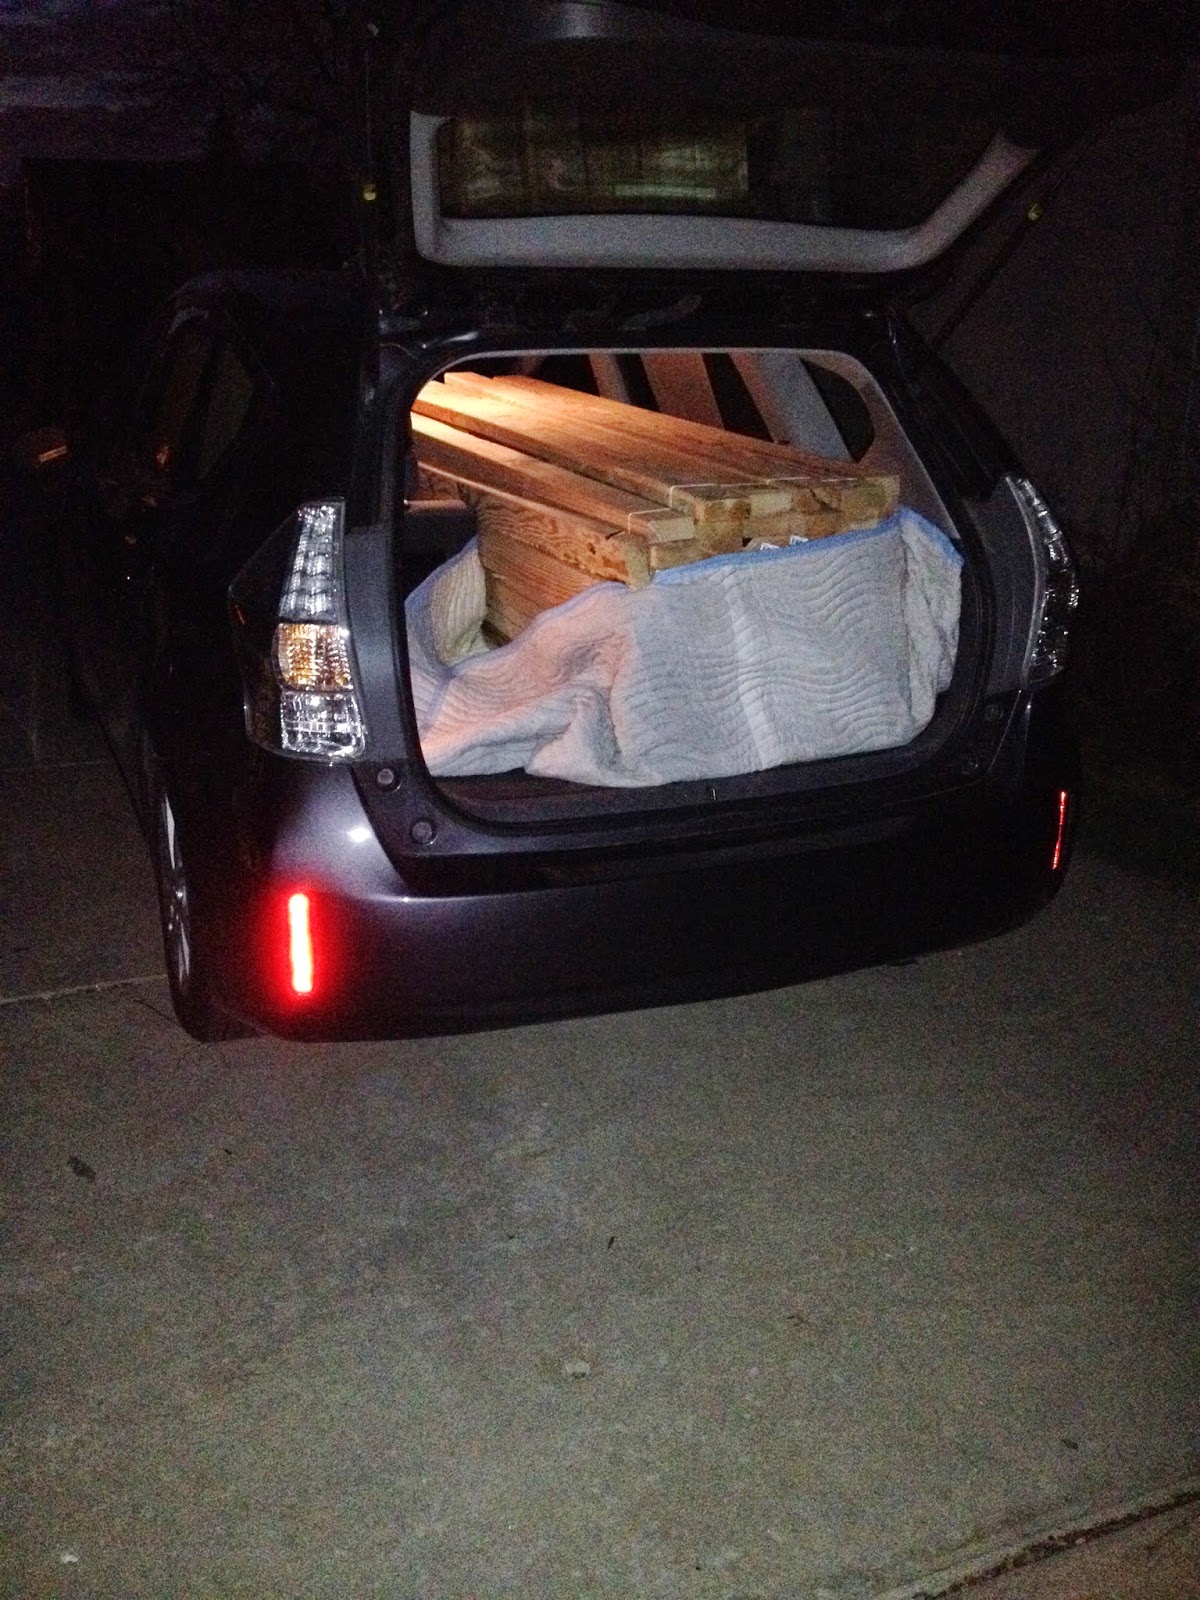
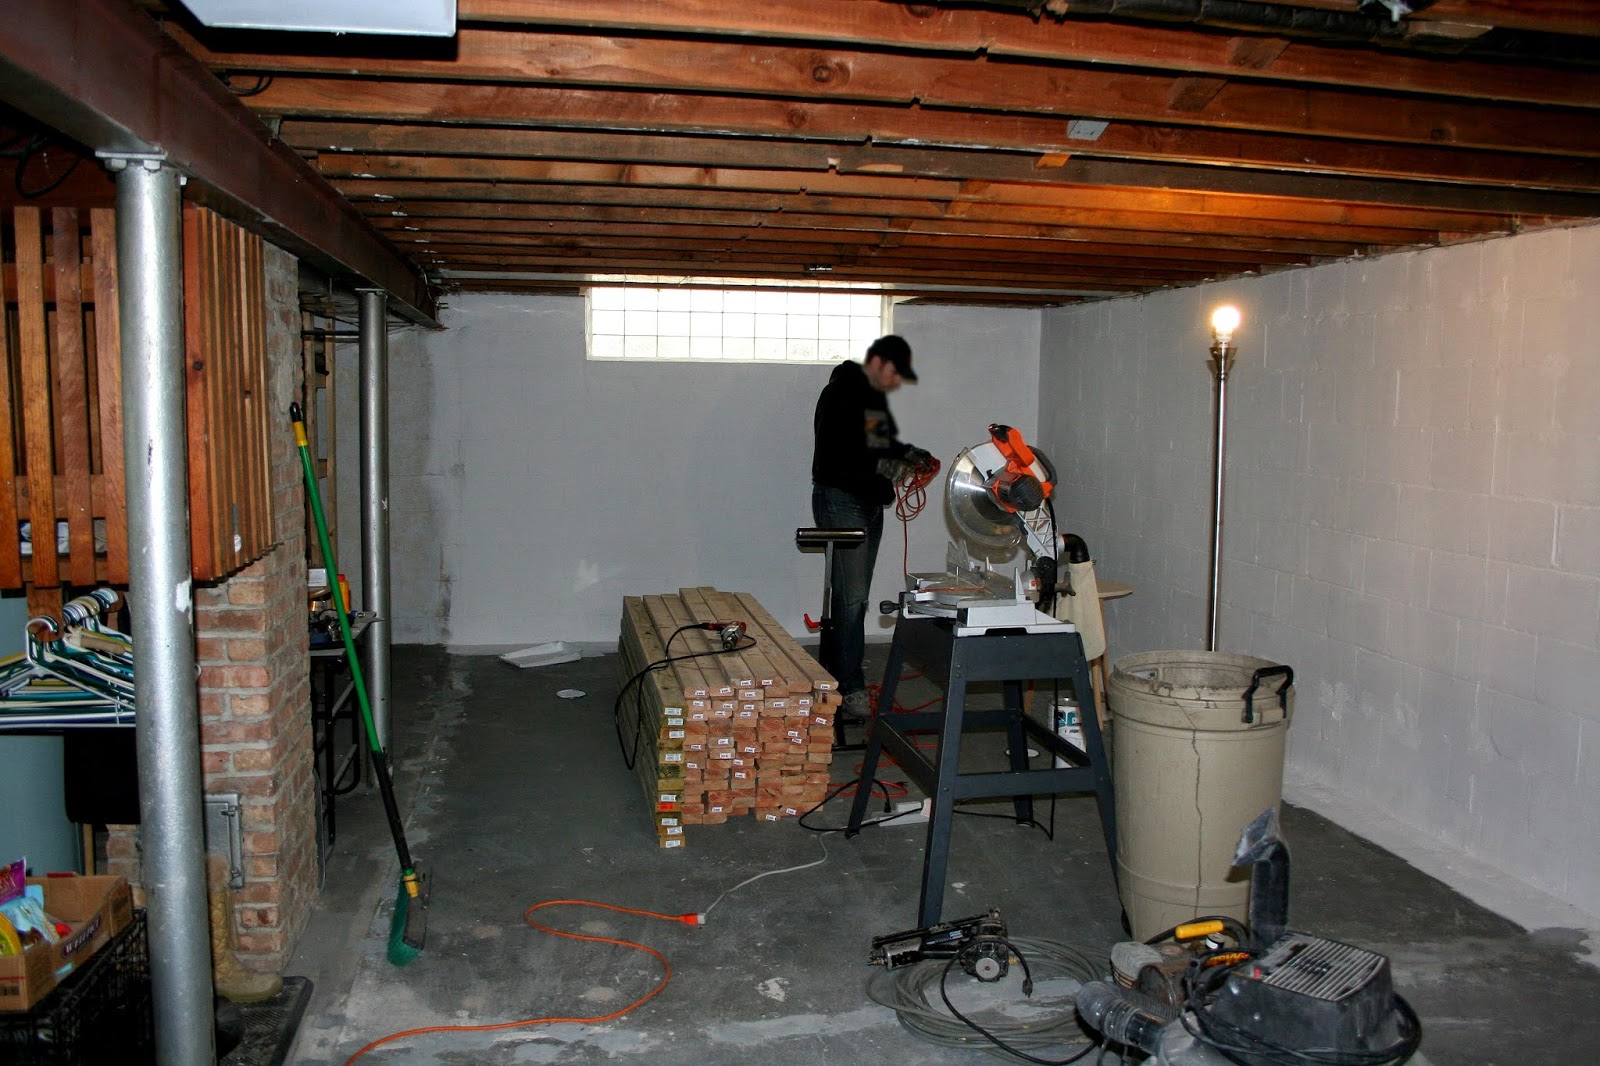
We dragged all our materials downstairs and got started! Immediately upon starting to snap our lines for the sill plates, we ran into a few roadblocks. Namely....water main and gas line. 


Yep, can't quite block those in easily. Or with a straight wall. We mulled it over for awhile, and like any architects....found that a picture was worth a thousand words. I grabbed the pencil and crudely scratched out my idea on that roller's width of white paint on the floor!


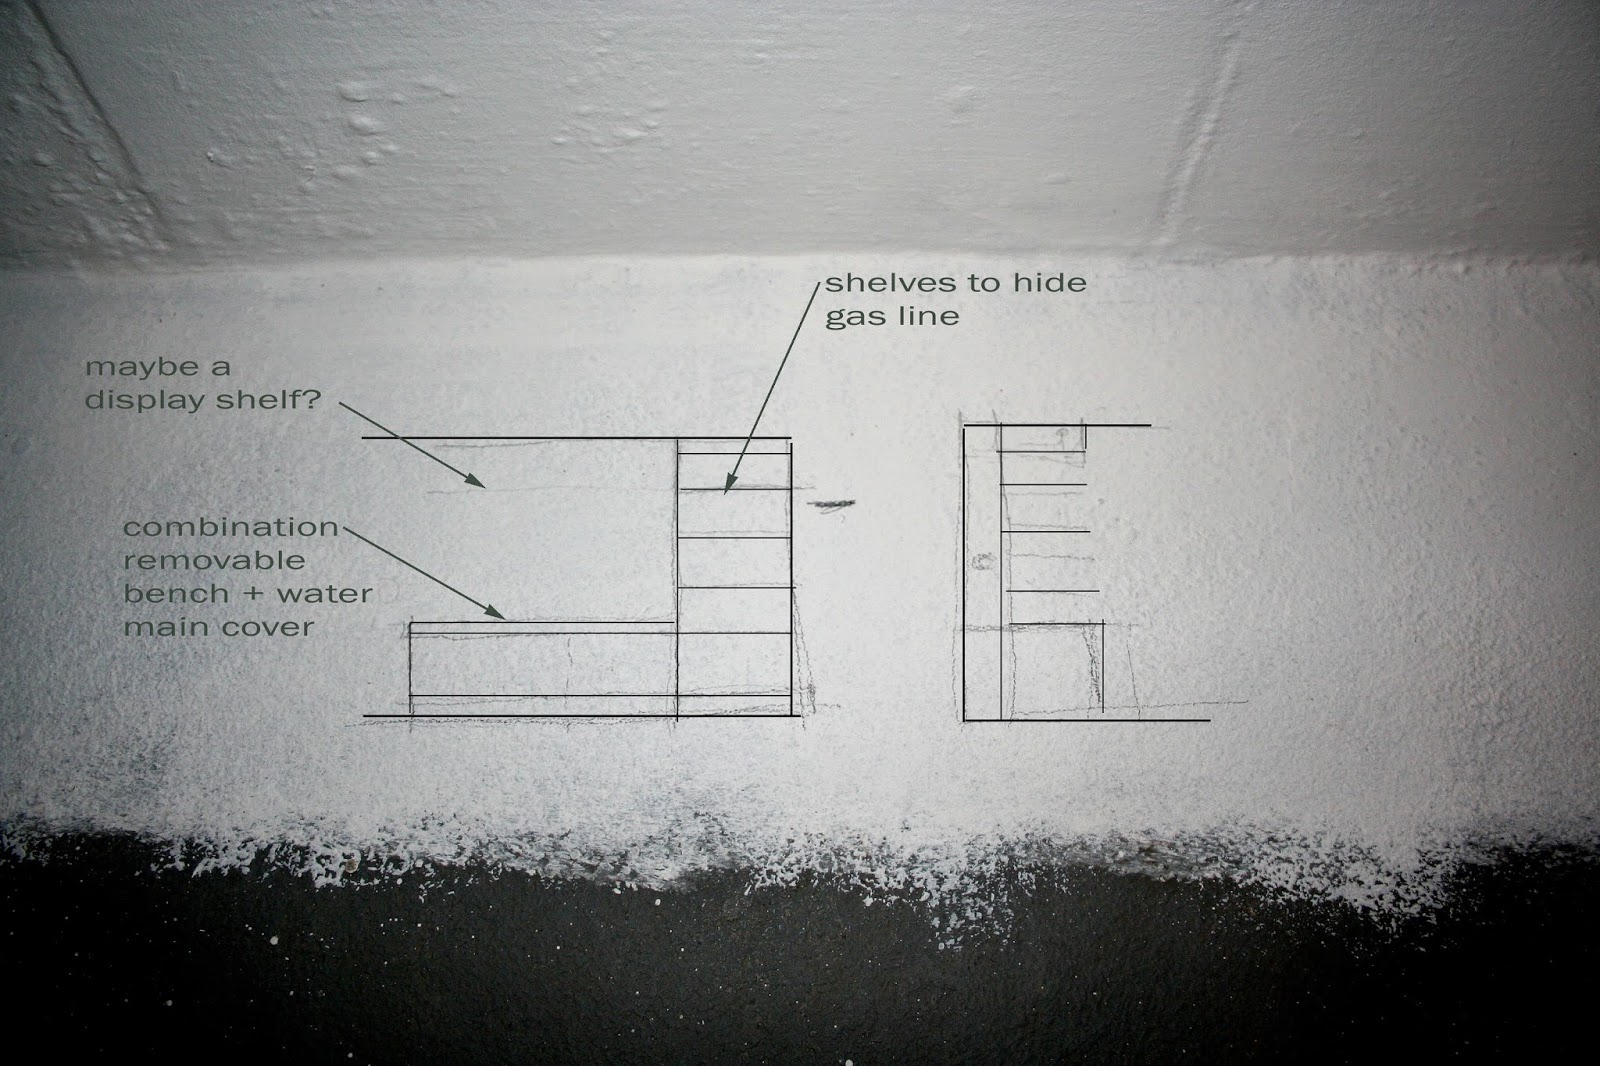
(I snapped a picture that was totally illegible when I uploaded it, so I added some darker lines) Basically, we need to maintain access to the water main on the floor, so we're going to build a bench that can be removed should we ever need to. Then, we'll bump out the wall a few inches to clear the gas line at the ceiling, and add some shelves in the resulting niche. Win-win, more storage, and it turns these problem spots into a "design element." Pro tip - any time you have to do something that might be weird....it's a "design element."

Another pro tip I've learned these past few weeks.....


keeping your bottle cap around keeps the sawdust out of your beer. Er, construction fuel.


Wing wall that will divide the bench and shelves for that "design element."


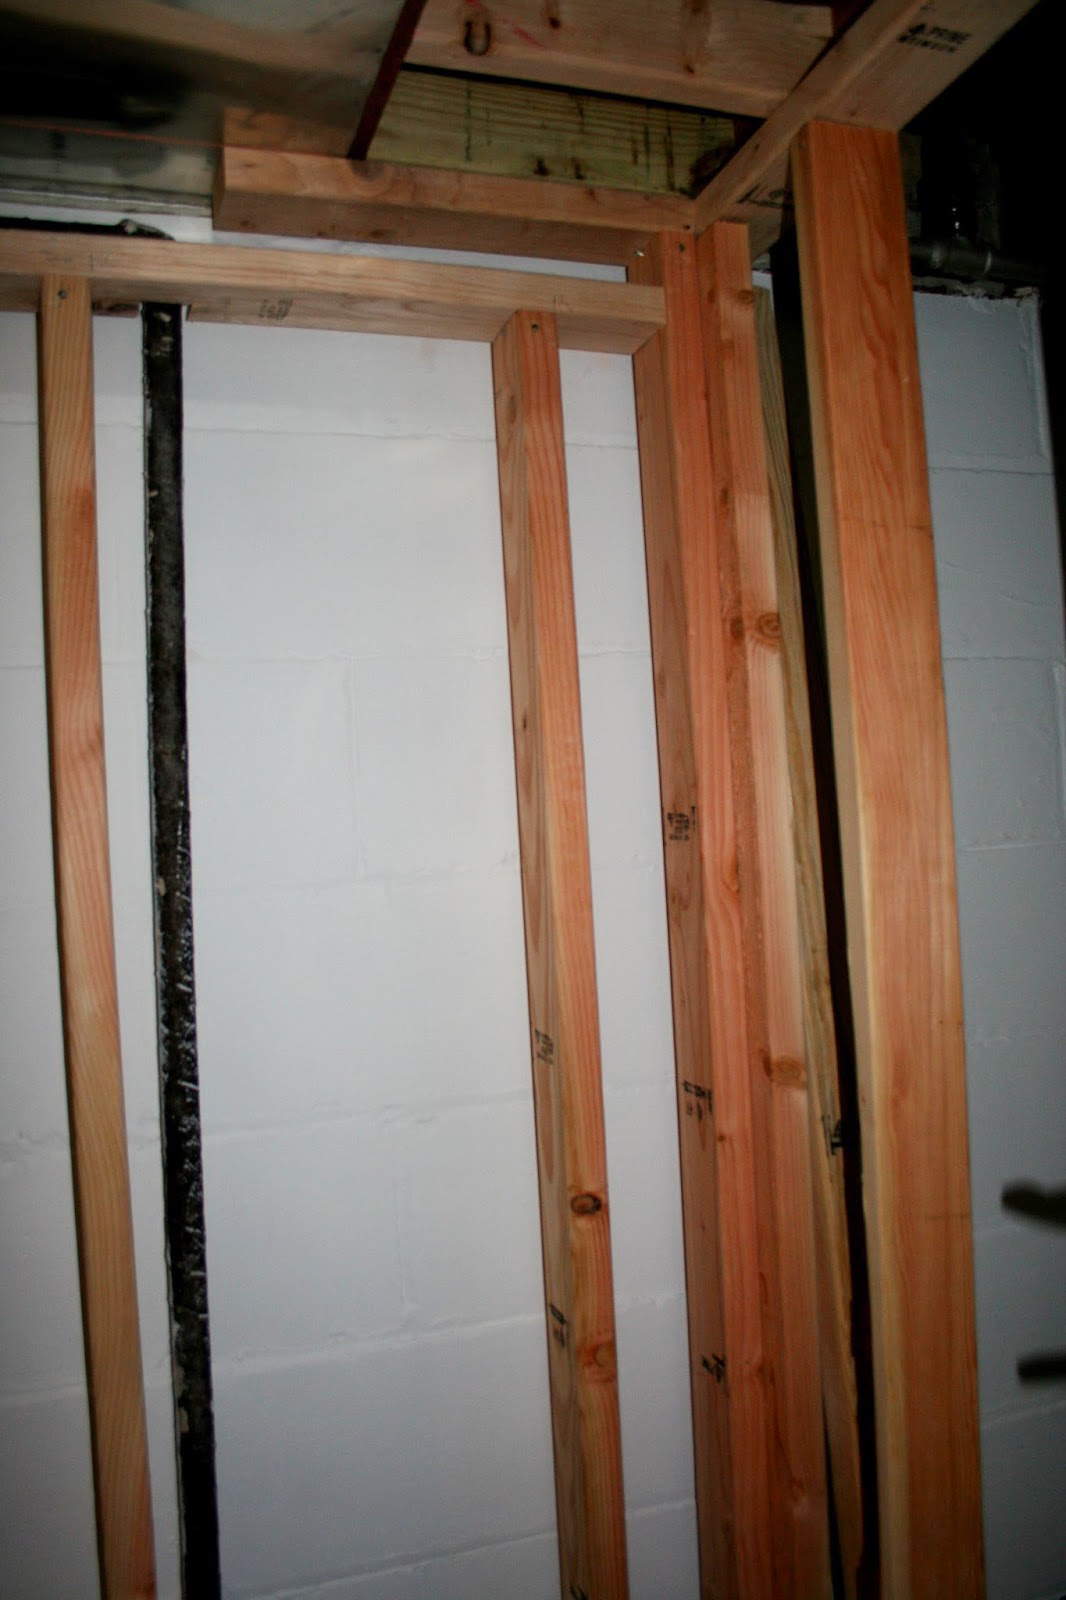
We got about this far on day one of framing, and got all but about 6 studs up on another day this past weekend. That gas line that necessitates the wall bump is also, conveniently, leaking. Yay! Our gas service was updated last year, so when the guy came out to replace the meter, he sealed off the leak with some kind of fancy tape. Technically this worked, so we're not in imminent danger or anything, but it should really get a permanent fix before we enclose it. We...well, the stronger of us....tried wrenching on the pipe leading to the leaking union, and it wouldn't budge. We're going to have our burly contractor neighbor come and take a look, but I think we'll end up calling in a pro for that, so that's one of the areas we haven't finished framing out yet. No need to make the job harder for the pipe fixers! We also didn't finish framing out the door until we actually purchased said door, because that made good sense. We've since picked one up, but it's nothing exciting. Just a plain, primed, flush door. It would be nice to get something paneled, but since the doors in the rest of the house are peeling hollow core doors....it didn't make sense to put the very nicest one in the basement! (Even as a plain flush door....given that it's not peeling up at the bottom....it's still the nicest one.)

But otherwise....we're almost fully framed! Next up, more very boring "in the walls" stuff like running new electrical, putting in air returns, redirecting the vents so that the heat comes in at floor level like it should (opposite of the rest of the house....), and insulation. Then comes drywall! That should be sort of a horrible job, but exciting in that it will then look like a room!

edit to add....I would be remiss if I didn't mention this ridiculous snafu. We just put up the last of the studs in front of this desk/work table. And I realized that because there is a large brick chimney to the left of this photo (you can see a peek of it at the bottom of the picture)....and a steel column touching the right side of the desk....that we had completely enclosed it. Whoops!

 
We decided that the path of least resistance would be just to unscrew the top from the base and shimmy it out that way....but man. Sometimes.

Tuesday, April 1, 2014

Making and unmaking

We had some free time this weekend, so we were able to start the basement remodel in earnest! I'd taken down the drop ceiling tiles a few weeks back, but this was way more fun!


It took me a while to switch gears from gentle touches to tearing a wall down with my bare (gloved) hands, but I got there! I took this one down with a few kicks! I won for biggest single chunk of drywall. :) 


This is the dividing wall that is now gone!


This one ended up gone as well. Sigh. This is NOT how you build a wall! Studs so far apart, wires going every which way. Oh well. We'll put them back up right. 

I don't know when we'll get to the reconstruction phase, though I've got a material list going on the Home Depot app. It's pretty handy! I ran a rough calc for drywall quantity, and it saved to my account. Even gave me screw and tape quantity!

Until then, there will be crochet. I'll keep dreaming of the future home of all the yarn! 


Tuesday, March 4, 2014

Everything in its place


I've tried for years to make the first floor bedroom in our house work as an office/craft room. And it just....never does. We started out with a corner desk from my husband's bachelor apartment that in my opinion was good for exactly nothing. What kind of sense does it make to have all the available desk surface behind the computer? It was hard to even pay bills in there because there was no place to spread out the papers, checkbook, calculator... We bought our house almost 6 years ago so it's hard to even remember now, but I think I brought an old drafting desk in there as well to put next to the corner desk for some work surface, but I hated that too.

I checked this and a few other of my defunct old blogs. and I've never posted a full picture of the office....I guess because it just doesn't work. I eventually got rid of the small desks and traded up to a long Ikea dining table. I remember looking for something solid wood, but never managed to find anything that was in budget and that I could arrange transportation for, so Ikea and their flat pack boxes won. This is the one we have. I added some wall shelves above the filing cabinet to the left of the desk in an attempt to get stuff OFF the surface. As you can see from the partial photo below....that hardly ever works (you can sort of see the shadow of the shelves above the printer).


I would take a more current photo....but that would involve actually downloading pictures from my camera. Which I never do. Because I don't have an always ready space to do that in. I have at LEAST 3 posts worth of photos living on my camera, destined to never be downloaded. At least not in a timely fashion. So I have my covered in junk work surface, which actually does work perfectly for bill paying and sewing, but the room itself does NOT work well for actually doing sewing projects, which makes me really sad. I have the closet - not pictured, sort of organized, really full - and a storage box below the futon/guest/mostly cat bed which takes up the room opposite the desk that serve as supply and book and random storage, but I have nowhere to cut. This has to be the bane of crafters everywhere. With my sewing machine and laptop/TV set up on my desk, I don't have the work surface to lay out pattern pieces or pin things out. This leaves me to either spread out on the precious little floor space and trip over it every time I go to the ironing board, or I can squeeeeeze out the door to get across the house to the dining room table. This is annoying because it's on the other side of the (small) house, and because I have my ironing board on the back of the door. This is a space saving holdover from (even smaller) apartment living, but it means I have to have the door to the office closed to pull it down. I can open it juuuust enough to squeeze out, but it's irritating enough that I usually cut on the floor, which is super ergonomical. Real word that I just made up. Sad that my dreams involve buying a full sized ironing board. Is that what it's like to be a grown up?

Anyway, since my interest in sewing and knitting and generally making a disaster of the office/craft room has continued to grow over the years, I set my sights on the basement. Our basement is roughly divided into fourths, like most of the rest of our cape cod. 1/4 is laundry, 1/4 is the area for water heater, furnace, storage, just over 1/4 was always sort of horribly finished by previous owners which left the remaining slightly less than 1/4 with no purpose at all, which we used to house extra pantry storage and the dog crate. My goal - convert the finished and purposeless half of the basement into a den/craft room extraordinaire. Last year we built a ton of wood shelving, which I did not yet photograph, in the storage 1/4 of the basement in anticipation of all the junk in the rest of the basement needing a place to live. It worked out really well for my parents, who were moving, who actually stored a bunch of their stuff there last summer and fall while they were between homes. However, this meant that we couldn't start clearing out all of our stuff until all of their stuff went to their new house, which happened a few months ago. A few months after that, our stupid less than 6 year old washing machine irreparably broke, so we had to replace it.

Nice matching appliances in fancy blue:

Sad new washing machine in dumb floor sample white:


In the time since this photo was taken, the man of the house pushed the washer back next to the water pipes, and moved the dryer to its right. Which is AWESOME....to actually be able to toss things right into the dryer from the washer, rather than either carrying them across the room wet, or using a basket to transport them. It's the little things I guess. Oh, and he swapped out the flex duct to rigid. Apparently flex is a fire hazard. As an added bonus, you can see that our basement actually gets great natural light most of the day - this is with no lights on! A not-scary basement was on my list during house hunting. Also, I ultimately plan to replace the giant, gross, leaky wash tub with a smaller, single basin. I actually bought it years ago for $10 on craigslist...just need someone (ahem, man of the house) to do some plumbing work and brace himself to get the concrete monster up the stairs. It's possible I'll have to help with the hauling.

Anyway, so here is the ultimate plan for the basement. Drawn in CAD, because that's how I roll.


And because I accidentally closed the pdf editor before saving (cursewords), enlarged plans of the finished side are without refined annotation.

The "den" portion, which will include the ability to stream my netflix stories right to the TV so that I don't have to use my laptop and can use it for other things, once we get some wires to connect new netgear box to old tv:


And the craft studio side:


The plan is to mostly work with furniture we have, to keep the budget down and give this project a chance of actually happening. In fact, the only new piece is the standing height cutting table, which I plan to build from an Ana White plan and which will be AWESOME!!!

Modern Craft Table


The only other new things might be the studio lights and some of the wall storage for all of my fabric and crafting paraphernalia and some of the storage for office supplies and books and such. Most of the cost will be to put lighting where we want it, rebuild the wall running vertically down the basement, since studs at 48" on center are not exactly sound, and to re-paint the walls and floors with some of that fancy water blocking stuff. Our basement stays mostly dry, but some of the corners DO get a bit damp from time to time, so we want to make sure that we've done what we can before putting up new drywall. We also have the unique idea to use moisture resistant boards and studs which I can only guess that previous owners did not do....They definitely didn't use moisture resistant ceiling tiles, which is gross and saggy and I have only been too happy to start pulling down.


There's the stupid wall that will come down. I had a few hours to myself on Sunday, so I ran to Home Depot and set up a bagster in our garage to give me a place to put all the tiles. I did it in there because it keeps freaking snowing and I didn't want it to fill up with powder. I figure the tiles are light and we can drag it down to the street before starting to fill it up with heavier stuff. Like that stupid wall.


Monday, January 13, 2014

Once upon a time....

We wanted to mount the tv on the wall. For normal people, this should take what, an hour? For us? 5 days. Yep, pretty standard stuff.


To my husband's credit, I will say that I think it looks great and he did an awesome job. But I just have to laugh and shake my head, because I know it's ALWAYS going to be a bigger job than it was supposed to be!


Saturday, November 23, 2013

Ok West Elm, I'm Impressed!

So earlier this week, I posted about this runner I got from West Elm a few weeks back that was pretty off kilter.


I'd been waffling about whether or not to return it, even though it's obviously flawed. Mostly because it seemed like too big of a pain to find an open UPS drop place. First world problems, I know, right? Well anyway, after a little encouragement, I finally just sent them an email inquiry to see if this was typical of all of these rugs, or if mine was indeed messed up. (I guess I thought that perhaps they would rely on the handstamped nature of the rug as a reason? Like handmade imperfection? Which, uh, as a handmade maker I really try to avoid myself, so that seems silly even to me.)

Anyway, I was just using their online form so there wasn't a way to attach this photo (and I certainly didn't direct them to my blog, because who the h*ll am I?), but I offered to send it if they wanted to follow up. So yesterday, I actually got a personal phone call assuring me that no, that was definitely NOT normal - no photo needed. And not only could I exchange this item, which is now on final sale, but she was going to arrange for UPS to pick it up at my house AND provide a mailing label! Which honestly was another reason I hadn't done the exchange earlier - I would either have to wrestle with my home printer which is always out of ink somehow, or remember to print it at work which is impossible. (Oh lord, how lazy can I be?!?!) Then they'll have a new one to me in about a week!

I have to say, this has been one of the most pleasant customer service experiences I've ever had!

Monday, March 7, 2011

Wingback Chair Reupholstery - Reveal!

For a little refresher on how far this has come, click here.

In August, the chair looked like this:


I had a notion of recovering it in this fabric, so I did some pretty laughable photoshop renderings of my vision for the corner.


However, after the acquisition of that shag rug, and 30 days (I kid you not, I started ripping into this on New Year's day and finished in the nick of time on January 30, mere days prior to my February 8 book club hosting duties) of backbreaking labor later, and the relocation of a table I already had that was somewhat homeless.....I had this:


Hooray! I'm so happy with how it turned out! It SURE isn't perfect, many mistakes were made, but I think it's a heck of a result for my very first time upholstering anything more complex than a simple seat that you staple over some batting.


Now for more pictures!


So there you have it - my baby! If there's any interest/I make an effort, I may eventually post a tutorial.


Friday, February 18, 2011

Craiglist, we can be friends again

Finally! I managed to hook up with a seller who was 1) not 100 miles away, 2) willing to negotiate on price, and 3) honored my position in line despite receiving a subsequent HIGHER offer! Hooray!!

So I suppose it's only fitting that I showed up and......it wouldn't fit in my car. Blast! But thanks to my seller being 1) not 100 miles away, we were able to call some nearby friends with a van to come and rescue us. The too-oversized-for-a-Corolla-purchase?


It's ~36" tall x 40" wide x 20" deep, and will make a perfect bedside table on the husband's side - our bed is off center due to a wonkily placed floor register, and I've been SCOURING the world for a non-expensive, tallish item that will fill the space and make the bed placement look a bit more intentional.


See? More space on the right, and actually there's even more space to the right that you can't see because I am a crappy photographer and I don't have a wide angle lens.

I haven't totally investigated the condition of the wood yet, but I'm enamored with the idea of painting it a smokey gray color - we have all white painted built-ins on the opposite side of the room, and our bed is a deep cherry color. I put together this little before and after to get the husband on board with my purchase via Anthropologie's website. New hardware is a definite....and I'll apparently be removing the wheels. I was on the fence....and then we lost one in transit. Dilemma solved!


Maybe someday if I do something with it, I'll show you the results. Or maybe not. Since I've had another h-u-g-e project (two actually!) completed for almost a month now that I haven't shown you yet. Trust me, it's awesome. And apparently secret due to my paralyzing laziness in taking "after" photos.  :)

Thursday, January 27, 2011

Craig? I have some peeves.

Ok, so, Craigslist. What's that song, when you're good you're good, but when you're bad, you're oh so bad? That's how I feel about Craigslist. I've had some successes - I got my awesome desk chair from Craig.

photo credit to the awesome Sara

I've gotten rid of some stuff that way too, like various tv's and our old desk. But it's never without a little....weirdness.

Like the desk. Well priced, tons of inquiries. Tons of arrangements made for people to come get it. And I got stood up no less than FOUR times! People - how hard is it to just SAY you aren't coming? As a corollary - you should probably try to BE there when you've arranged for someone to come get something, and not make them sit on a farm in the middle of nowhere with your dad who doesn't know exactly what you're there for while you just don't answer your phone.

I have approximately a zillion issues with how people word their sale postings, the pictures they provide - I don't even LOOK at ads without pictures, so those people are a whole other story - and some of the insane price points people think they can get. Oh, and posting every single day for three weeks about your "majestic" table and chairs that SO aren't without a single drop in price? And not at least deleting your other 21 previous posts so that I can SEE you haven't lowered the price? Lame.

Also lame? Why do people not post dimensions? I have to ask for dimensions for virtually every. single. item I try to buy. Putting your dog in the picture for scale doesn't really help - I don't know how big your dog is. Please don't tell me something is 2 and a half feet high, and get all offended when I arrive and it's 18" tall at best and I don't want to purchase it. Or the most awesomely terrible response I got to my inquiry?

I don't have anything to measure to dimensions right now. But I did quick step measure, it is 3.5 steps to 2 steps and my foot size is 9.5.
What the heck? I mean, I do not wear a 9.5, I don't know if you are a man or a woman, I have no i-d-e-a how big that is!!

And while I'm all about contacting people if I can't make it to a pick up, or I'm running late, I do NOT consider a sale in the bag until someone has given out their address or a meeting is arranged. Just because I emailed to see if something was available? Yep, doesn't mean I'm married to it. My understanding of the unwritten Craigslist rules is that I'm under no obligation to reply to you in this instance. Sometimes I will with a, "thanks, it's not right for me." But I don't always have time, and don't feel it's necessary.  Apparently the guy who followed up several weeks later to tell me his item was stiiiiill available did not feel the same way. And he REALLY didn't feel the same way when he further emailed to yell at me for wasting his time, and that I must get off on inquiring if items are still around. I'm sorry dude, YOU are the one wasting your own time following up on casual inquiries from a month ago. But since you likely have no friends, I guess it's your time to waste.

I'm also fairly confused by what seems to be a new trend - selling already refinished furniture, or handmade crafts....on Craigslist. In my opinion, Craigslist is where you BUY the items that you subsequently refinish. I mean, if you want to sell them for a profit, maybe there should be a special section for that. Or a boutique or something. Because I can put Anthropologie knobs on something just like you did and not pay your markup. I'm on Craigslist to find a deal. Paying your markup? No longer a deal. And the crafts? Try Etsy. How many people in your local area even want knitted baby hats modeled on a scary baby doll head?

Sigh. Come on Craig. I'm having a baaaad run of luck here. Just give me one good deal and a smooth transaction on an item I can actually afford and that I know fits in my space ahead of time, and we can be friends again. Until then? Well, I'm keeping my someday-to-be-posted unused drafting table, ceiling fan, and brass light fixture for MYSELF!

Tuesday, January 4, 2011

It has begun...


I decided to face this new year head on and dive right into a project that is way above my head. It looks pretty bad.....but hey, surgery would look a lot like murder if you stopped halfway through, right?

I'm about 85% of the way through the dis-assembly stage.  I still need to take apart the pieces on the foot of the recliner, and then I need to rip the seams out of all the skirt pieces and the seat cushion.  Most of the tutorials and books I've been referring to are for standard wingback chairs....that don't recline.  And therefore don't really come apart.  At the beginning, I did not realize how much the moving parts were going to impact my method.  I had to completely remove both the foot (as I'm calling it, no idea what it is actually called!) AND the chair back itself.  I started out trying to keep it intact, but I got far fewer owies on my hands when I took parts off rather than wedging my hands in with all the metal and raw wood edges.  I've taken roughly one zillion (actual count is more like 200, but still) photos of my progress, along with copious notes about the order in which pieces were removed, and numbered and up-arrow labeled all pieces.

Next task after dis-assembly is complete - cutting the new pieces.  That should be done in, oh, a year.

Tuesday, December 21, 2010

cute or weird?

Maybe it's because I'm freakin freezing all the time lately, but I have knitting and warm and soft textures on the brain.  I posed this question to my husband the other day - would one of these be cute or weird?


And just so we're all on the same page people - I'm talking about the pouf, not the kid!

He responded that he thought it was kind of weird.  To this, I sent about 4,000 images showing him why he is wrong.


I took a leap and found a great deal (well, hopefully great - I'll let you know my source once I get my order to ensure that it's good quality) on yarn....so I ordered it.  Yep, I'm going to attempt to DIY.  Because it's not like I don't already have eleventy-five other projects going on at the moment.  Oh wait, yes I do.  Well, maybe I'll make a pouf.  Maybe I'll make a mess.  And yes, I'm a little afraid I'll end up like this:


So, what's your vote?  Cute, or weird?

(I did my best to link to all my photo sources, but because I collected most of them all at once to photobomb my husband, I didn't do a great job with that.  If you find a source that I didn't link to, let me know and I'll be happy to add it!)