Monday, June 1, 2015

Cozy Cape Cottage Exterior - Spring 2015


My husband has been wanting some photos of the exterior of our house for quite awhile now that it's basically finished. (yeah, there's still some actual "finishing" stuff that needs to happen, maybe it will, maybe it won't! And landscaping, not our forte, will always be a work in progress.) Our crabapple tree, which has been sort of sickly for a few years, was starting to bloom a couple of weeks ago, so I walked around across the street taking pictures and feeling sort of embarrassed about it!


The different colored patch of grass at the bottom of the photo above is where the city laid sod last year after upgrading our gas lines. Hopefully if we overseed the yard for the next couple seasons it will eventually blend in!


(can you spot the puppy watching me from the window?)


I read somewhere once that chives are a good companion plant for crabapples, so I planted some by our sick tree. Maybe I cured it?! (probably not, but I do love harvesting them for sour cream and chive baked potatoes!)


These last couple of images show some of our "green" upgrades. We have two rain barrels, one next to the front door (my husband tried to fight me on it, but I insisted, and I think it looks fine) and one off the back of the garage. This way I don't have to haul the watering cans too far. We use Save the Rain (affiliate links) diverters to allow rainwater to bypass the barrels and just go down the gutter when they are full. This happens to us a lot - if we're getting a lot of rain, there isn't much need to use the water in the barrels, so they fill up in the spring! I just keep tabs on the water level as I use it later in the summer, and when it's getting low, I just flip down the diverter and it refills with the next rainshower. We've had these for several years now, and they work great.

You can also see our retractable clothesline in that last photo of the garage. Admittedly I don't get to hang our laundry out as much as I'd like - our backyard is really shaded and clothes don't quite dry if I try to hang them out after work, which limits me to dry weekend days in the summer only. (I've tried in the winter, and again, things just don't get dry even after a whole day out there!) We have this same one in our basement which I use year round. The link above also includes the pole, which is across the yard not pictured. I just have to stretch it out, and I've got a ton of drying space! We leave the clothesline box up all year (according to Amazon I bought this in 2009 and it's holding up just fine out there!), and we bring the pole inside the garage in the winter. The base is anchored in concrete in a planting bed, and there is a plastic cover that screws on to keep it from filling up with water when the pole is not attached. Then in the summertime, we just bring the pole out and it clips onto the base. This was a compromise between us, because I wanted to be able to dry clothes outside and my husband didn't want to look at or duck under lines all year - this system has been working out very well for us!

Lastly, you can see a peek of our compost bin next to the back door. (sort of - it's black and in shadow!) We have this model through our local sewerage district. They've been doing annual one day sales for a few years, and I was happy to upgrade to this "real" bin after my makeshift "plastic bin with holes drilled into it" completely fell apart after a few years of use. Ideally I'd have a second one so I could let the compost age for another year, but this works well enough that we have enough to add to our small garden. My husband wants to build a fancy 3 bin system behind the garage, but that's been an idea for several years now, so we'll see! For now we just have this one and a large brush pile behind the garage. I do love having this right by the back door. I think we'd be pretty unlikely to use it if we had to walk behind the detached garage in the snow! Again, we've been doing this for several years, so it's a pretty road tested system for us. We don't notice any smell from it, and we probably only turn it once a year when we sift out the finished compost in the spring. I do notice some gnats, but only when I open the lid to toss stuff in a couple times a week...or if I cook lol! We sit on the patio very nearby the bin, and there definitely aren't a bunch of gnats swarming around when the lid is on.

I wasn't actually planning to go into a lot of detail about this yard stuff, but I guess I did, so I hope it's helpful!

Friday, May 22, 2015

DIY Garden Markers

I've been wanting some re-useable garden markers for several years now. I've tried the popsicle stick thing in the past, and even with a sharpie marker, they were illegible by the end of the season. My grandma always sticks the seed packets in the ground, but mine always seem to get carried away by birds or something, and then I just have to wait a month or so till the plants get bigger to see what's what. I thought about buying some, as there are plenty of cute ones all over Etsy, but wanted the control to decide which herbs and veggies I wanted to grow rather than buying a pre-made set. I suppose I could have requested a custom set...but then I found these:
 

I've casually had my eye out for a long time for a set of letter stamps, and I was seduced by this full set of alphas and numbers at a local antique shop. I don't know what my ultimate purpose is for owning letter stamps, but because these are metal, I have the flexibility to press them into soft clay, hammer them into wood, maybe stamp them with ink or paint...the guy at the shop said they could even be heated up and burned into leather. I suppose it's that versatility that gave me the push to buy these rather than just something at a craft shop. Plus....they look pretty cool in their boxes.


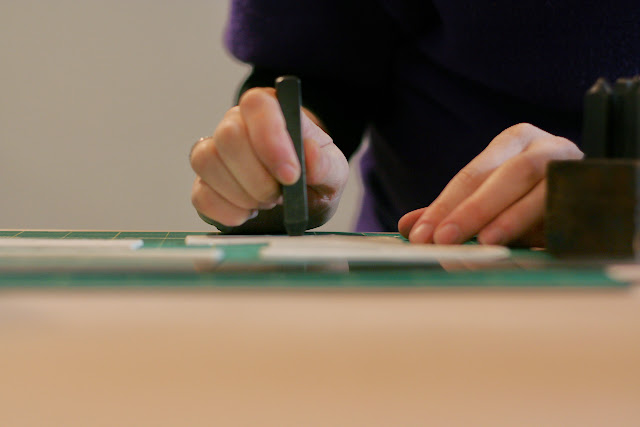
I rolled out a bunch of markers with Sculpey clay, stamped them, and baked them.


I baked them according to the directions on the package, but after they had cooled....they were still super flexible. That wasn't really my goal.


 I thought, well, maybe they'll firm up if I cook them longer? Nope, not so much. They got really stinky, which is probably not a great sign, and they started changing color. At that point I just gave up. I did a little bit of research (not sure why I didn't do that before I started!), and found that if this sort of clay is thin enough, it will pretty much always be flexible. I did a little experimenting with markers two and three times as thick as my first attempt, and it turned out that triple thick was the charm.


The good news is that in addition to making markers for myself, I'd planned to make them for my mom for mother's day as well. This will be the first year that she can really do a garden at her new house because the yard was put in toward the end of summer last year. I decided that I would keep the beta test set for myself, and remake hers more sturdy. I had always planned on painting them, so the discoloration of my first try didn't really bother me. (I do wish that the depressed lettering stood out a bit more - I'd hoped that if I dragged the brush lightly enough that it would float over the impressions, but that didn't quite work. I'm interested to see how legible these will be at the end of the season. I think sitting in the dirt might actually make the lettering stand out more!)

I paired these with a potted planter of annuals for her front porch, and it turned out to be a nicely themed mother's day gift that I knew she would really love. I tried to anticipate what she'd plant based on what she's been talking about and what she had at her old house. If there's anything missing - she knows where they came from, and I can always make more now that I have the system down pat!

Thursday, May 21, 2015

A baby shower extra

As I mentioned in this post, I went to a baby shower for a dear friend a few weekends ago. She asked me to make her some pillowcases for her nursery with some fabric she'd picked out, and I was happy to do that.


As I laid out the fabric I needed for the pillowcases, I was excited to see that I had some fabric left over. I know that she isn't much for sewing, so she wouldn't have any need for the extra fabric. I knew I'd pinned a bunch of cute baby clothes on Pinterest, and was pretty excited to actually DO one of the many things I've pinned! (I used this pattern)


I put the picture above in a previous post - I was a little afraid she would catch on to my subterfuge.


She pulled out the pillow and the extra case, and was all, oh yes, I knew about this....and then she noticed the little dress and was so surprised! I paired it up with some sweet bumblebee sheets from the registry, because I'm a big believer in getting at least one thing that the new mother or bride to be picked out.


Friday, May 1, 2015

Works in Progress

Ah spring. Tis the season for spring cleaning, yes? However, since I don't feel like PHYSICALLY tidying anything, I've focused on getting my lists cleaned up. Let's pretend that's a thing. I've updated my goodreads page and my ravelry projects, as well as the projects page here on my website. Funny, how even though it's just cataloging things I've already done (and even the list of things I just INTEND to do), it makes me feel so much more accomplished.

With that, here's a little status update of what I've got going on currently.


I'm working on some stretchy ribbed tube socks, brightly colored in hopes they will actually be worn. If not....I might be done making kid socks. I'm using the toddler tube sock recipe by the Knitmore Girls, with the change of working them toe up. I think I'll run through the color sequence one more time so that bubble gum pink lands on top. The yarn is Knitpicks Felici, snapped up the last time it was available.


Not to be outshone by a toddler, I'm also working on socks for me. As I'm starting to amass a bit of a stockpile of sock yarn, I decided that self striping yarns would be a simple stockinette pattern, while solid colors should be knit into a pattern for a little interest. This tweedy sock yarn, also from Knitpicks, may have caused me to stumble a bit though. I'm working the Uncommon Dragon chart from Lara Neel's Sock Architecture (affiliate link), again, modified to work toe up. (I think I'll just do a different kind of heel than written. This is one of the few patterns from this book written ONLY for top down, due to the pattern flowing right into the heel. I don't know if I have the brainpower to make that work upside down - working the chart upside down is enough of a head trip, especially since charts are new territory for me!) In the end, the socks will still be wonderful to have, and learning to read charts is great for developing my skills, but the pattern gets a bit lost with the texture of the yarn. I think it stands out a bit more in person, but honestly not that much. Oh well - I'm still enjoying it!


Speaking of being new to charts, well of course I would go ahead and cast on not one, but TWO charted projects! I did eventually cast on the sweater that I couldn't quite face a few months back. What, you can't tell that's a sweater? If you need a better visual, it's the Brooklyn Bridge Cardigan by Melissa Wehrle from her fantastic book Metropolitan Knits. (affiliate link) This one is definitely going to take a while. I've been tending to knit on it only at knitting group once a week, so it's only growing about 4 rows at a time thanks to my decision to knit it all in one piece. It's also black, in fingering weight yarn, which seems to horrify everyone....but it's something that I KNOW will get a lot of use in my wardrobe. That's the kind of knitter I am. I like to knit for the process, but I also like having the finished object and knowing it's something that will fit into my lifestyle. I try not to be seduced by pretty yarns in the skein if I can't honestly see them being something I would love to wear as much as look at. The sweater so far is pretty basic, mostly stockinette with a lace panel up the fronts. That rolled edge at the bottom (this is worked bottom up) will eventually be sewn down as a nice tidy hem, and the front has an i-cord edging that is worked as you go. Ideally it's worked starting right above the hem, but some knitters forget to read the directions fully when trying to mash together the chart, the i-cord, the two fronts and the back and may or may not have started it a few rows late, and decided that it definitely wasn't worth the trouble to rip it back after having cast the darn thing on three times. I'm not naming names, but I think you can guess who I'm talking about.


Last I've been meaning to pick away at giving the studio both some organization and some actual decorating. Way back in September, I saw a burlap covered pinboard and knew I must have one.


Another thing I apparently also must have is a stronger pair of shears. 


I feel like I've heard of a million different people using homosote for an economical way to DIY huge pinboards. Can I tell you what a pain it was to find this stuff? I looked it up on Home Depot's website, and since it autocompleted and showed me a picture of something that looked right, I assumed they had it. Yes? NO. What actually popped up in the search was MDF, but I wasn't reading carefully. There is no way I'm going to push a pushpin through MDF, so that was definitely not going to work. I was on limited shopping time and was feeling too impatient to go somewhere else, so I punted. I thought, well I could use some insulation board as the substrate, and put some of that cork roll on it to better hold the pins, and then I can just wrap the whole thing in burlap and no one will be the wiser. Who knows, this may have actually worked, but the guy at Home Depot that day.....wow. I grabbed a 4'x8' sheet of insulation, and asked if he could cut it into 2' strips so that I could get it into my car. So he whips out a blade and just starts slicing! I asked, well....are you going to measure that? He said, no, there are marks here that are 2'. He hands me a terribly crookedly sliced piece of foam that is definitely NOT 2' wide, which I pointed out to him with actual measuring. He shrugged and kept cutting. I said, look, I am ACTUALLY looking for 2x4 pieces, so can we just start with a new piece? He grumbled but did actually go to get a new piece, which he measured and cut....I could see that it was still a bit crooked but I tried to convince myself that it would be ok. I paid and went to put it in the car....and these pieces. They were just. Wow, so bad. I sat down and sighed and thought....do I feel like dealing with this later? The answer was no, so I just grabbed the foam and the cork and walked back inside to return them. Later on, I searched out other home improvement stores and found exactly what I was originally looking for at Menards. I'd like to say I've learned a lesson about not being impatient and just making do, but I can't be certain that is not a lie.


Speaking of being impatient, I did straighten out that fabric on the right so it's not quite as crooked. It's still a little crooked, but it's better. I need another pair of hands to help me out hanging these, so they are just leaning on the still unfinished bench for now. I think I might paint and mount a strip of pegboard between them for things like rulers and such. It's a quick turn around from the cutting table, so I think that will be handy.


Last but not least for now, I'm still chipping at that quilt. I'm getting closer! I laid out the batting again, and need about one more row of blocks on one of the short sides and one of the long sides. I've also started figuring out how I'm going to square off the edges. Not pictured yet, but I think it will work. Now my trick is to lay out the last of the flowers without getting similar patterns too close together! I think I'll have to cut a little more fabric to make that happen. I'll probably use some of the already cut scraps to piece a little bit of the backing. Next quilt.....will DEFINITELY be machine pieced!

Thursday, April 23, 2015

All progress, no follow through


Does this ever happen to you? In the middle of 15 things, and nothing quite makes it back into its home?


Ah, there we go. Space to work.

I've recently started using this new list keeping app that I LOVE. It's called TickTick. I think I found it via googling something like "shareable mobile and desktop to do list," or something very technical like that. Let me count the things I love about this app! I have a bunch of lists for things like groceries, target, honey-do....and now I can simply add my husband to them and we BOTH have the list, LIVE in our pockets. Now when I need to stop at the store, I can see what he has put on the list and vice versa, without having to remember if I actually added to my list the thing that we were out of.... I can also add alerts for when things are due, AND integrate it into my calendar. And while that's all fantastic, I have also been using it for my "neverending sewing list" and my "neverending yarn list" and my "neverending Etsy list" (yes, I will re-open someday, but I've put it on vacation mode now as my vision and my mojo aren't quite clear at the moment). All of this rambling to say that I reserved myself a sewing day one weekend, and I wasn't just sitting there thinking....now what was I going to do with all this time? Watch TV and take a nap? Oh no, I was productive.


I made myself a couple of drawstring knitting project bags. I immediately put them both into use and didn't take any finished object pictures. They are just the right size for a pair of socks or a few preemie hats, and they look pretty sticking out of my purse.


I made a couple of fabric headbands upon request, which turned out really cute! I also did not take pictures of any of THESE finished objects. I did add one for myself to the list (the boring gray one - it's navy on the reverse and can be worn either way) in hopes of encouraging them to be worn for more than 5 minutes, and I'm happy to report that it's super comfortable! I have a high forehead which benefits from bangs day to day, but I do like to pull them back to exercise (haha) or when I'm doing a lot of looking down, like when I sew or sketch. Because I also wear reading glasses, I always worry about headbands causing too much pressure at the temples and giving me headaches, but this one fit really nicely!


Finally, and the ultimate reason I planned this free day for studio time, I worked on a project for a dear friend who is expecting her first little one this summer. All in all, it was a perfect excuse to set aside the time to get some stuff done, and was quite an enjoyable day!

Now, to just get around to those after pictures....